
 Setup Guide
 VPN Use Cases
 Account & Billings
 Video Tutorials
 Faq's
Faq's
How to Configure Ivacy VPN on Linux Mint
 28707 Views
 July 4, 2016
 admin
admin 104 Comments
 12
12Before you begin, please make sure that:
- You have a working internet connection
- A Premium Ivacy VPN account. If you haven’t subscribed yet, click here to subscribe for Ivacy VPN
You can select the respective tab for the desired protocol.
To configure PPTP on Linux Mint system for Ivacy VPN, you have to follow these steps.
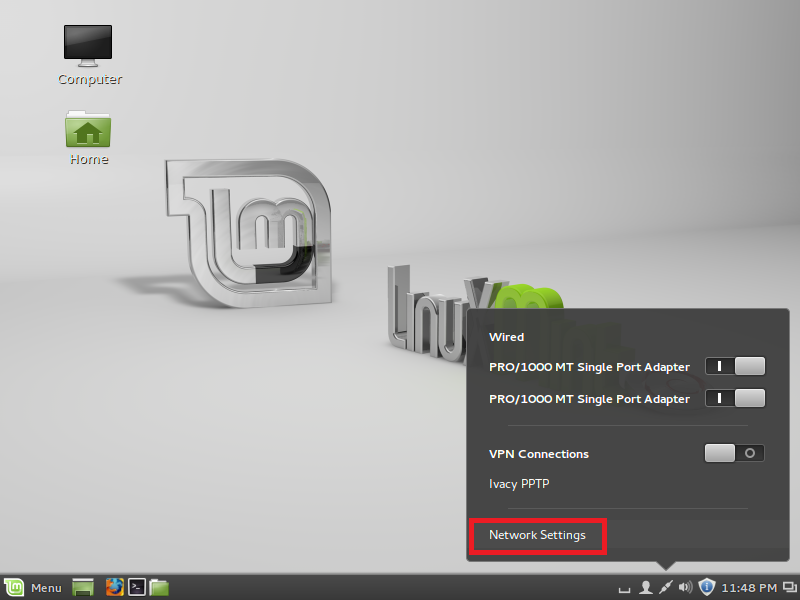
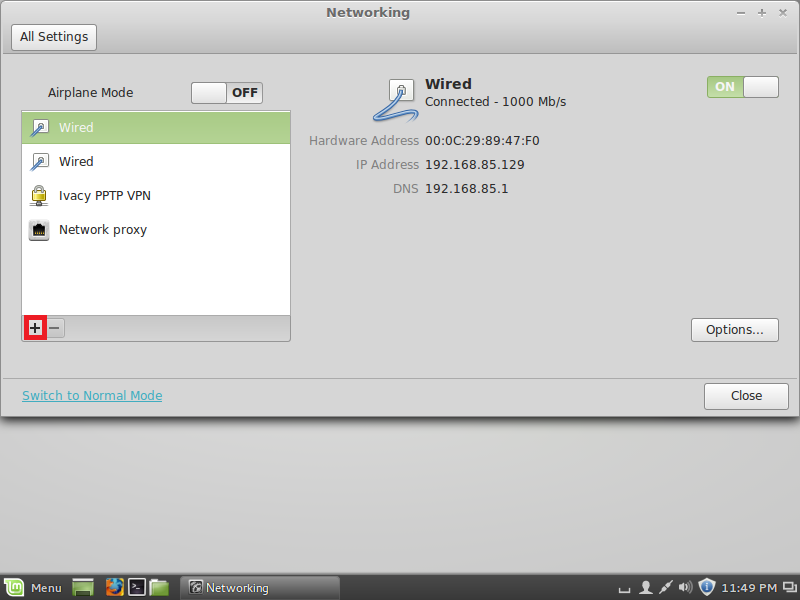
- On the bottom right corner, look for ‘Network Connection’ icon. Click it and go to ‘Network Settings’.

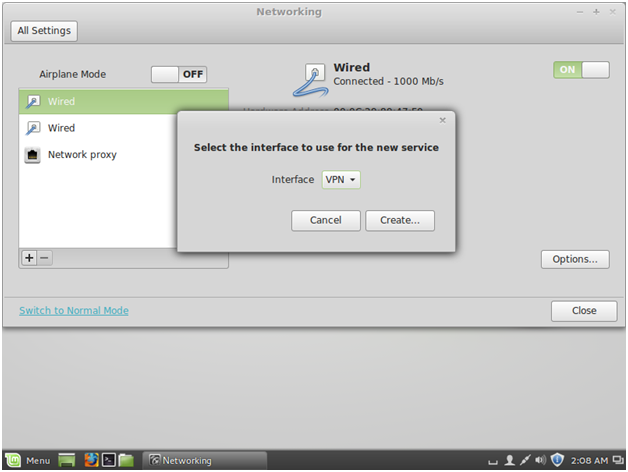
- The ‘Networking’ window will open up. On the left hand side, click on a small ‘+’ sign.

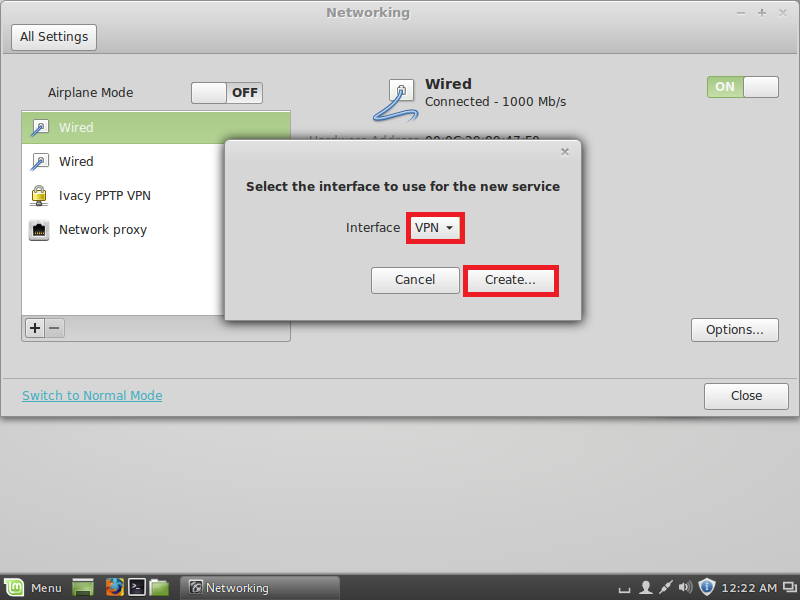
- A new dialog box will open up. Keep the ‘Interface’ as VPN. Hit the ‘Create’ button.
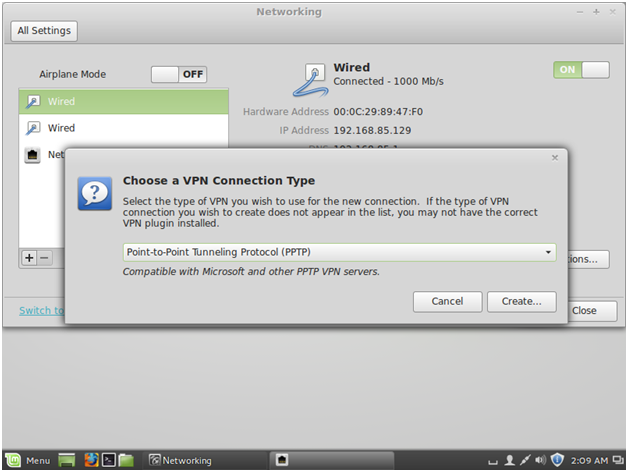
- From the ‘Choose a VPN Connection Type’ dropdown menu, select ‘Point-to-Point Tunneling Protocol’ option. Again, hit the ‘Create’ button.
- A new window with multiple fields will open up. You have to insert the following information.
• In the ‘Connection name’, field, type, Ivacy PPTP VPN
• Insert desired server name in ‘Gateway’ To get the complete server list, click here.
• Type your ‘email / username’ and ‘password’ in the respective fields.
• Hit the ‘Advanced’ button.
- Again a new window will open up. Select the following options.
• Use Point-to-Point encryption (MPPE)
• Allow BSD data compression
• Allow Deflate data compression
• Use TCP header compression
• Uncheck EAP
• Hit the ‘OK’ button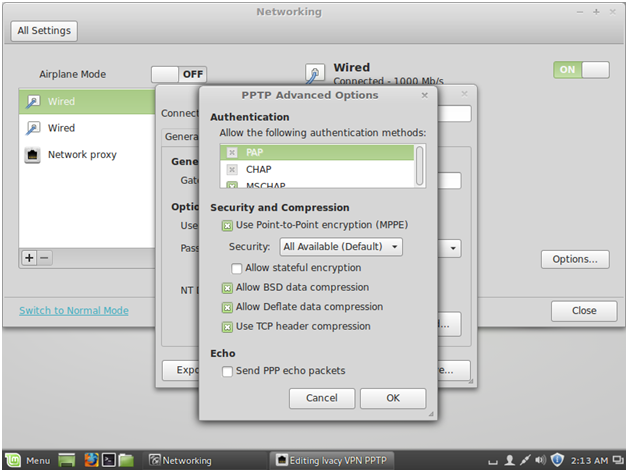
- Then click on ‘Save’ button.
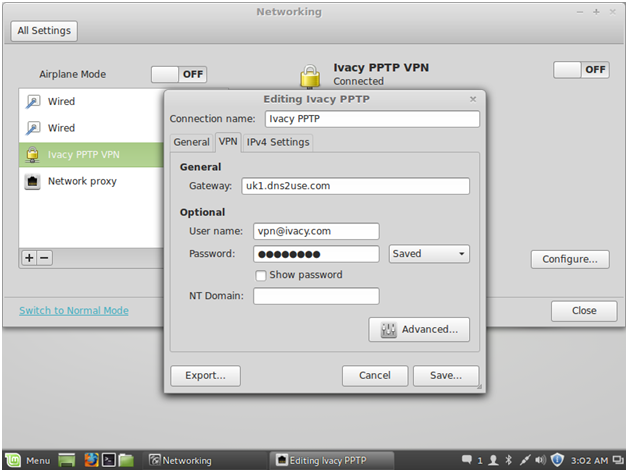
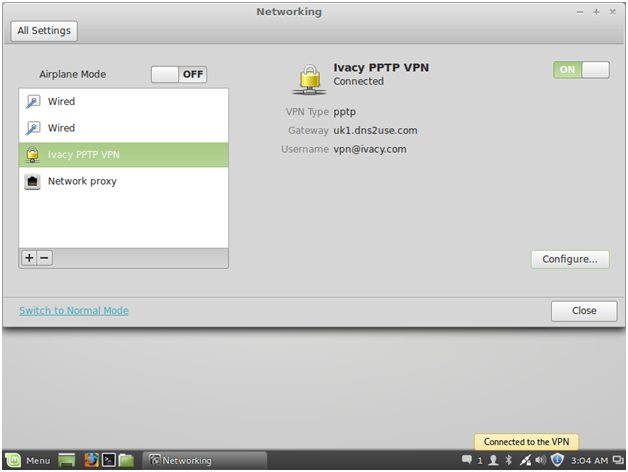
- Click on ‘Ivacy PPTP VPN connection icon’. Turn the VPN ‘ON’.
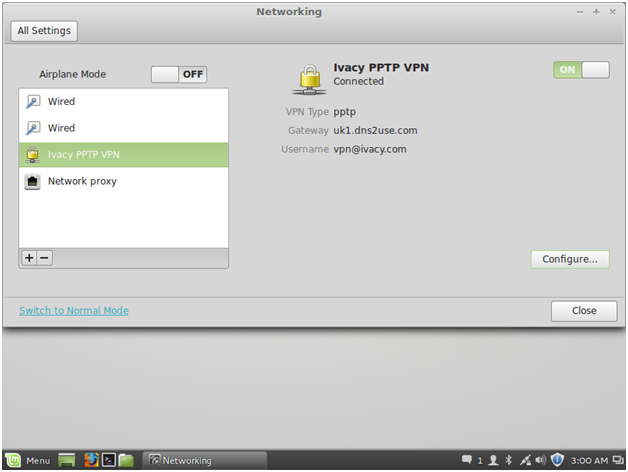
- You are now connected to Ivacy PPTP VPN. Enjoy privacy with Ivacy.
 To disconnect:
Go to ‘Network Connection Icon’. Turn the VPN ‘OFF’.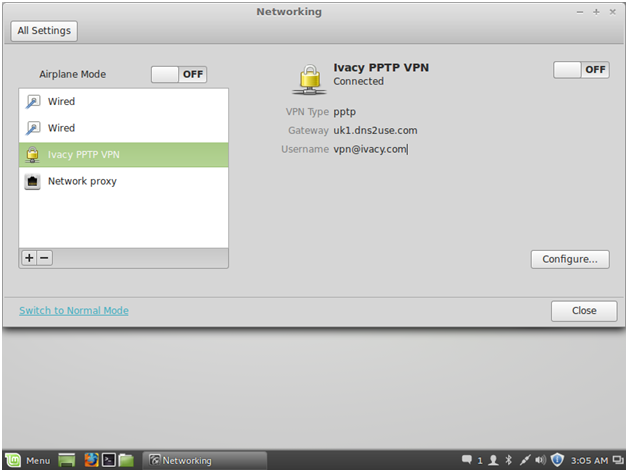 If you face any difficulty in setting up Ivacy PPTP VPN for Linux Mint, contact our customer support team.
- To configure SSTP on Mint you have to install packages first. Follow below steps to download / install required packages and configure SSTP. Visit the following website
http://sourceforge.net/projects/sstp-client/files/
http://sourceforge.net/projects/sstp-client/files/network-manager-sstp/0.9.4-1/
http://sourceforge.net/projects/sstp-client/files/sstp-client/1.0.9/
and download following packages as per your OS / bit.
• For Mint 32 bit download:
libsstp-client0_1.0.9_i386.deb
sstp-client_1.0.9_i386.deb
network-manager-sstp_0.9.4-0ubuntu2_i386.deb
network-manager-sstp-gnome_0.9.4-0ubuntu2_i386.deb
• For Mint 64bit download:
libsstp-client0_1.0.9_amd64.deb
sstp-client_1.0.9_amd64.deb
network-manager-sstp_0.9.4-0ubuntu1_amd64.deb
network-manager-sstp-gnome_0.9.4-0ubuntu1_amd64.deb• Right click on libsstp-client0_1.0.9_i386.deb and open with “GDebi Package Installer“
• Click on ‘install package’ to continue
• Provide you Mint ‘password’ and hit ‘OK’ to continue
• Once installed, go back to downloads folder - Do the following:
• Right click on sstp-client_1.0.9_i386.deb and open with ‘GDebi Package Installer’
• Click on ‘install package’ to continue
• Provide your Mint ‘password’ and click on ‘OK’ to continue
• Once installed, go back to downloads folder - Do the following:
• Right click on network-manager-sstp_0.9.4-0ubuntu2_i386.deb and open with ‘GDebi Package Installer’
• Click on ‘install package’ to continue
• Provide you Mint password and click on ‘OK’ to continue
• Once installed, go back to downloads folder - Do the following:
• Right click on network-manager-sstp-gnome_0.9.4-0ubuntu2_i386.deb and open with ‘GDebi Package Installer’
• Click on ‘install package’ to continue
• Provide your Linux Mint ‘password’ and click on ‘OK’ to continue
• Once installed, go back to downloads folder
After installing packages. Reboot your system. - Click on ‘Network Manager Icon’ and select ‘Network Settings’
- Click on ‘+’
- Keep the ‘Interface’ as VPN. Hit the ‘Create’ button.
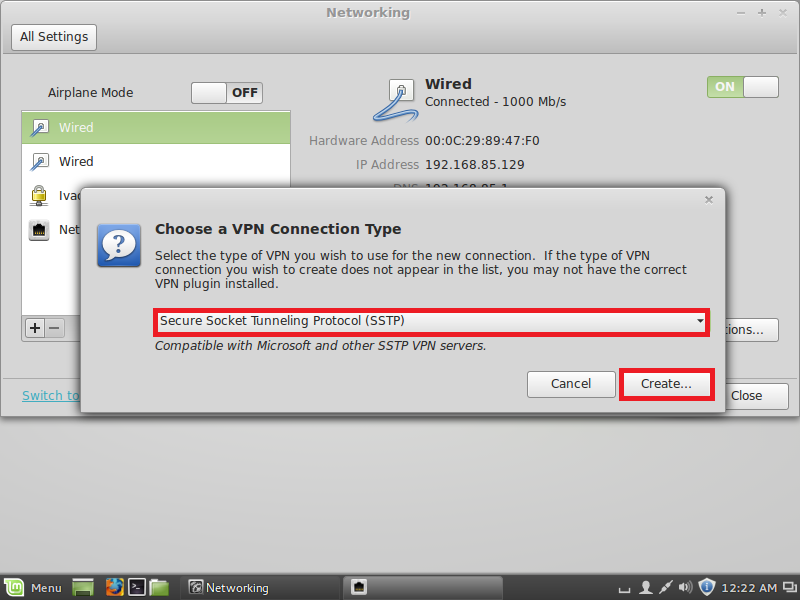
- Select ‘Secure Socket Tunneling Protocol (SSTP)’ and click ‘Create’
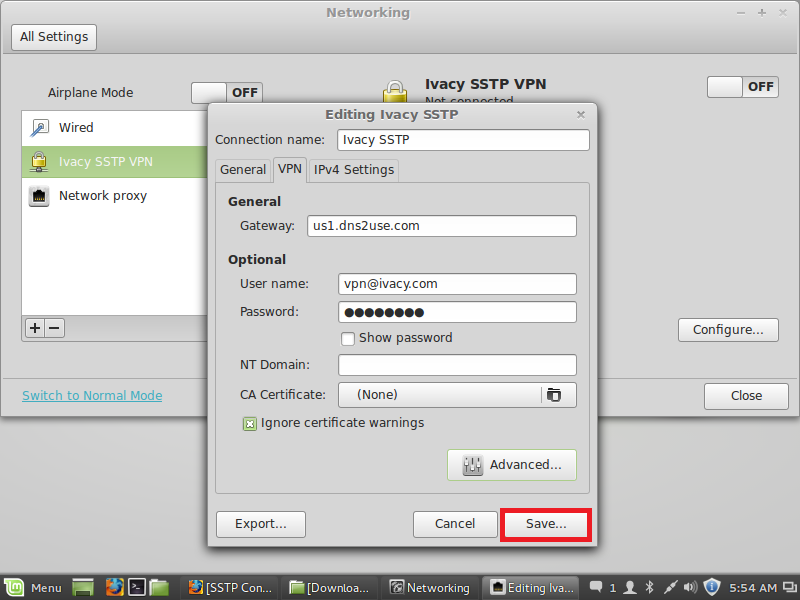
- Do the following:
• In ‘Connection Name’ field, type ‘Ivacy VPN SSTP’
• Insert desired ‘Gateway’. Get the server list here (click here)
• Insert the ‘username / email’ and ‘password’ in the respective fields
• Check ‘Ignore certificate warnings’
• Click on ‘Advanced’ button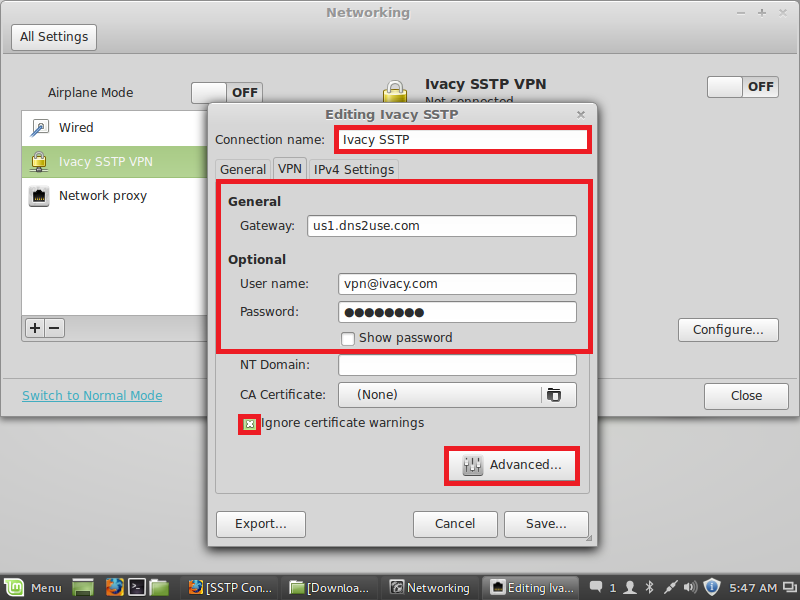
- Do the following:
• Uncheck ‘Use Point-to-Point encryption (MPPE)’
• Check ‘Send PPP echo packets’
• Uncheck ‘Allow BSD data compression’
• Uncheck ‘Allow Deflate data compression’
• Click on ‘OK’ button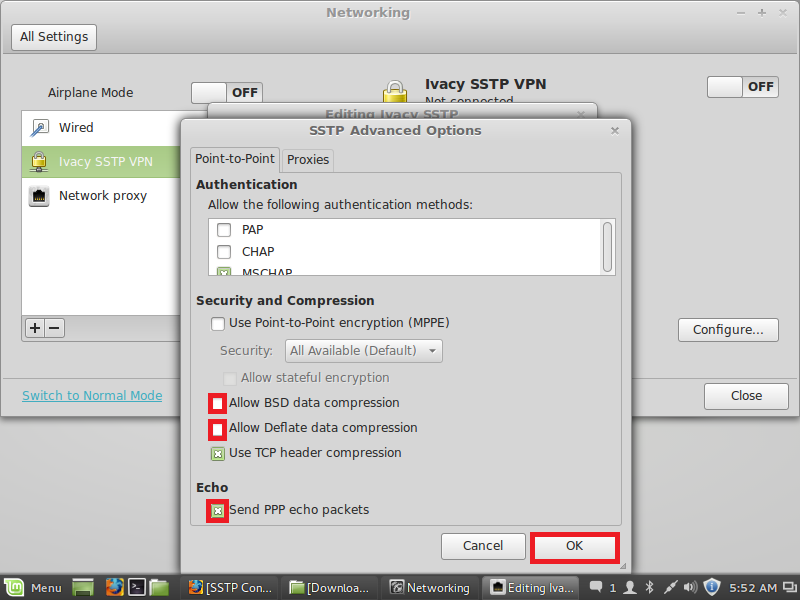
- Hit on ‘Save’ button
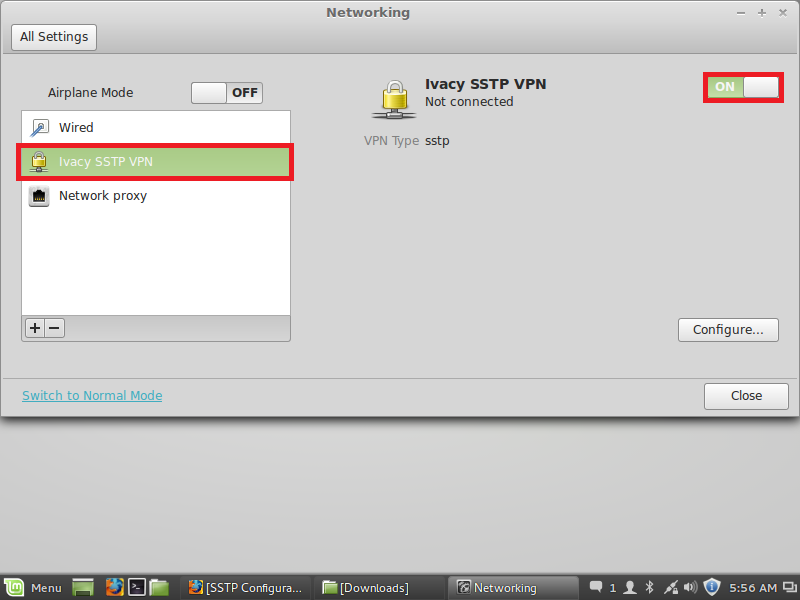
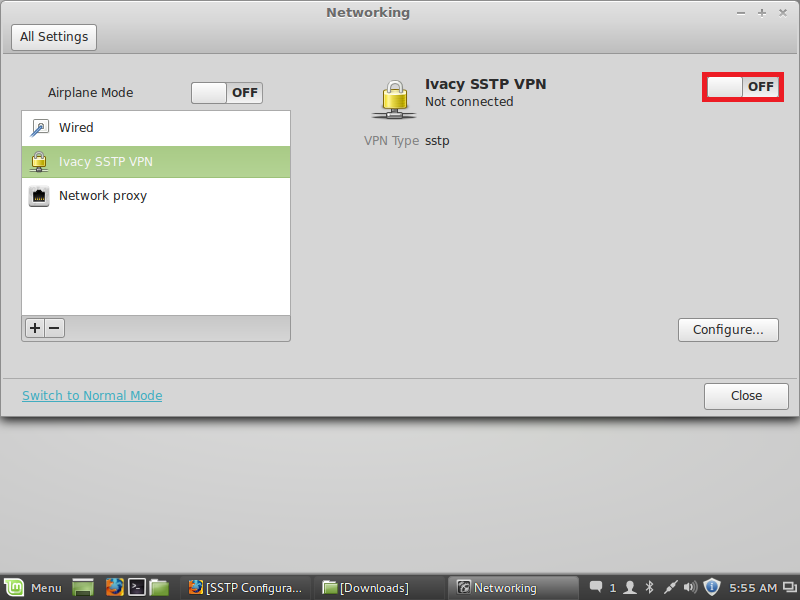
- Click on ‘Ivacy VPN SSTP’ connection and click on switch to ‘Turn ON’ VPN.
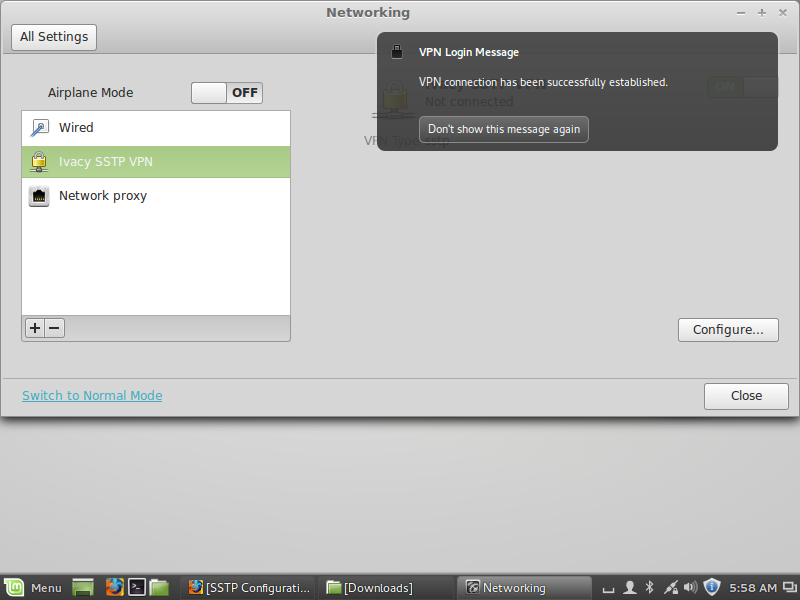
- You are connected to Ivacy SSTP VPN on your Linux Mint now. Enjoy privacy with Ivacy
 To disconnect VPN
 - Click on ‘Network Connection Icon’ and ‘Turn OFF’ VPN
That’s it! You have successfully configured Ivacy VPN on your Linux Mint. Enjoy complete privacy with Ivacy.