
 Setup Guide
 VPN Use Cases
 Account & Billings
 Video Tutorials
 Faq's
Faq's
How to configure OpenVPN on Linux Mint
 12009 Views
 April 4, 2020
 Andrew
 21 Comments
 15
15In this particular guide, you will learn about configuring OpenVPN for your Linux Mint with Ivacy VPN.
Before you begin, please make sure that:
- You must have an active internet connection
- A Premium Ivacy VPN account. If you haven’t subscribed yet, click here to subscribe for Ivacy VPN
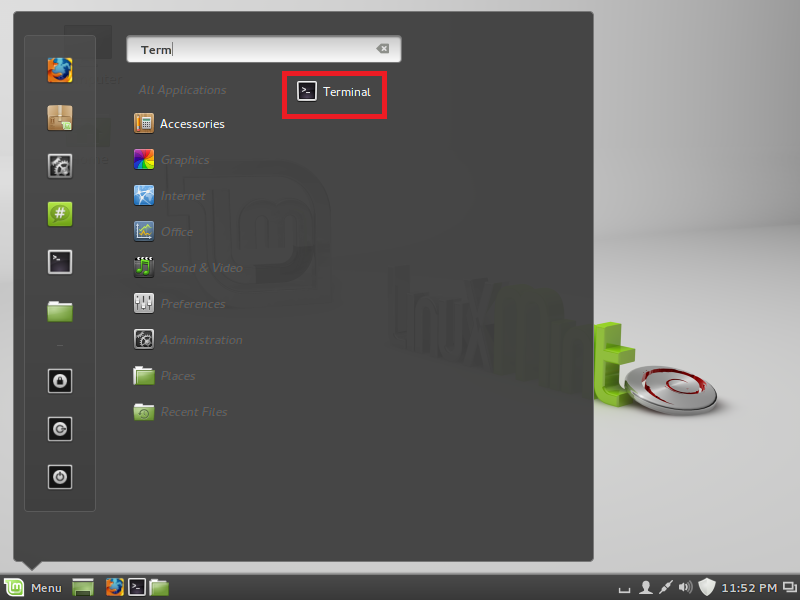
- Click on ‘Menu’ icon. Search for ‘Terminal’ and open it.

- The command line interface will open up. Type the following command on the prompt.
‘sudo apt-get install network-manager-openvpn’. Press ‘Enter’ key.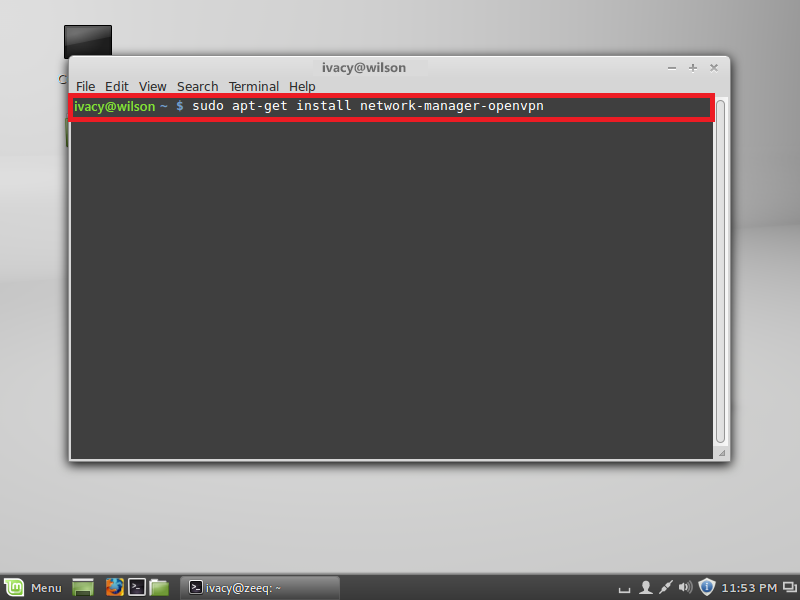
- Type your ‘password’. Press ‘Enter’ key again.
- Type the letter ‘Y’. Press the ‘Enter’ key.
- Type the following command on the prompt.
‘sudo apt-get install network-manager-openvpn-gnome’. Press ‘Enter’ key again.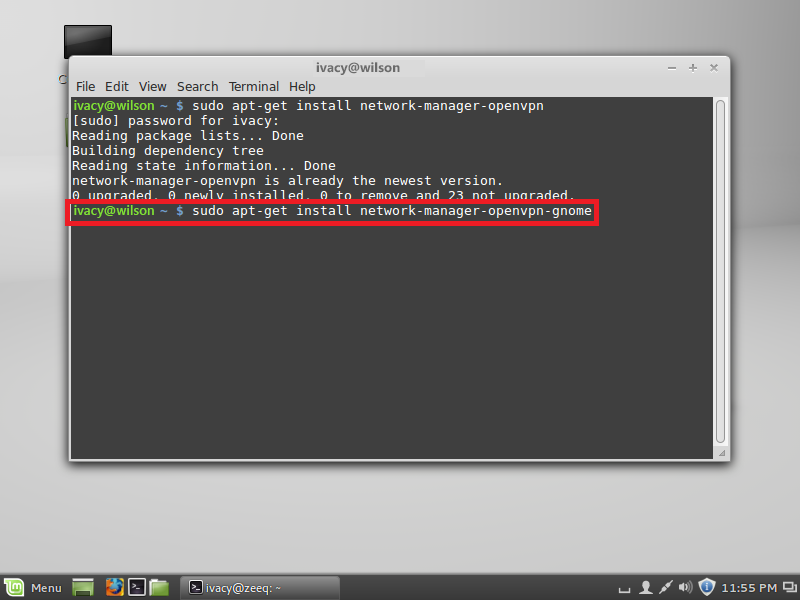
- Type the following command on the prompt.
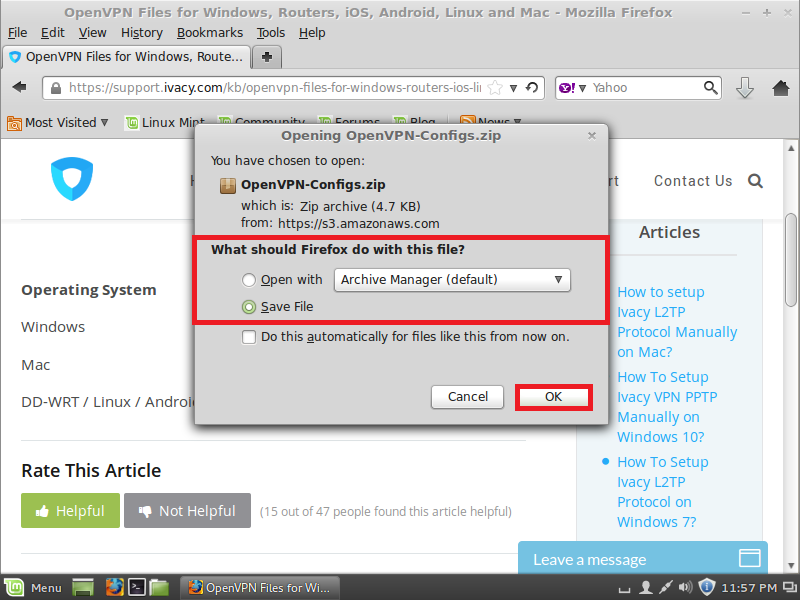
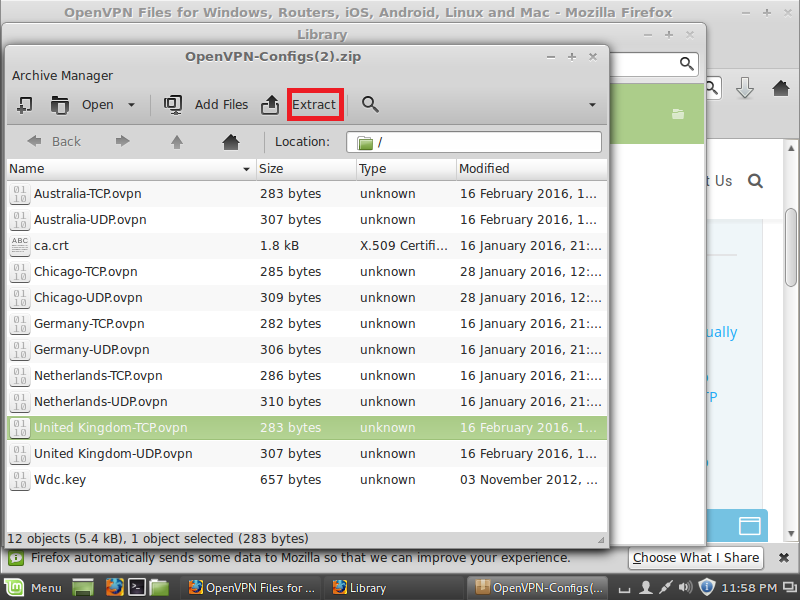
‘sudo restart network-manager’. Again hit the ‘Enter’ key. - Download the ‘OpenVPN folder from here. Extract the files. (Click here to Download File).
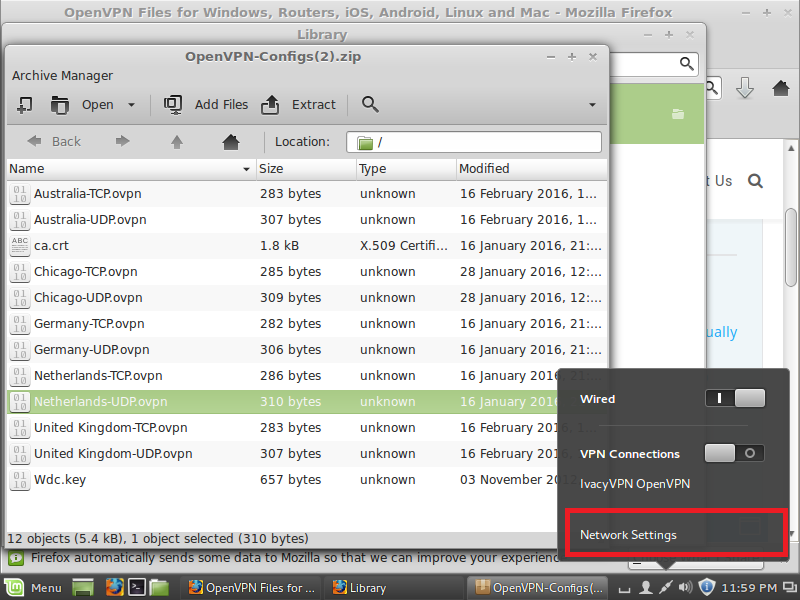
- From the taskbar, click on ‘Network Connections’ icon. Click on ‘Network Settings’ option.
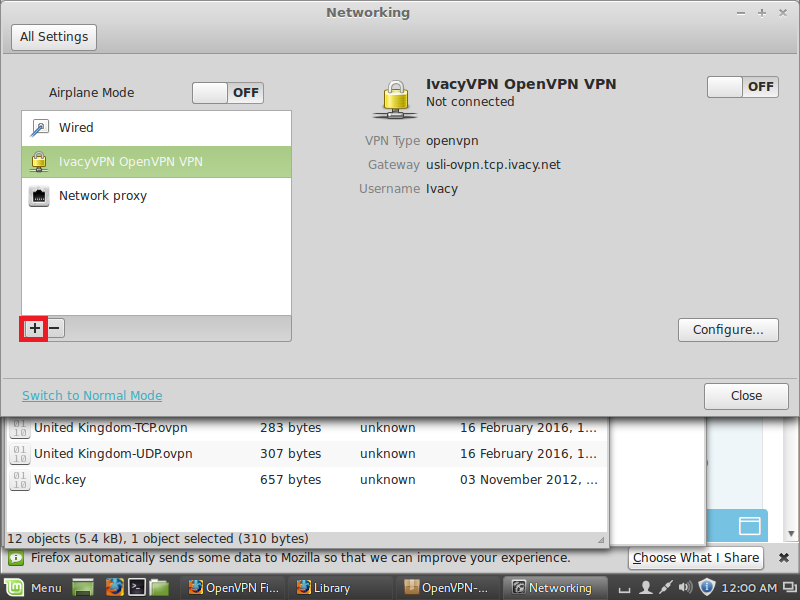
- The ‘Networking’ window will open up. On the left hand side, you will see a ‘+’ sign. Click on it.
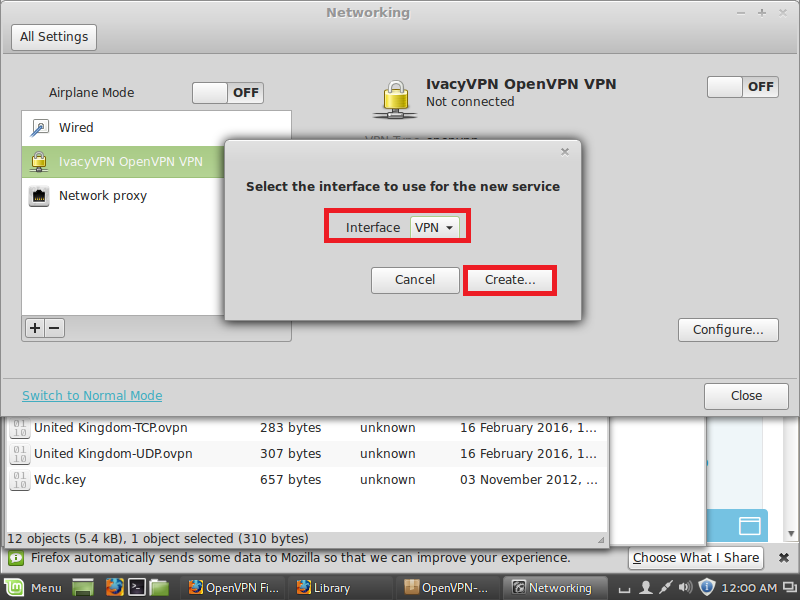
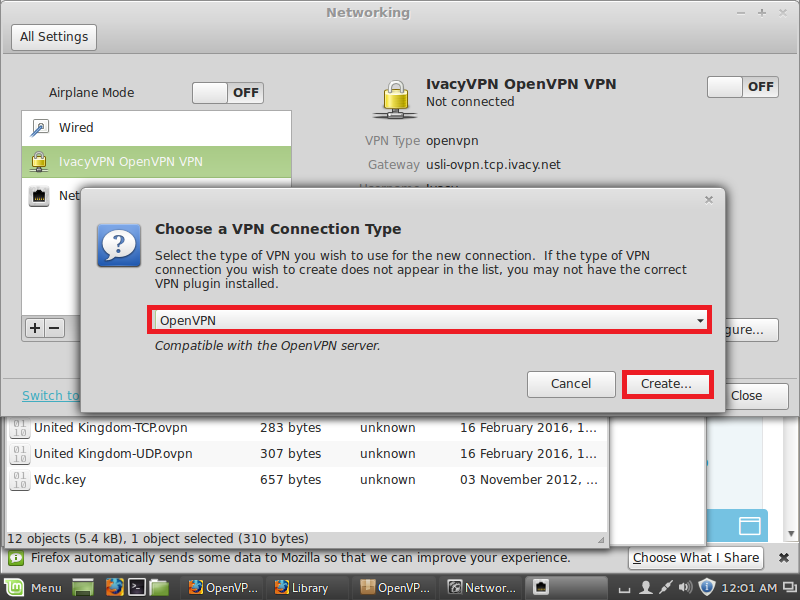
- The ‘Select the interface to use for the new service’ dialog box will open up. From ‘Interface’ dropdown menu, select ‘VPN’ option. Click ‘’Create’ button.
- The ‘Choose a VPN connection Type’ dialog box will open up. From the dropdown menu, select ‘OpenVPN’ option. Hit the ‘Create’ button.
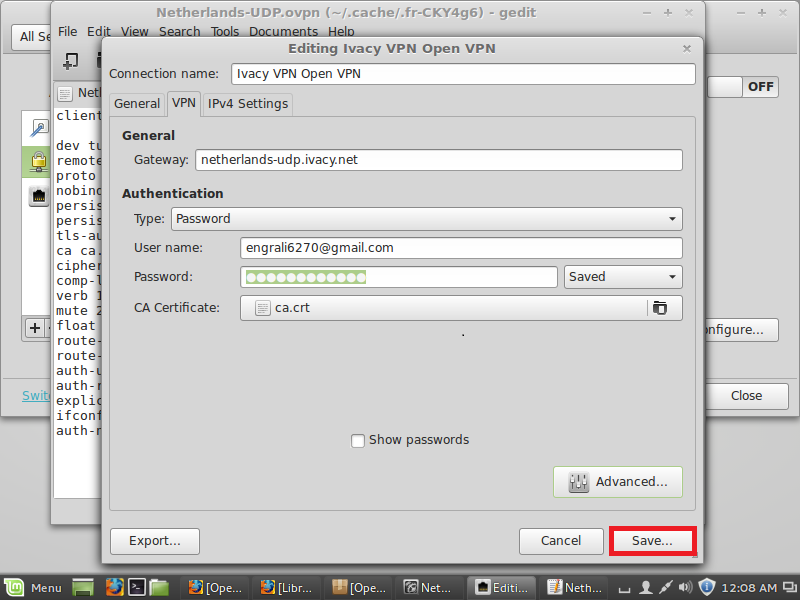
- A new window with multiple fields will open open up. In the ‘Connection Name’ field, type ‘IvacyVPN OpenVPN’. In the ‘Gateway’ field, type the gateway that you want to use. Open the ‘.ovpn file’ to get the server address that you want to use. From the ‘Type’ dropdown menu, select ‘Password’ option. In the ‘Username’ field, type your ‘email / username’. In the ‘Password’ field, type your ‘password’. Click on the ‘folder icon’ against the ‘CA Certificate’ field.
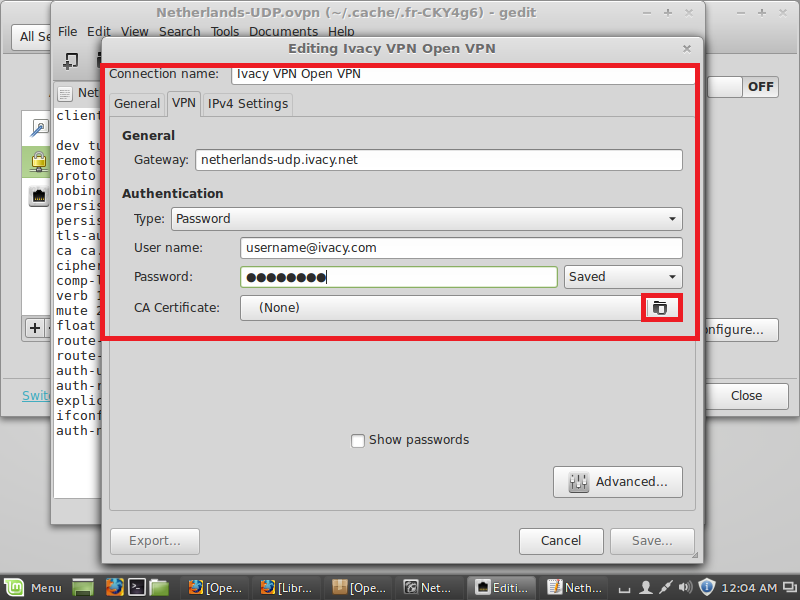
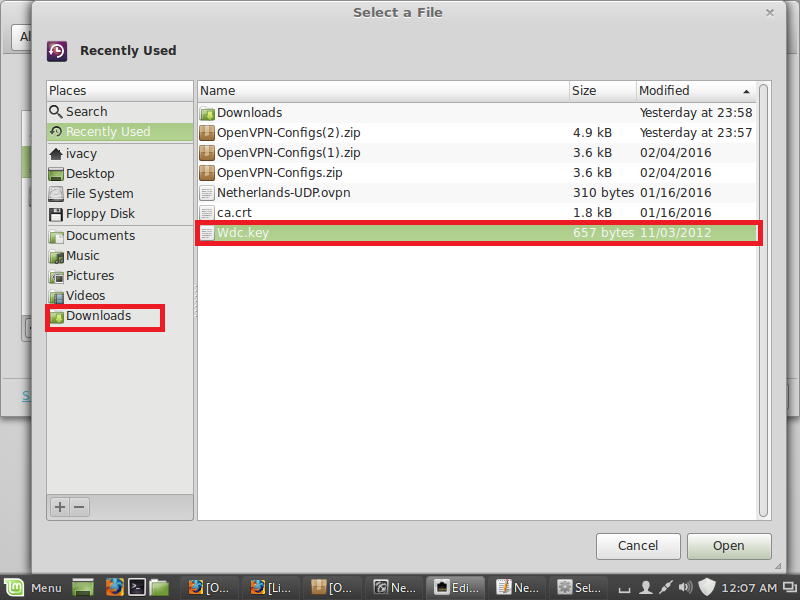
- Go to ‘OpenVPN downloaded folder’. Select ‘ca.crt’ file. Click ‘Open’ button.
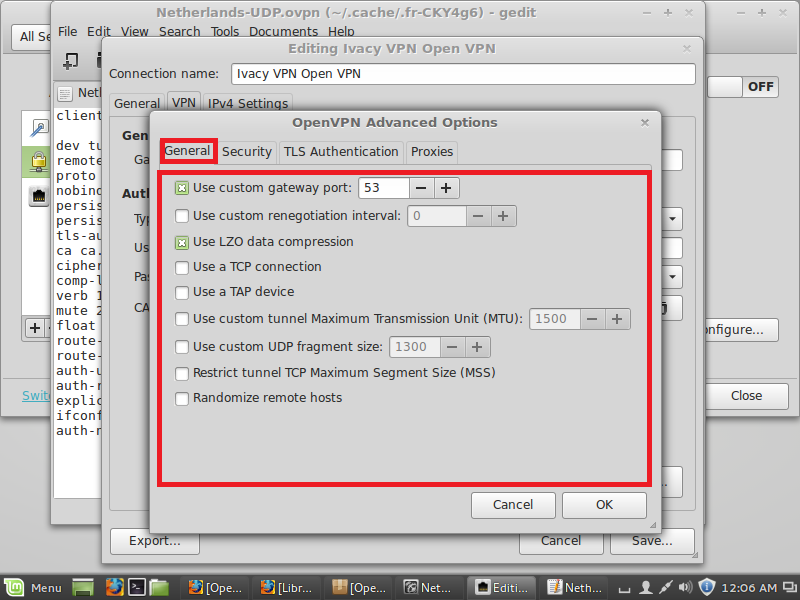
- The ‘Editing IvacyVPN OpenVPN’ window will open up. Click on ‘Advanced’ button.
- Navigate to ‘General’ tab. Check the ‘Use custom gateway port’ checkbox. For ‘UDP’, type ‘53’ and for ‘TCP’, type ‘80’. If you are using a TCP connection, check the ‘Use a TCP Connection’ checkbox.
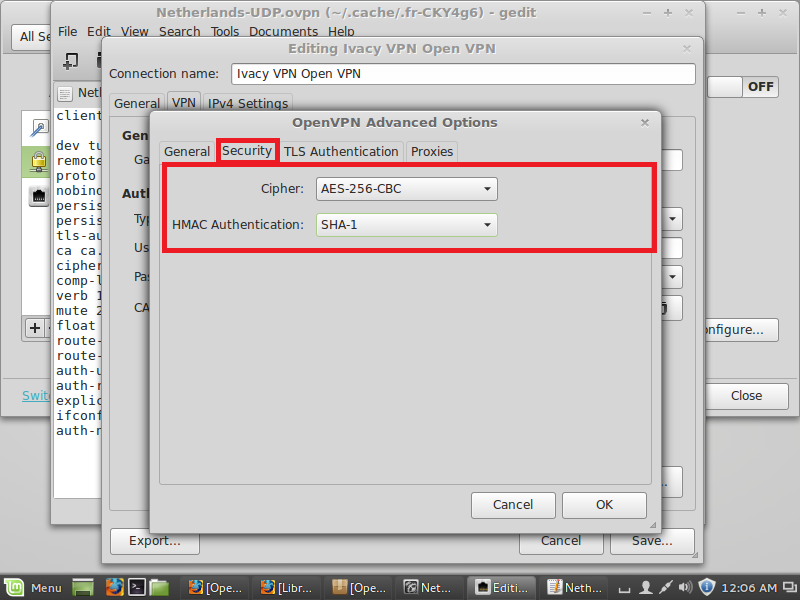
- Go to ‘Security’ tab. From ‘Cipher’ dropdown menu, select ‘AES-256-CBC’ option, or any other encryption that you desire to use. From ‘HMAC Authentication’ dropdown menu, select ‘SHA-1’ option.
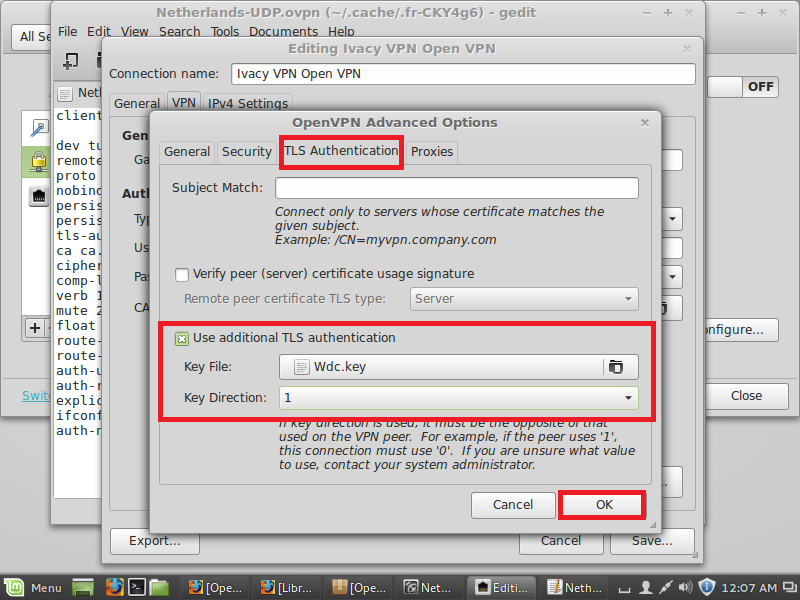
- Go to ‘TLS Authentication’ tab. Check the ‘Use additional TLS authentication’ checkbox. Click on ‘folder icon’ against the ‘Key File’ field.

- Go to ‘OpenVPN downloaded folder’. Select the ‘Wdc.key’ file. Click ‘Open’ button.
- From the ‘Key Direction’ dropdown menu, select ‘1’. Click the ‘OK’ button.
- Hit ‘Save’ button.
- On the left-hand side, you will see a window. Click on ‘IvacyVPN OpenVPN VPN’ connection. Switch the VPN button ‘ON’.
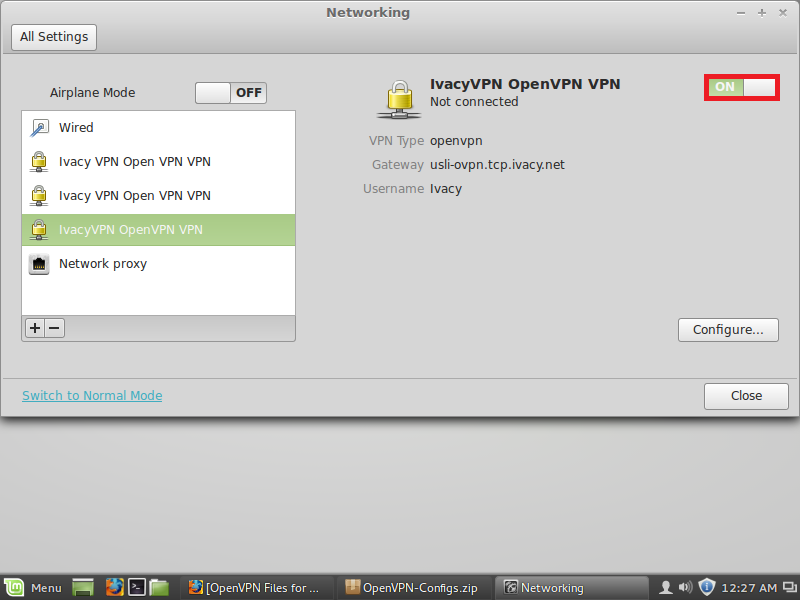 You are now connected to the IvacyVPN OpenVPN connection. Enjoy privacy with Ivacy VPN.
To Disconnect:
Click on the ‘Network Connection’ icon on the taskbar. Switch the VPN button ‘OFF’. If you are facing any problems in setting up Ivacy VPN on OpenVPN protocol, you can always contact our customer support team.