
 Setup Guide
 VPN Use Cases
 Account & Billings
 Video Tutorials
 Faq's
Faq's
How to Configure Ivacy on Mikrotik Router (PPTP)
 12752 Views
 March 22, 2020
 Andrew
 No Comments
 2
2Before you begin, please make sure that:
- You must have an active internet connection.
- VPN Supported Router.
- Own a premium Ivacy account (If you do not already own one, you can buy a subscription from here)
- Access your router interface by entering 192.168.88.1 address in your browser search bar. Enter ‘login’ and ‘password’ to access the configuration interface.
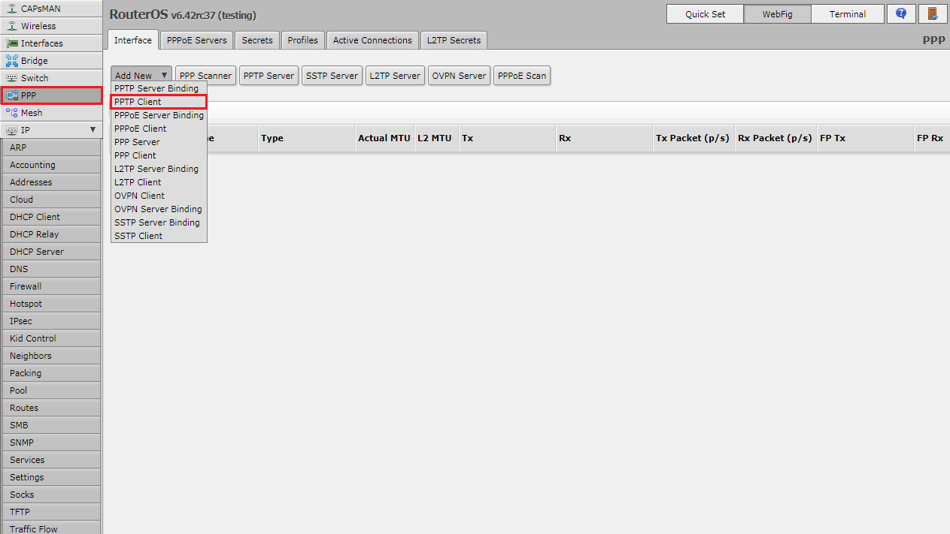
- Choose ‘PPP’ from the Main Menu and from ‘Add New’ a choose ‘PPTP Client’ to configure PPTP protocol (For SSTP simply choose SSTP Client)
- In the ‘General’ tab, define your VPN connection ‘Name’ such as ‘IvacyVPN’
- In the ‘Dial Out’ tab, type in your desired server address in ‘Connect To’ (List of server addresses is available here)and enter your Ivacy ‘Username’ and ‘Password’.
• Enable ‘Dial on Demand’ and ‘Add Default Route’ and click Apply/OK.
- From the Main Menu choose ‘IP’ and then ‘Firewall’ tab in the sub menu, Choose ‘NAT’ and then ‘Add New’ NAT rule.
• In the ‘General’ tab choose ‘scrnat’ in Chain and ‘Ivacy VPN’ in Out. Interface List.
• In the ‘Action’ Tab choose ‘masquerade’ as the Action.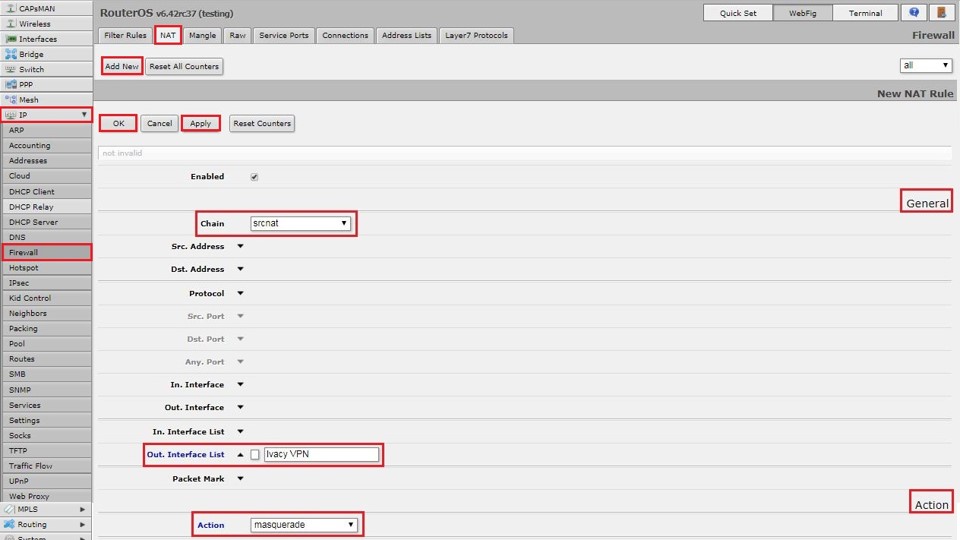
- Click Apply/Ok.
- Choose ‘Mangle’ tab and ‘Add New’ rule.
• In the ‘General’ tab choose ‘prerouting’ as Chain and define the IP Address of the connection in ‘Src. Address’ to be used under VPN. Also check on the box beside IP.
• In the Action tab choose ‘mark routing’ as the Action, ‘Ivacy VPN’ in the New Routing Mark and enable ‘Passthrough’.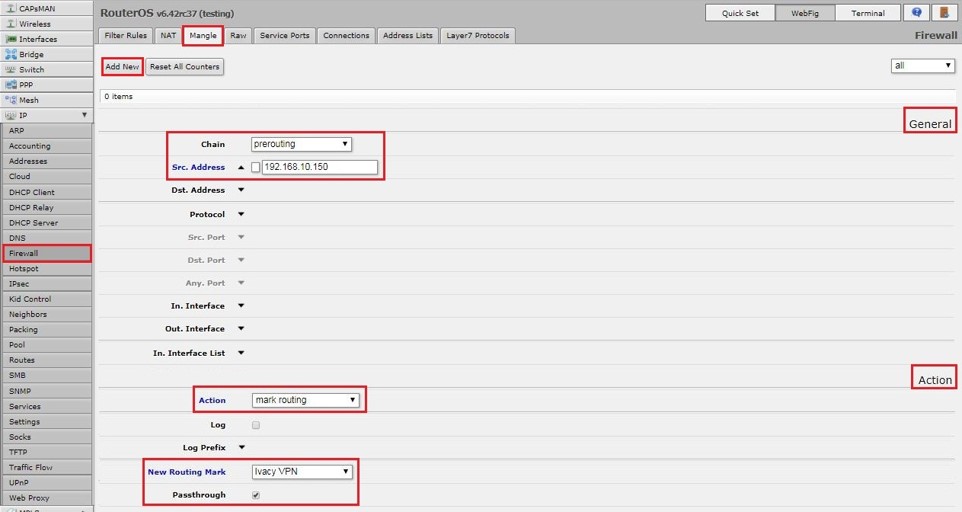
- Choose ‘Routes’ tab from the sub menu and from the ‘Routes’ tab ‘Add New’ route.
• In the ‘General’ tab define the ‘Dst. Address’ to be 0.0.0.0/0.
Gateway and Routing mark would be ‘Ivacy VPN’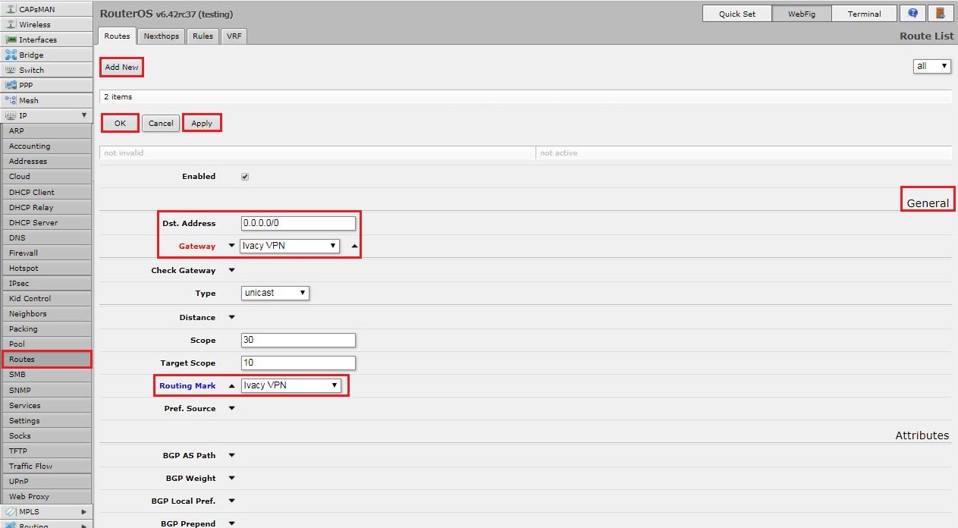
- Click Apply/OK
- Choose ‘DNS’ from the sub menu and type in either OpenDNS or Google DNS in ‘Servers’.
• ‘Allow Remote Request’ will be enabled.
- Click ‘Apply’ to save the settings.
- From the Main Menu choose ‘Interface’ tab, click on the VPN Interface then check the VPN status from the ‘Status’ tab.
 You are connected with Ivacy VPN. Enjoy Privacy with Ivacy.