
 Setup Guide
 VPN Use Cases
 Account & Billings
 Video Tutorials
 Faq's
Faq's
How to Configure Ivacy on Synology (PPTP)
 7215 Views
 March 20, 2020
 Andrew
 4 Comments
 3
3Before you begin, please make sure:
- You must have an active internet connection.
- VPN Supported Router.
- Own a premium Ivacy account (If you do not already own one, you can buy a subscription from here)
To begin, access the Control Panel and choose “Network” in the left sidebar:
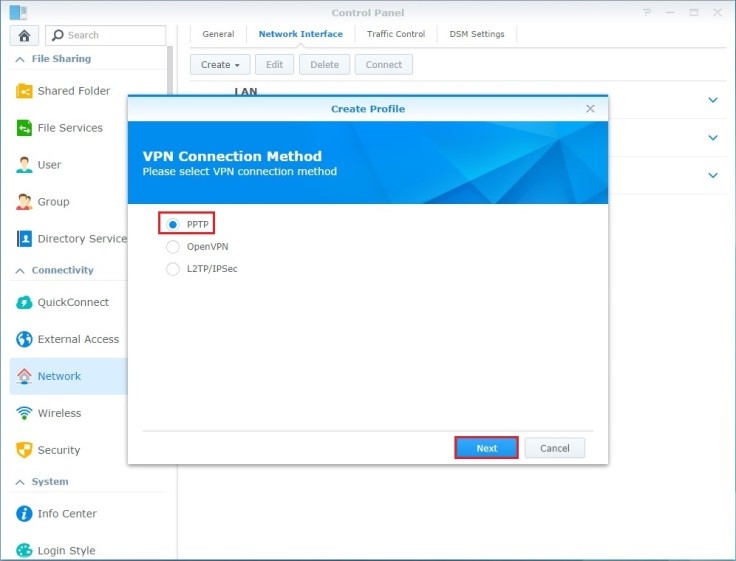
- Choose “Network Interface” in the top menu bar to create your VPN profile. Select “PPTP” as your VPN connection method and select “Next”.
- To create a VPN profile, you need to specify the general settings as explained below:
• Profile name: You can name your profile anything you like – e.g. “Ivacy US”.
• Server address: Enter the server of the location you wish to connect to. For our server list, please click here
• User name: Enter your Ivacy username.
• Password: Enter your Ivacy password.When you’re done, click “Next”.
- You will now be redirected to advanced settings where you will fill them out as follows:
• Authentication: Choose “MS CHAP v2” from the drop-down menu
• Encryption: Choose “Maximum MPPE (128 bit)” from the drop-down menu
• Make sure you tick the following options only:
• “Use default gateway on remote network”.
• “Reconnect when the VPN connection is lost”.When you’re done, click “Apply”.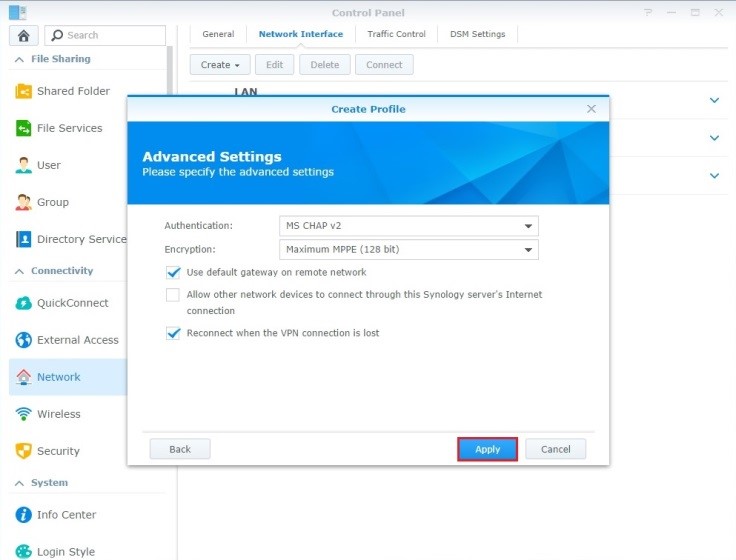
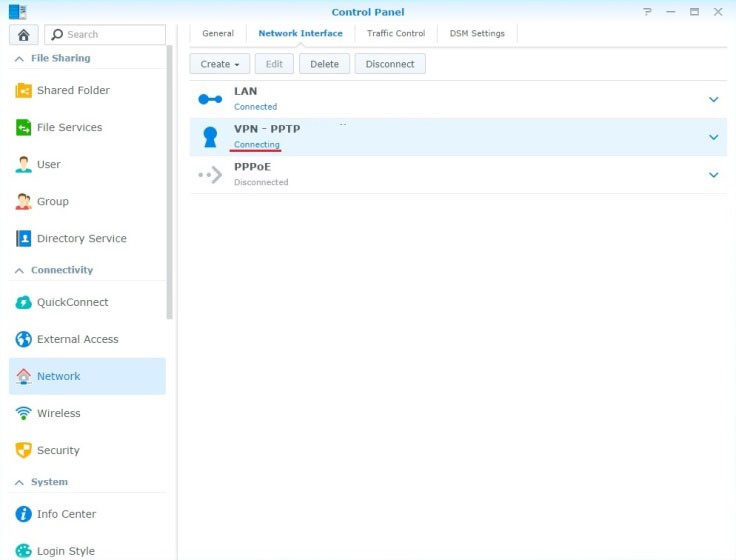
- Now you’ll see that your VPN profile has been created – to establish a VPN connection, click “Connect”.

- The status of your profile will now change from “Disconnected” to “Connecting”.
- Once you have established a connection, the status of your VPN profile will change to “Connected” and you will be able to see the duration of your connection, your new IP address as well as bytes sent and received.
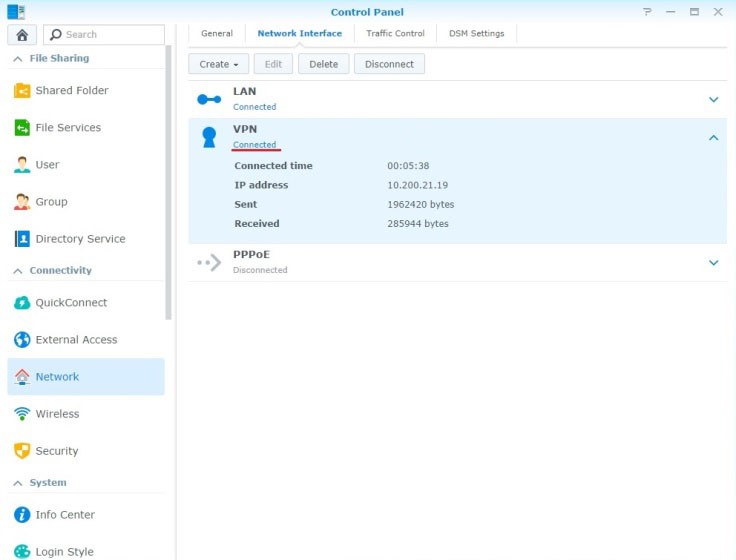
- To disconnect, just click “Disconnect”.