
 Setup Guide
 VPN Use Cases
 Account & Billings
 Video Tutorials
 Faq's
Faq's
How To Setup Ivacy VPN on Windows XP Manually
 6589 Views
 July 4, 2016
 admin
admin 7 Comments
 4
4Before you begin, please make sure that:
- You have a working internet connection
- A Premium Ivacy VPN account. If you haven’t subscribed yet, click here to subscribe for Ivacy VPN
You can select the respective tab for the desired protocol.
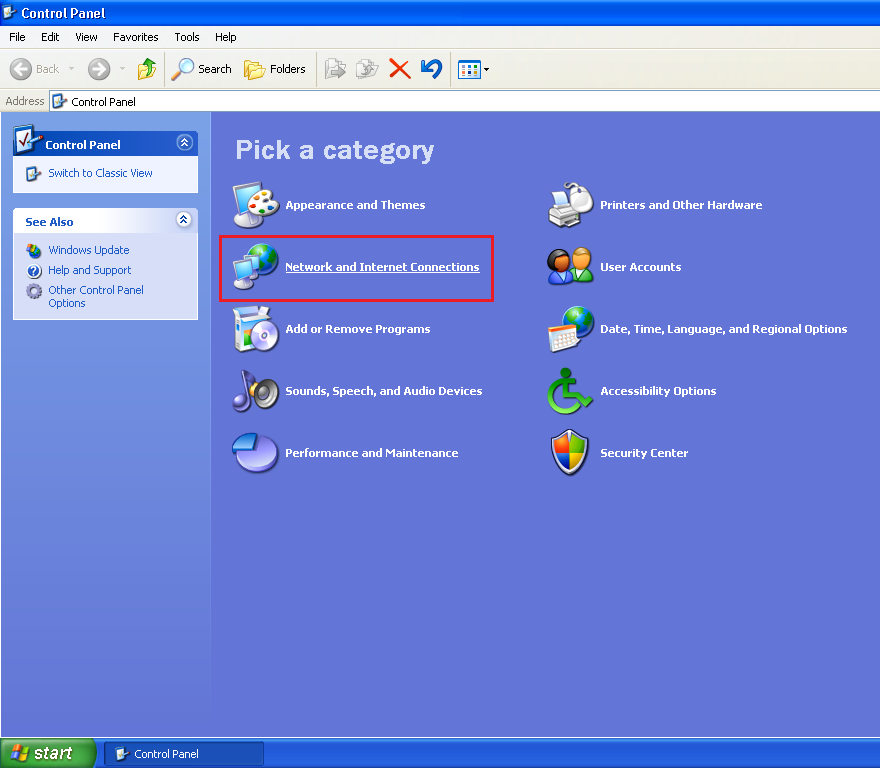
- Open “Control Panel” and click on “Network and Internet Connections”.
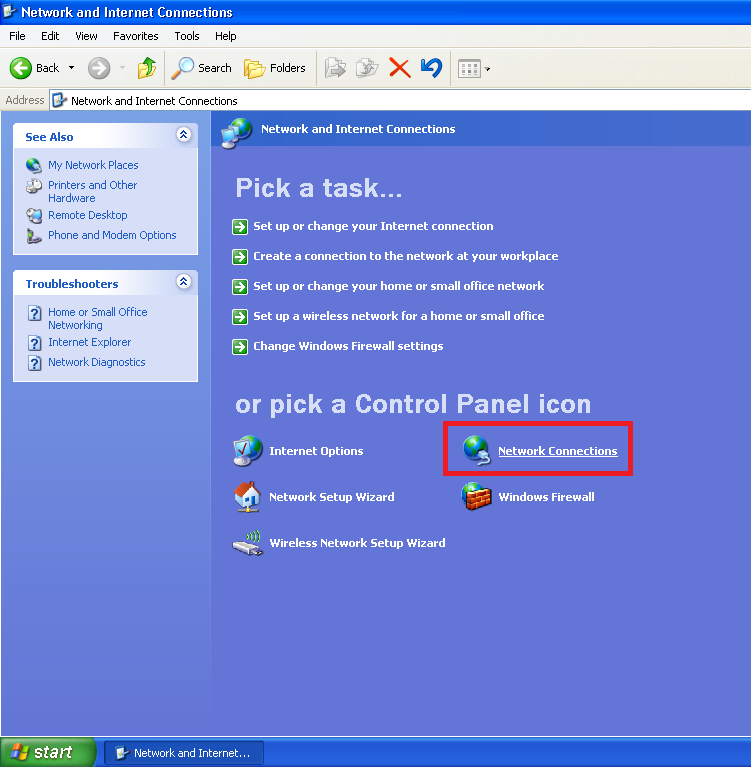
- Click on “Network Connectins”.
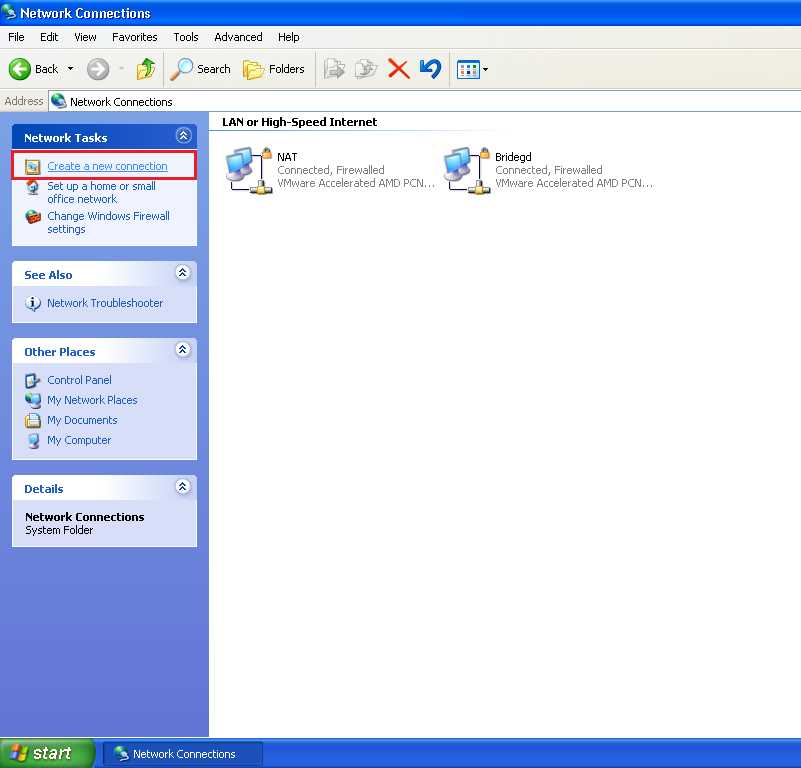
- Now create a new connection.
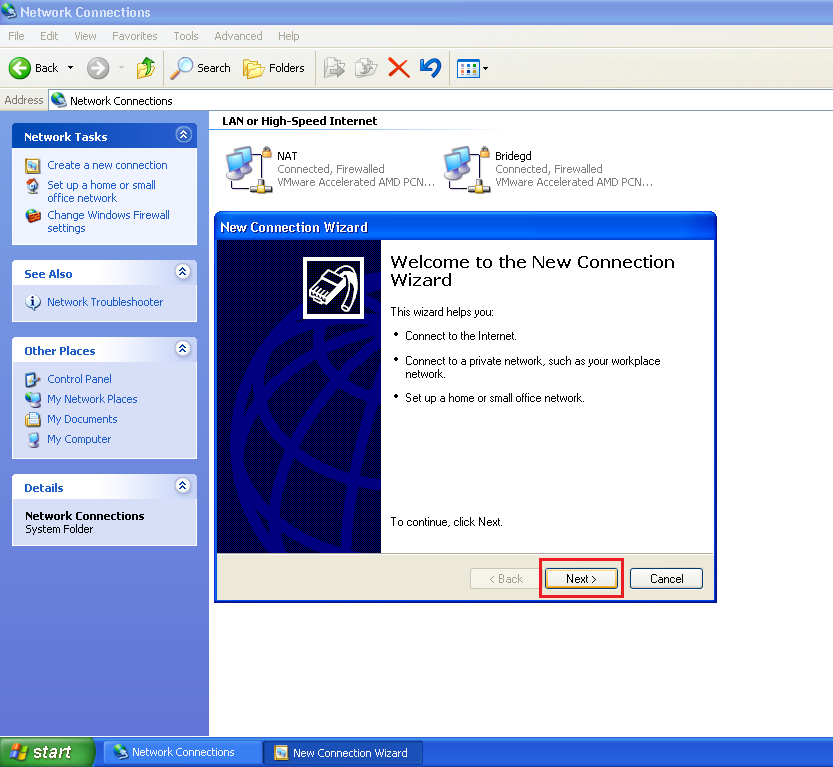
- Click “Next”.
- Then connect to a workplace by selecting it and clicking “Next”.
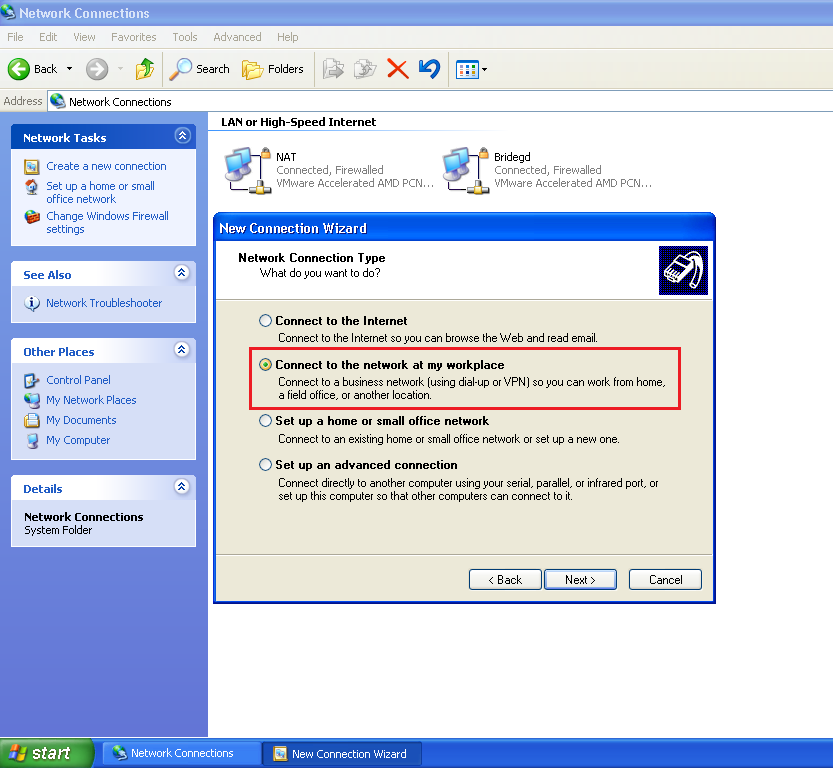
- Select “Virtual Private Network connection” and click “Next”.
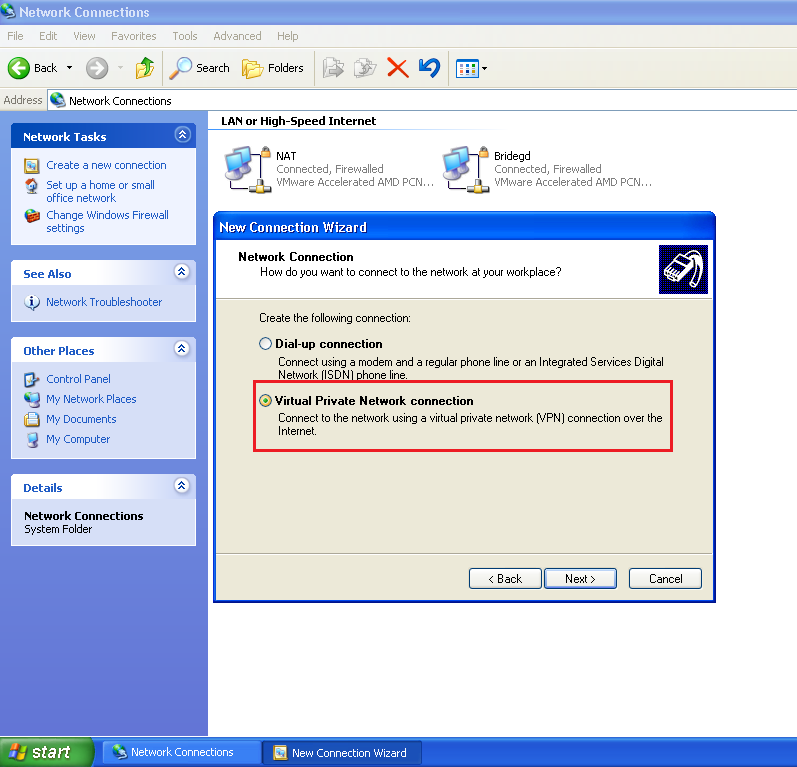
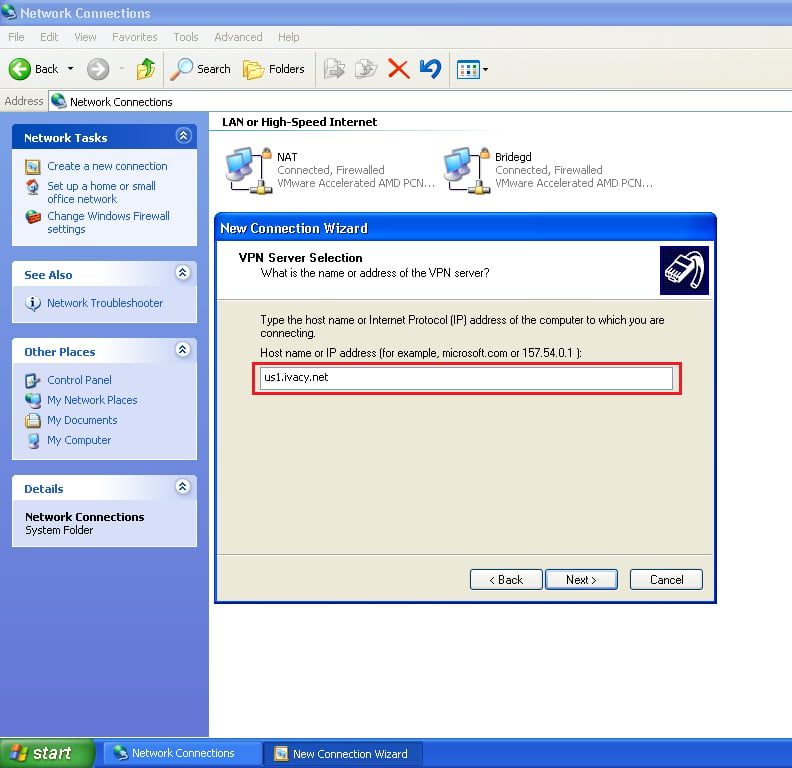
- Write desired server address in “Host name or IP address” field (the list of all server addresses can be found here).
- Type any name like ‘IvacyVPN PPTP’ in “Company Name”.
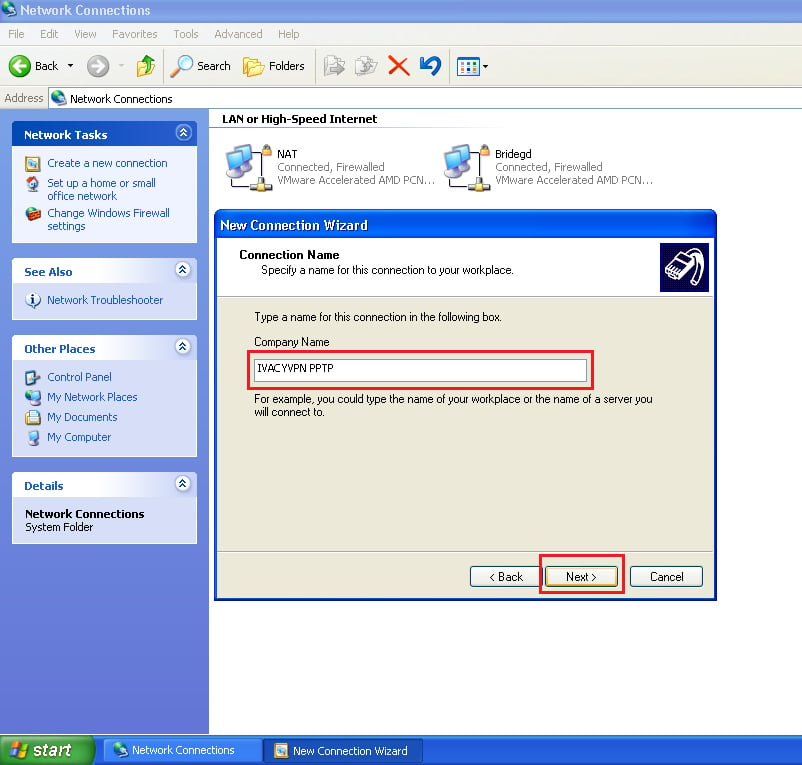
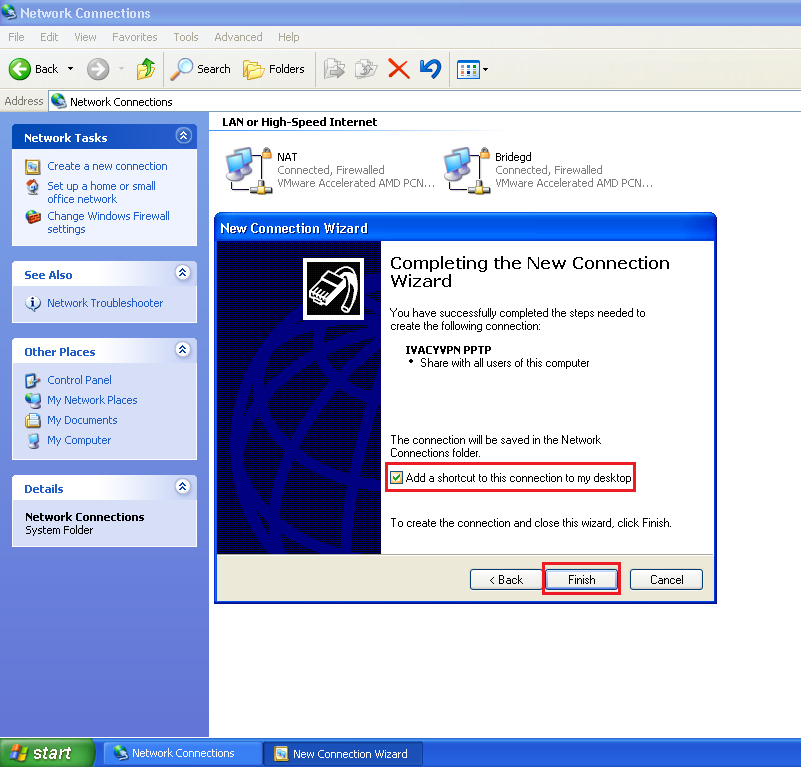
- Select “Add a shortcut to this connection to my desktop” and click “Finish”.
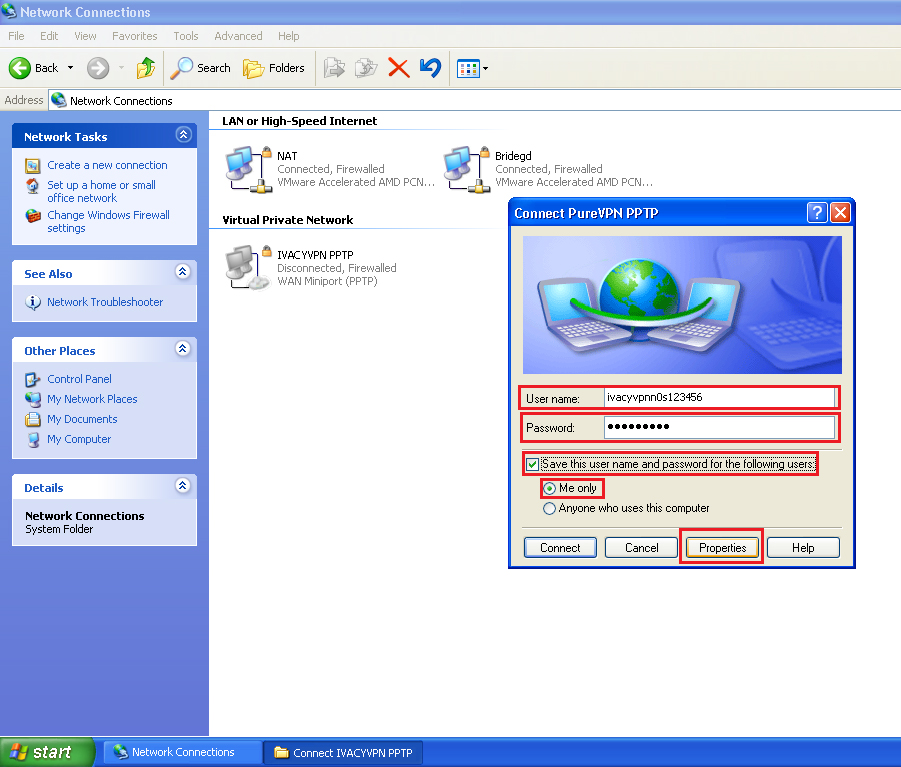
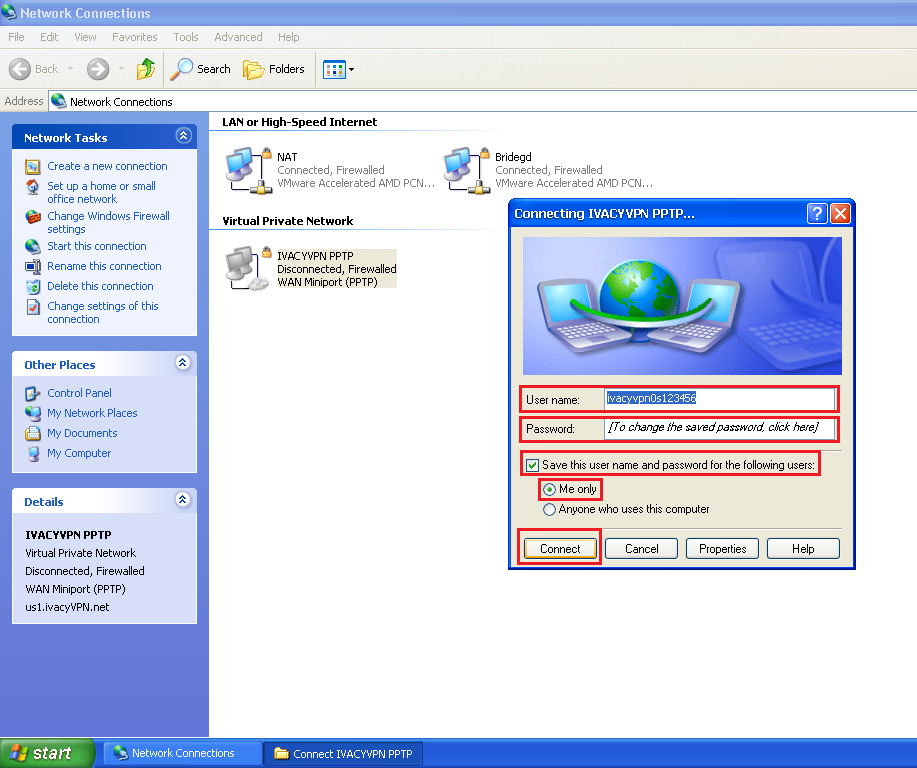
- Enter the ‘username’ and ‘password’ (the email address and the password are the same that you chose at the time of order placement). Click on the option “Save this user name and password for the following users” and open “Properties”.
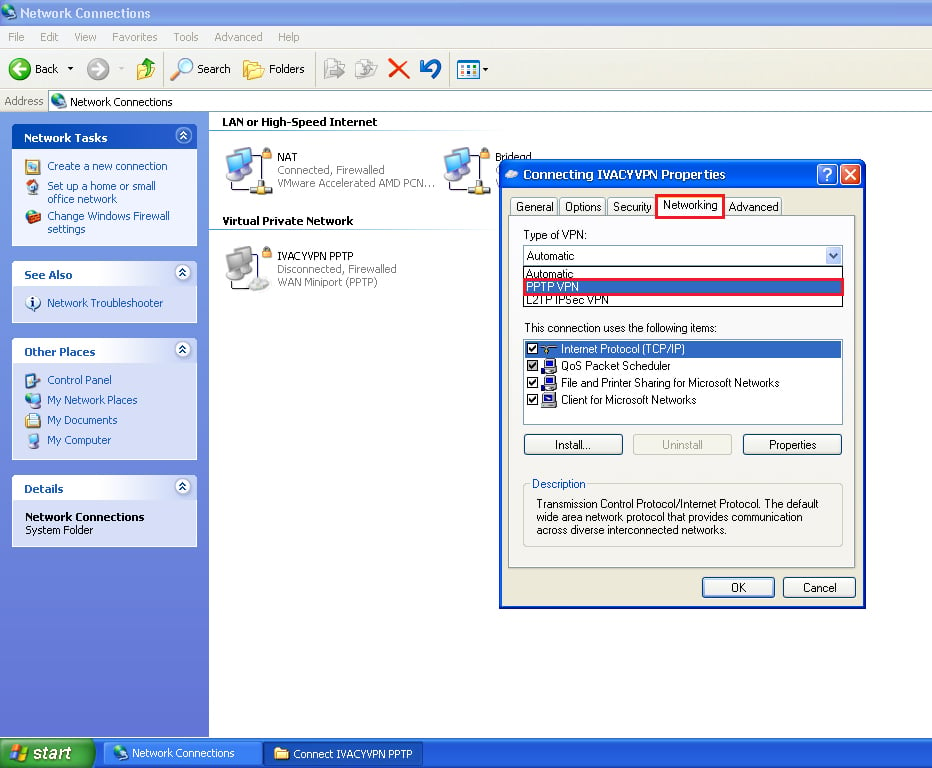
- Go to “Networking” tab and select ‘PPTP VPN’ from “Type of VPN:” drop-down menu.
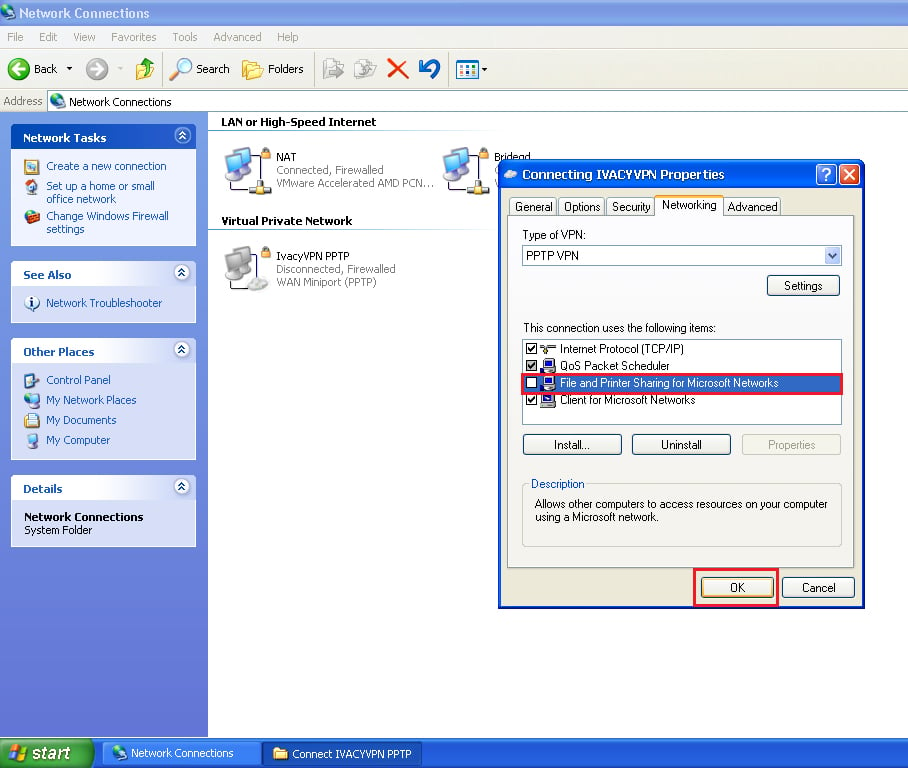
- Now uncheck the TCP/IPv6 and File and printing sharing to enhance security.
- Now connect with Ivacy PPTP with username and password given in the email and enjoy Privacy with Ivacy.
- Open “Control Panel” and click on “Network and Internet Connections”.
- Click on “Network Connections”.
- Now create a new connection.
- Click “Next”.
- Then connect to a workplace by selecting it and clicking “Next”.
- Select “Virtual Private Network connection” and click “Next”.
- Write desired server address in “Host name or IP address” field (the list of all server addresses can be found here).
- Type any name like ‘IvacyVPN L2TP’ in “Company Name”.
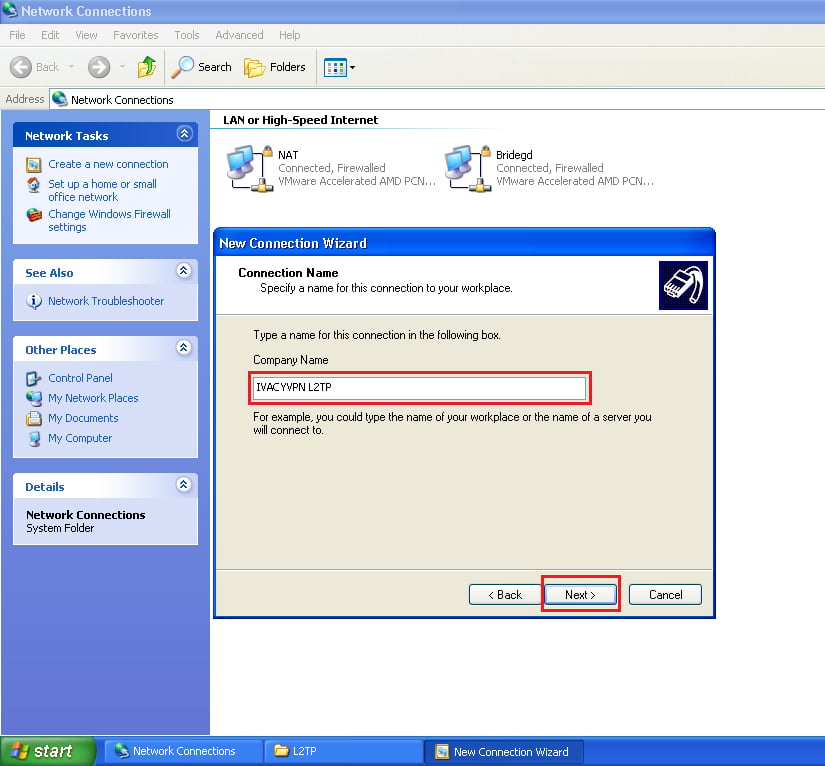
- Select “Add a shortcut to this connection to my desktop” and click “Finish”.

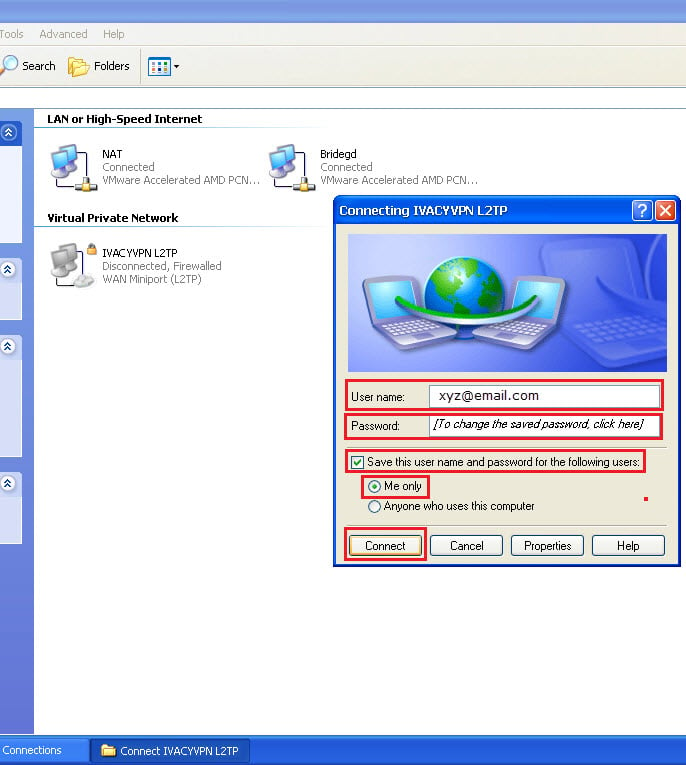
- Enter the ‘email’ and ‘password’ (that you chose at the time of registration). Click on the option “Save this user name and password for the following users” and open “Properties”.
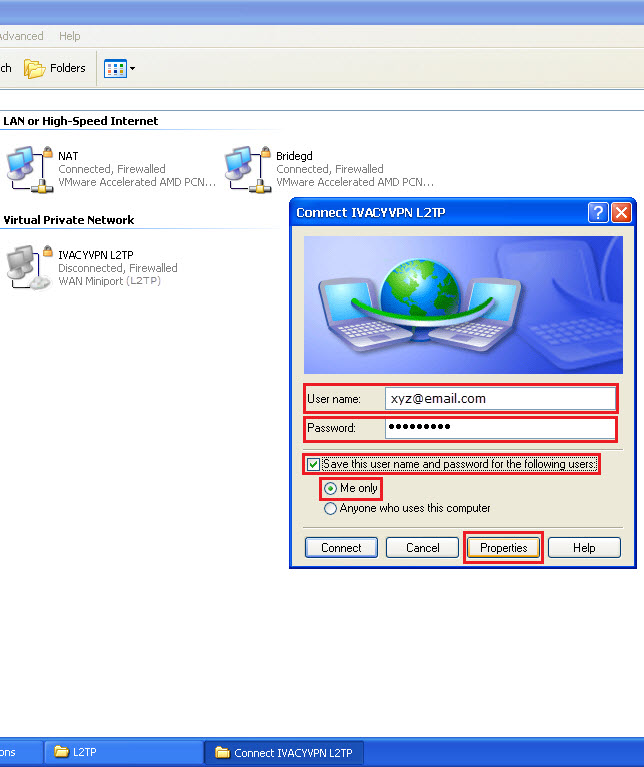
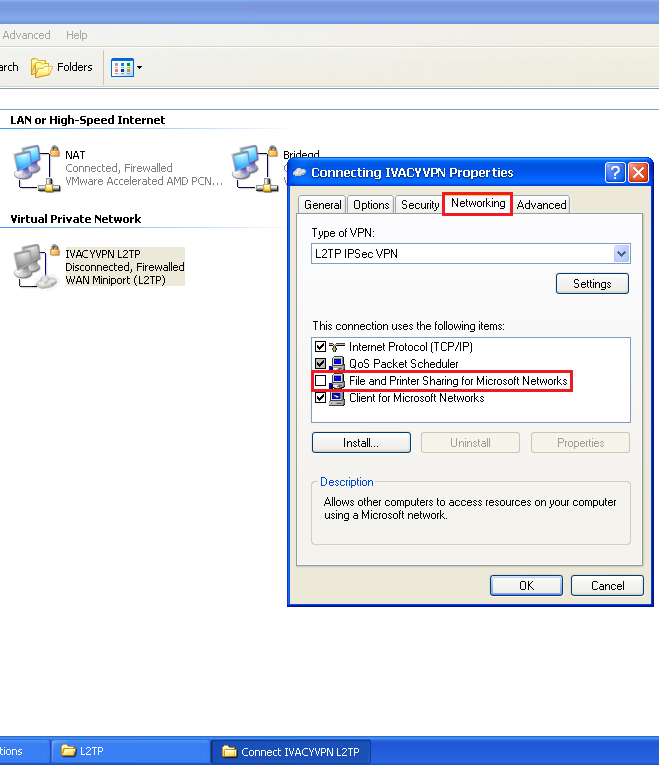
- Go to “Networking” tab and select ‘L2TP IPSec VPN’ from “Type of VPN:” drop-down menu.
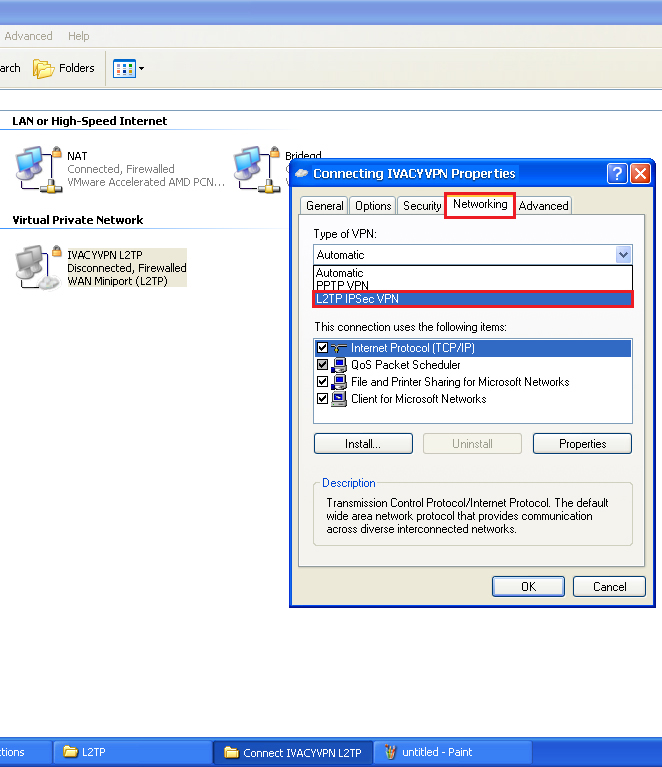
- Now uncheck the “File and printer sharing for Microsoft Networks”
- Now connect with Ivacy L2TP with email and password (email and password are the same that you choose at the time of registration) and enjoy Privacy with Ivacy.
Install IvacyVPN OpenVPN
- You must first download and install the IvacyVPN OpenVPN installer on your system. In order to download the OpenVPN installer, click here. (Click here to Download File).
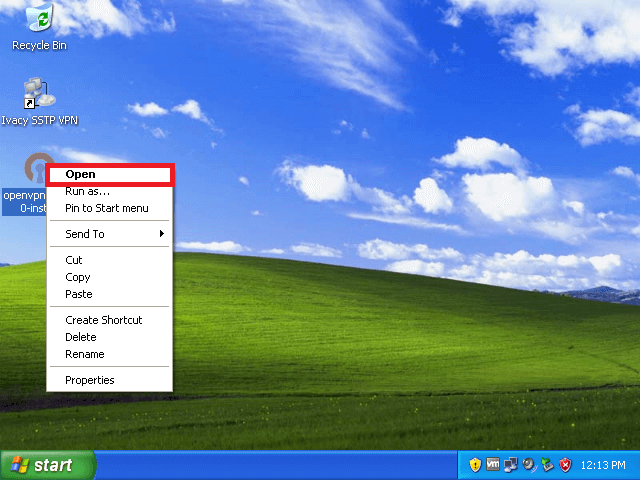
- Right click on “OpenVPN Installer” and select “Open” or you can also double click on the icon.
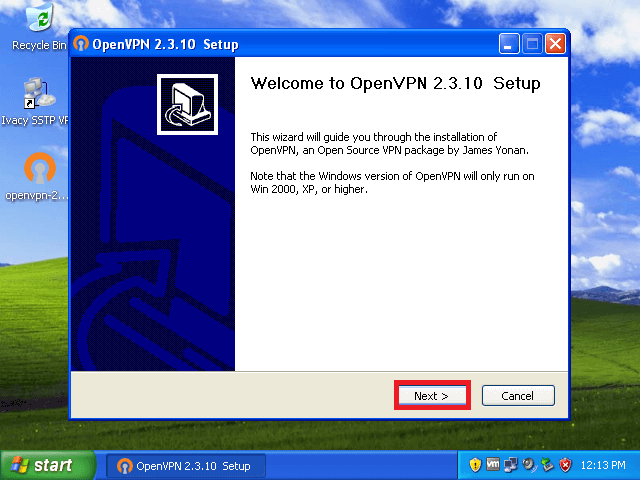
- The ‘OpenVPN Setup 2.3.10 Setup’ window will open up. Click on ‘Next’ button.
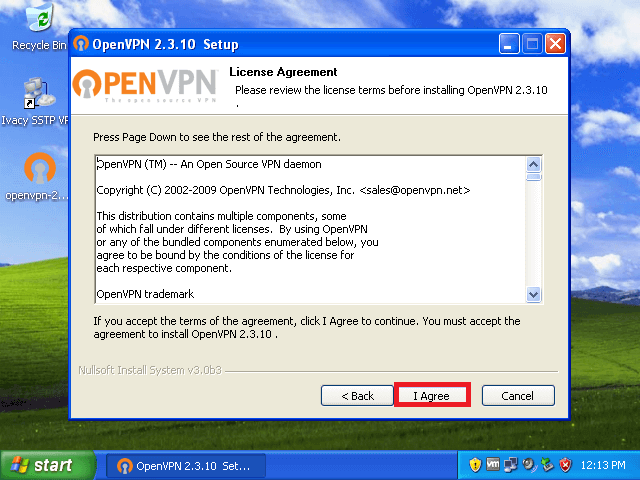
- Click on ‘I Agree’ button, once the ‘License Agreement’ opens up.
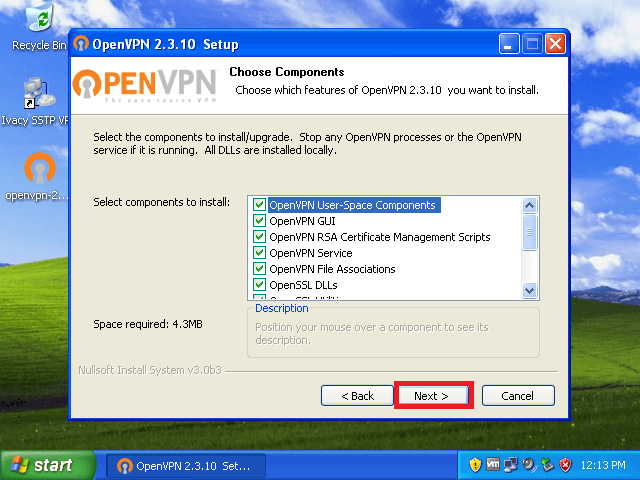
- The ‘Choose Components’ window will open up. Click on the ‘Next’ button.
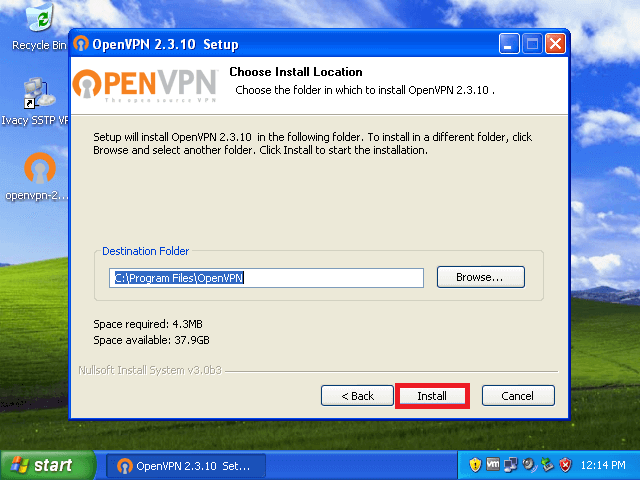
- Click on the ‘Install’ button to begin installation procedure.
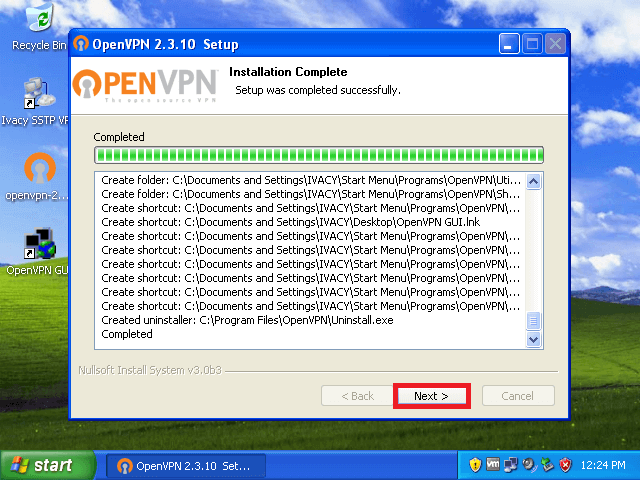
- Once the ‘installation process’ is complete, click on the ‘Next’ button.
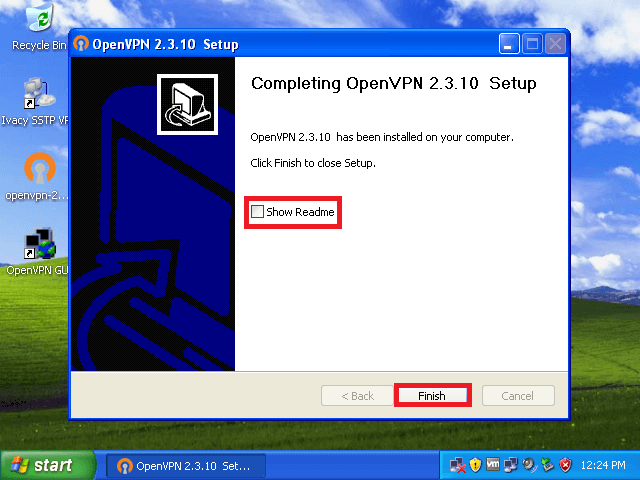
- Uncheck the ‘Show Readme’ checkbox. Hit the ‘Finish’ button.
Connect to Ivacy VPN OpenVPN
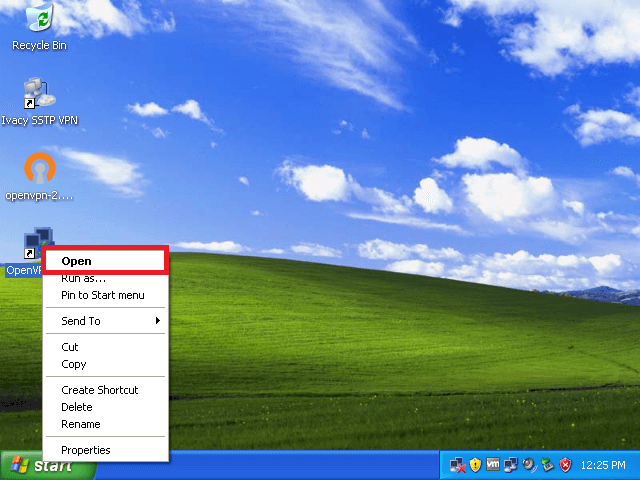
- Right click on ‘OpenVPN GUI’ icon. Select ‘Open’ option. You can also double click on the icon to proceed.
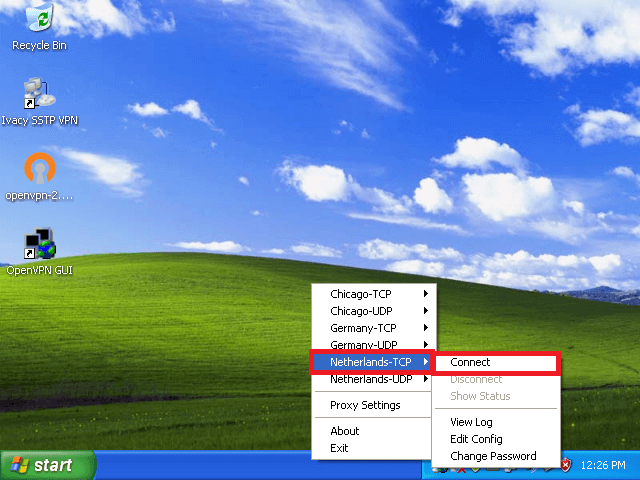
- Right click on the ‘OpenVPN’ icon on the taskbar of your system. Select your desired ‘server’. Select the ‘Connect’ option.
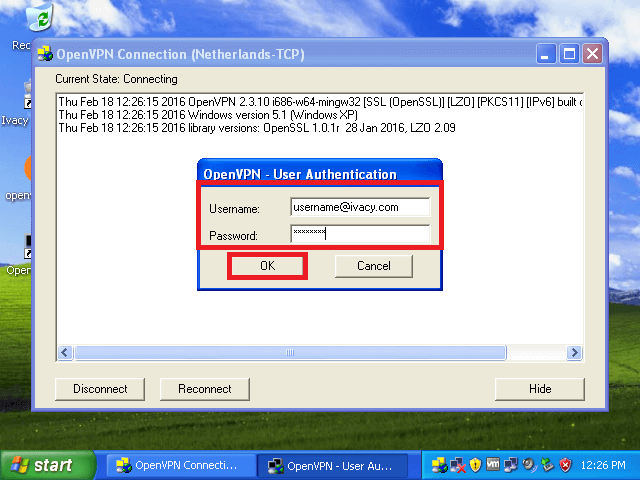
- Insert your ‘username / email’ and ‘password’ in the two fields provided for this purpose. Click on the ‘OK’ button.
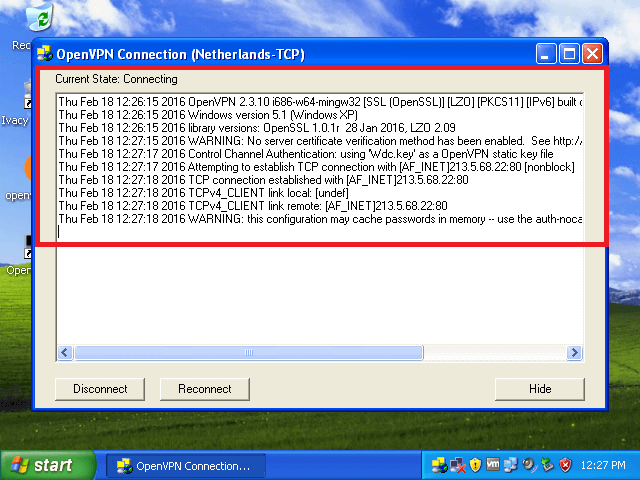
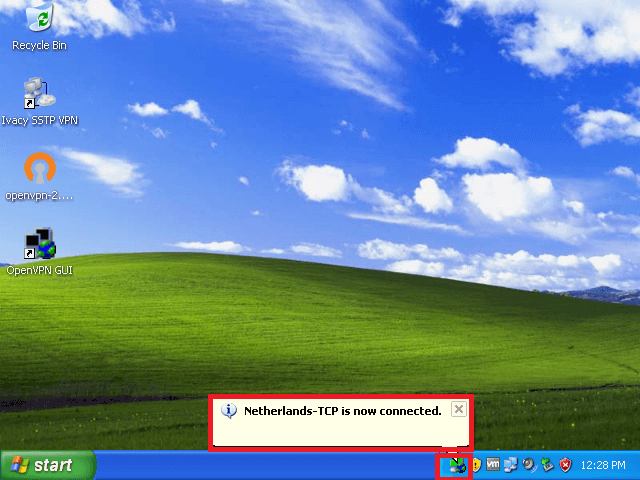
- In a few moments. The OpenVPN connection will be established. Enjoy privacy with Ivacy VPN.
Save Username and Password
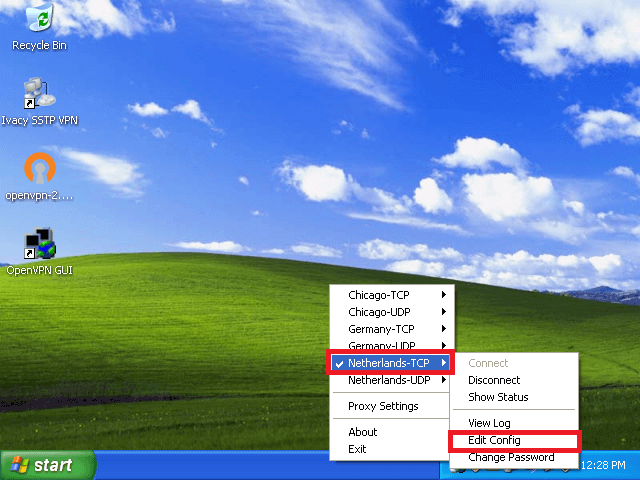
- Navigate to ‘OpenVPN’ icon on the taskbar and right click on it. Select the ‘desired server’ and select the ‘Edit Config’ option.
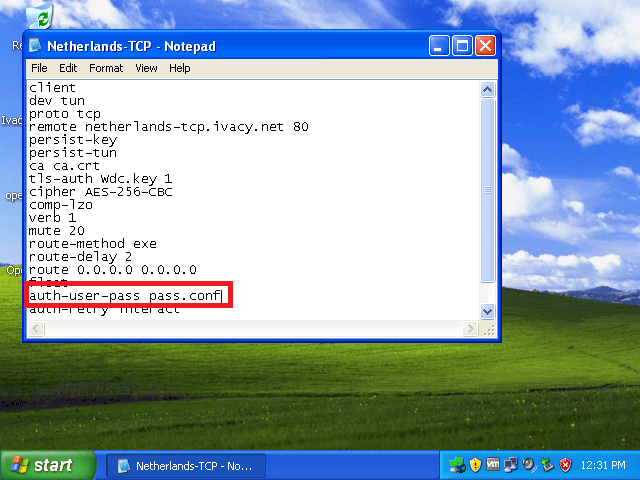
- Type-in ‘pass.conf’ against the ‘auth-user-pass’ parameter. ‘Save’ the file.
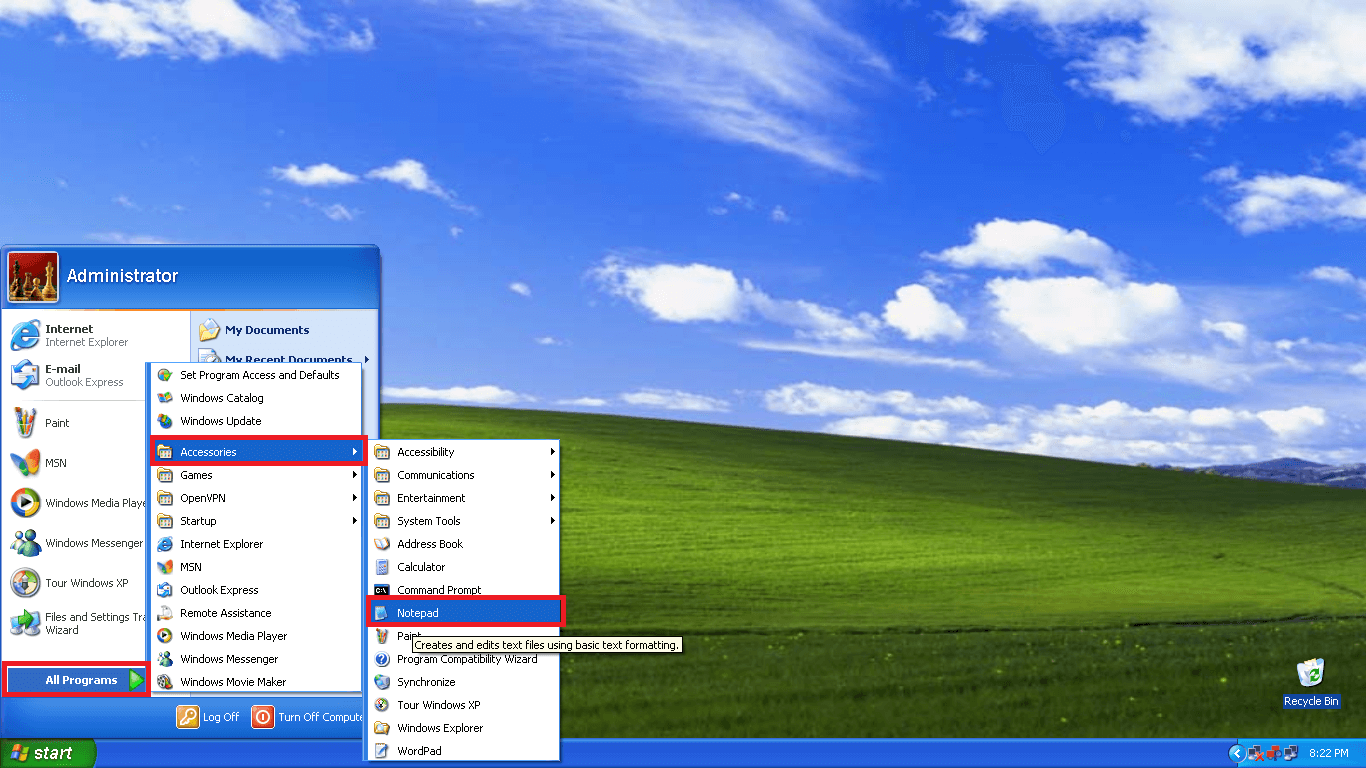
- Open ‘Notepad’ from the ‘start menu’.
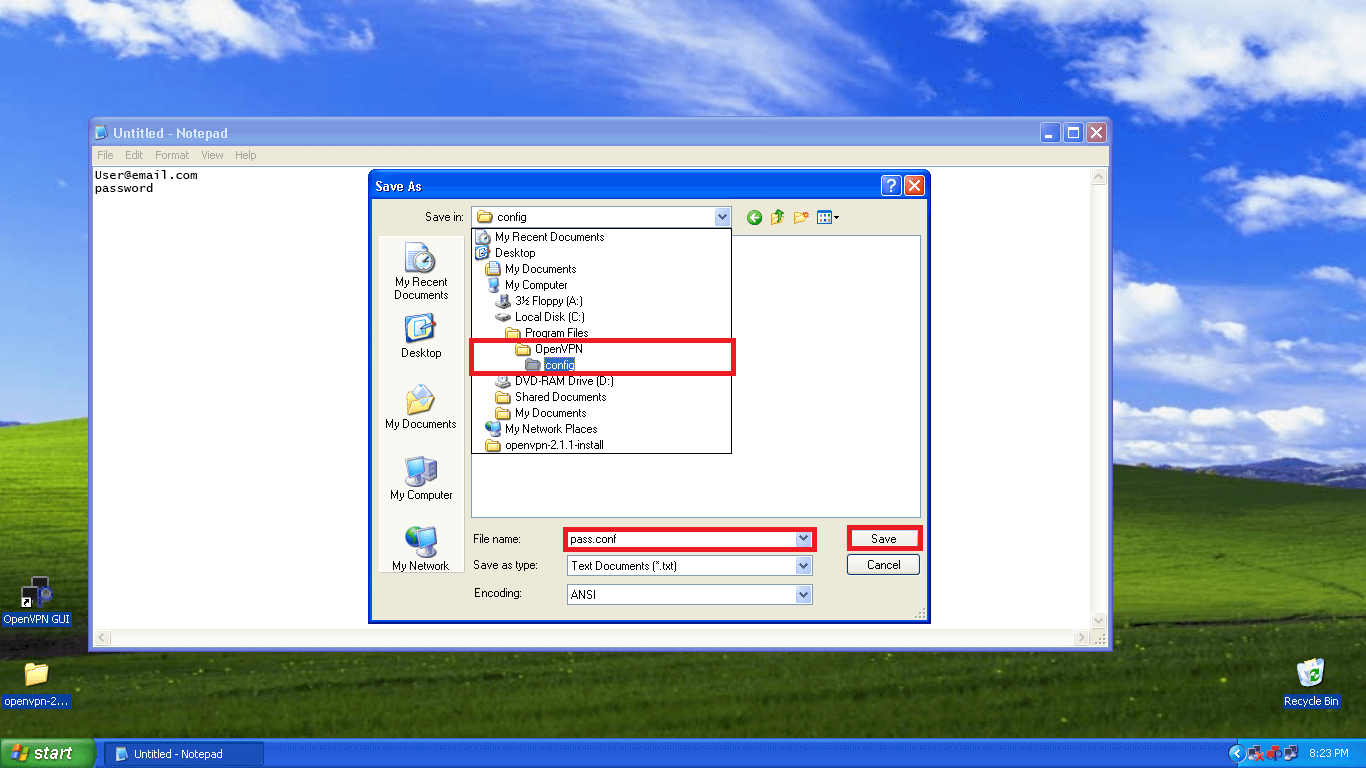
- Save your ‘username / email’ and ‘password’. Save the file as ‘pass.conf’ in ‘config’ folder.
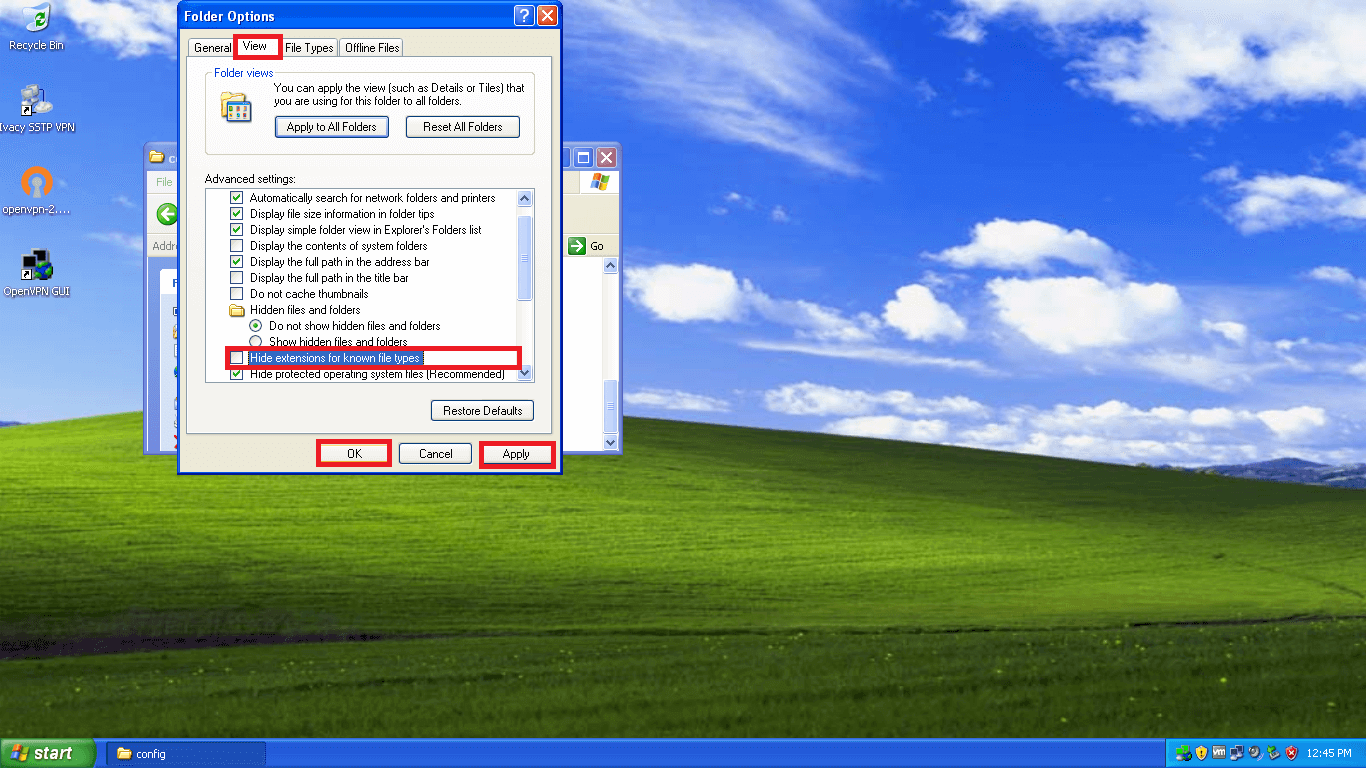
- Open the ‘config folder’ where you have saved the ‘pass.conf’ file. Click on ‘Tools’ tab. Select ‘Folder Options’.

- A new window will open up. Go to ‘View’ tab. Uncheck the ‘Hide extensions for the known file types’ checkbox. Hit the ‘Apply’ button. Now, hit the ‘OK’ button.
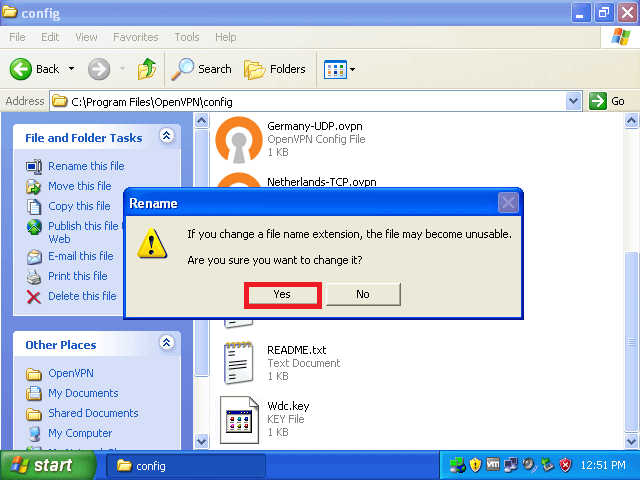
- Right click on ‘pass.conf.txt’ file and rename it. Remove ‘txt’ extension and hit the ‘Enter’ key.
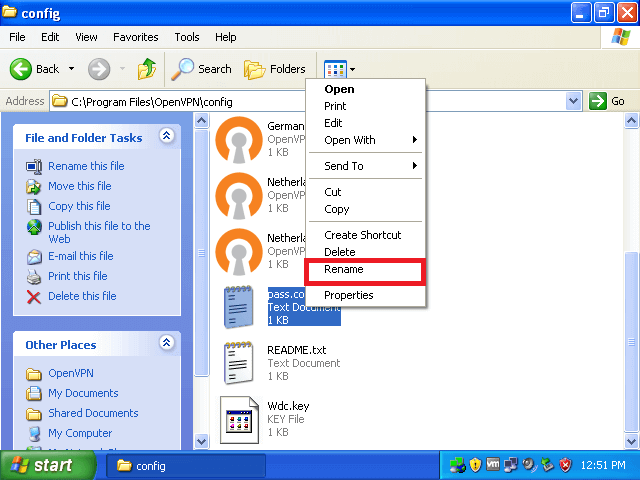
- The ‘Rename’ dialog box will open up. Hit the ‘Yes’ button.
 Your username and password have now been saved!Repeat Step 13 and Step 14 to edit all the servers.
That’s it! You have successfully configured Ivacy VPN on your Windows XP. Enjoy complete privacy with Ivacy.