
 Setup Guide
 VPN Use Cases
 Account & Billings
 Video Tutorials
 Faq's
Faq's
How To Setup VPN on Windows 10 Manually
 67425 Views
 October 10, 2019
 admin
admin 951 Comments
 35
35Before you begin, please make sure that:
- You have a working internet connection
- You own a Premium Ivacy VPN subscription. If you haven’t subscribed yet, click here to subscribe for Ivacy VPN
You can select the respective tab for the desired protocol.
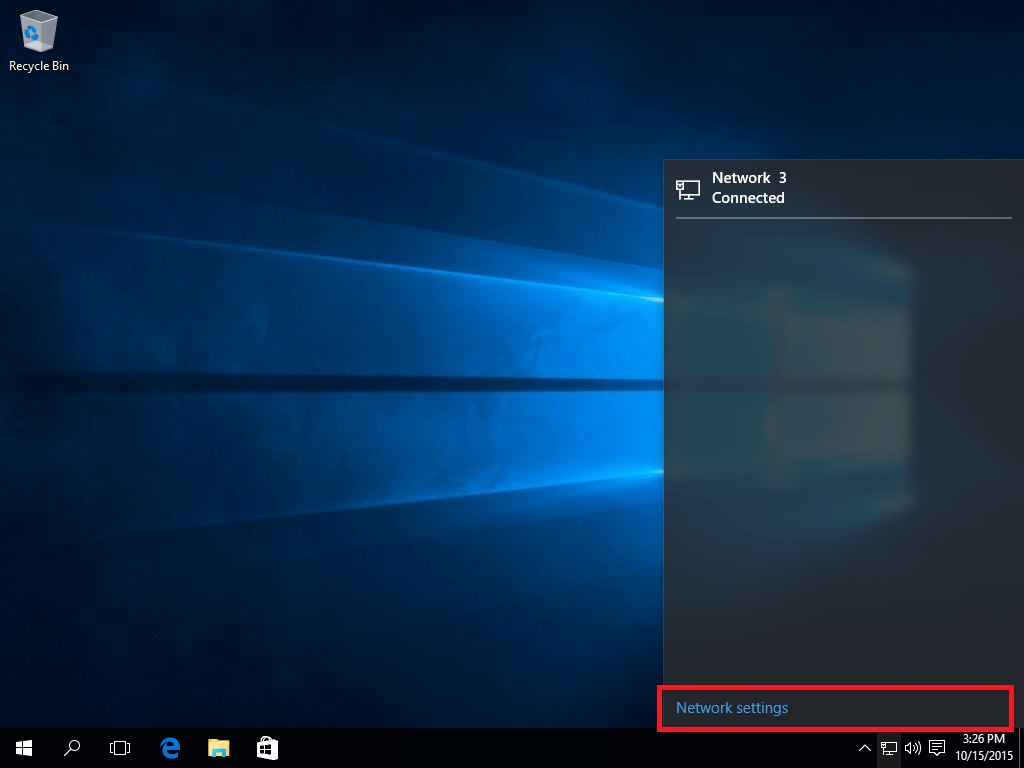
- Click on the ‘Network’ icon on the taskbar of your system. Go to ‘Network settings’.
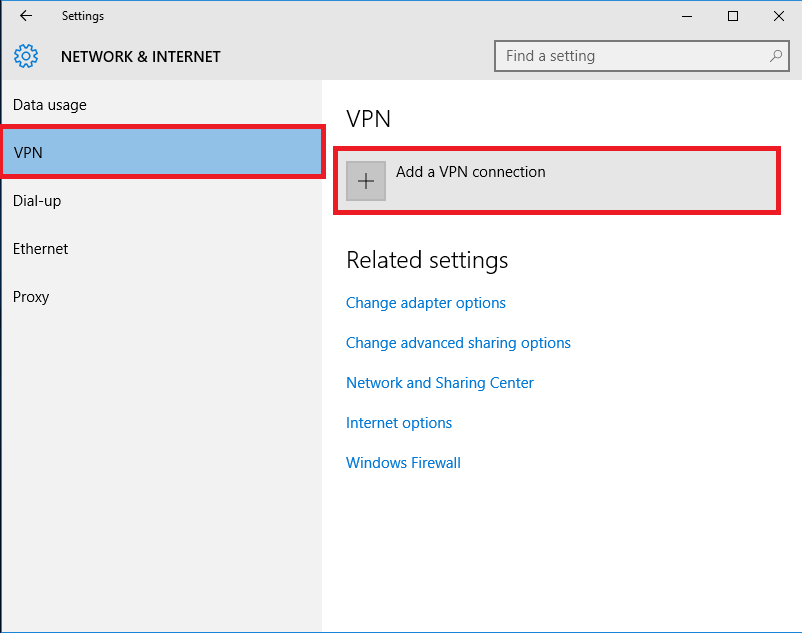
- In the new ‘Network & Internet’ window, click on ‘VPN’. Then click on ‘Add a VPN connection’.

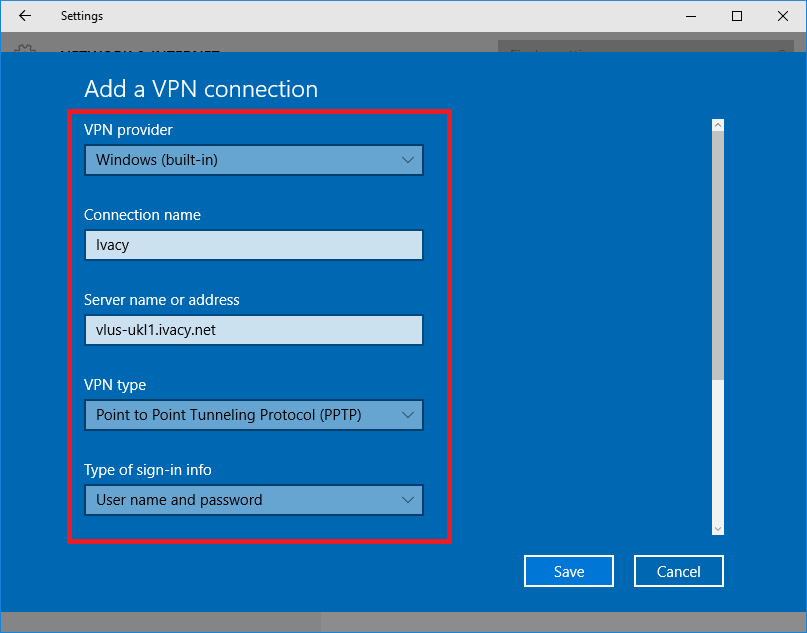
- The new ‘Add a VPN connection’ window will open up. Here, you will see multiple fields. You should select ‘Windows (built-in)’ option, from the ‘VPN provider’ drop down menu. In the ‘Connection name’ field, type the name of the VPN that you desire to use, for instance, ‘Ivacy’. In the ‘Server name or address’ field, you should type the desired server address that you want to use. For instance, ‘vlus-ukl1.ivacy.net’ (the list of all server addresses can be found here). From the ‘VPN type’ drop down menu, select ‘Point-to-Point Tunneling Protocol (PPTP)’. From the ‘Type of sign-in info’ dropdown menu, you should select, ‘Username and password’ option.
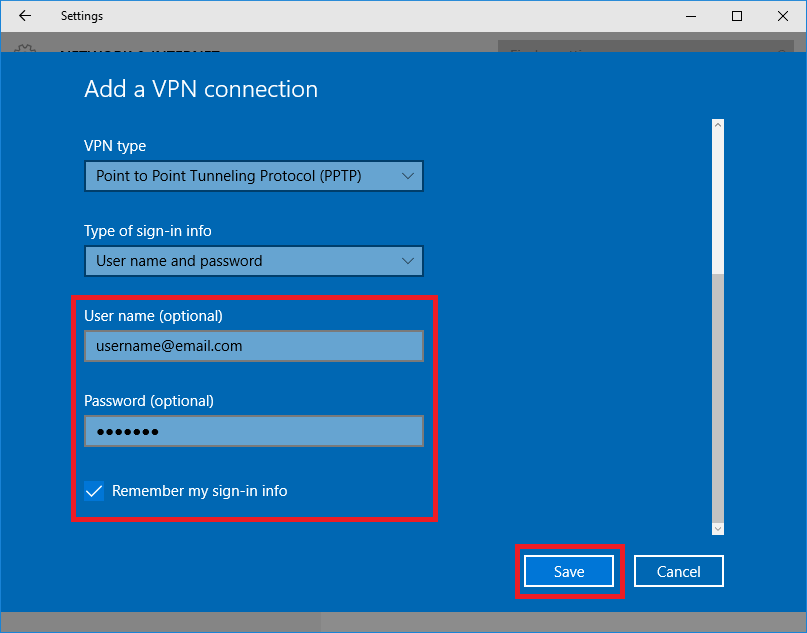
- Scroll down and type your email/username and password in the respective fields provided. Keep the ‘Remember my sign-in info’ checkbox, checked. Click ‘Save’.
- Go back to ‘Network & Internet’ window. Click on the newly created ‘Ivacy’ connection.
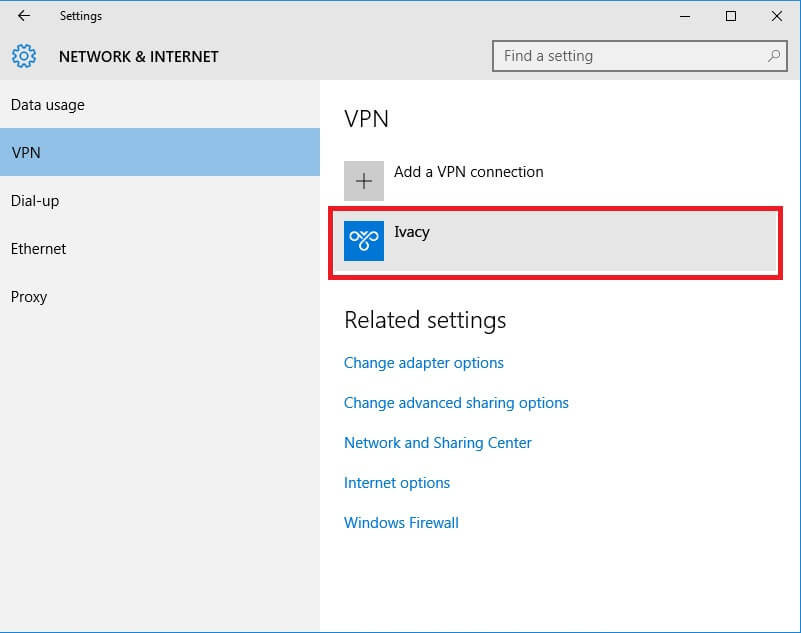
- Click ‘Connect’.

- Click on the ‘Network’ icon on the taskbar. Click on ‘Network settings’.

- In the ‘Network & Internet’ window, click on ‘VPN’. Then click on ‘Add a VPN connection’.
- A window will open up. It presents you with multiple fields. From the ‘VPN provider’ dropdown menu, select ‘Windows (built-in)’ option. In the ‘Connection name’ field, type the name of the VPN that you want to use. For instance, ‘Ivacy’. In the ‘Server name or address’ field, type the address of the server that you want to use. For instance, vlus-ukl1.ivacy.net (the list of all server addresses can be found here). From the ‘VPN type’ dropdown menu, select ‘Layer 2 Tunneling Protocol with IPSec (L2TP/IPsec)’ option. From the ‘Type of sign-in info’ dropdown menu, you must select the ‘Username and password’ option.
Scroll down and type your email/username and password in the respective fields provided. Check the ‘Remember my sign-in info’ checkbox. Hit ‘Save’.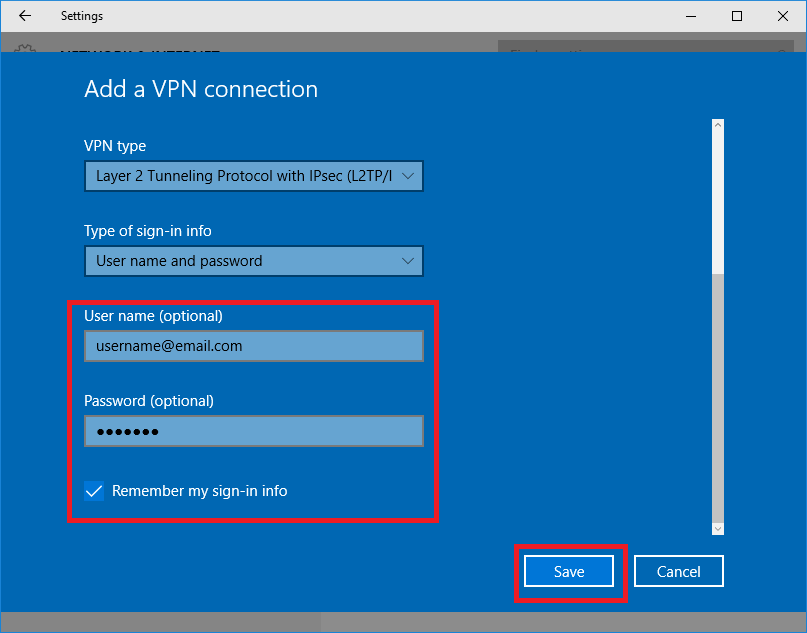
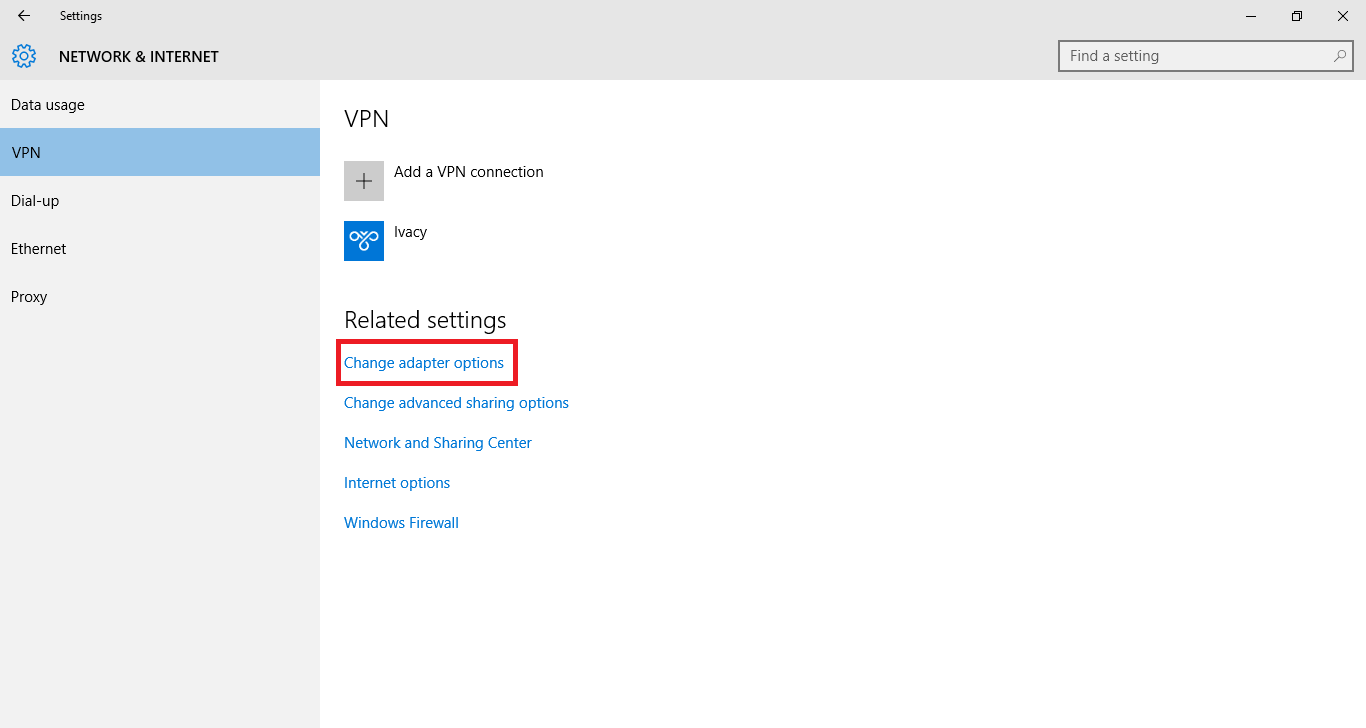
- Go back to ‘Network & Internet’ window. Under the ‘Related settings’ sub-section, click on ‘Change adapter options’.
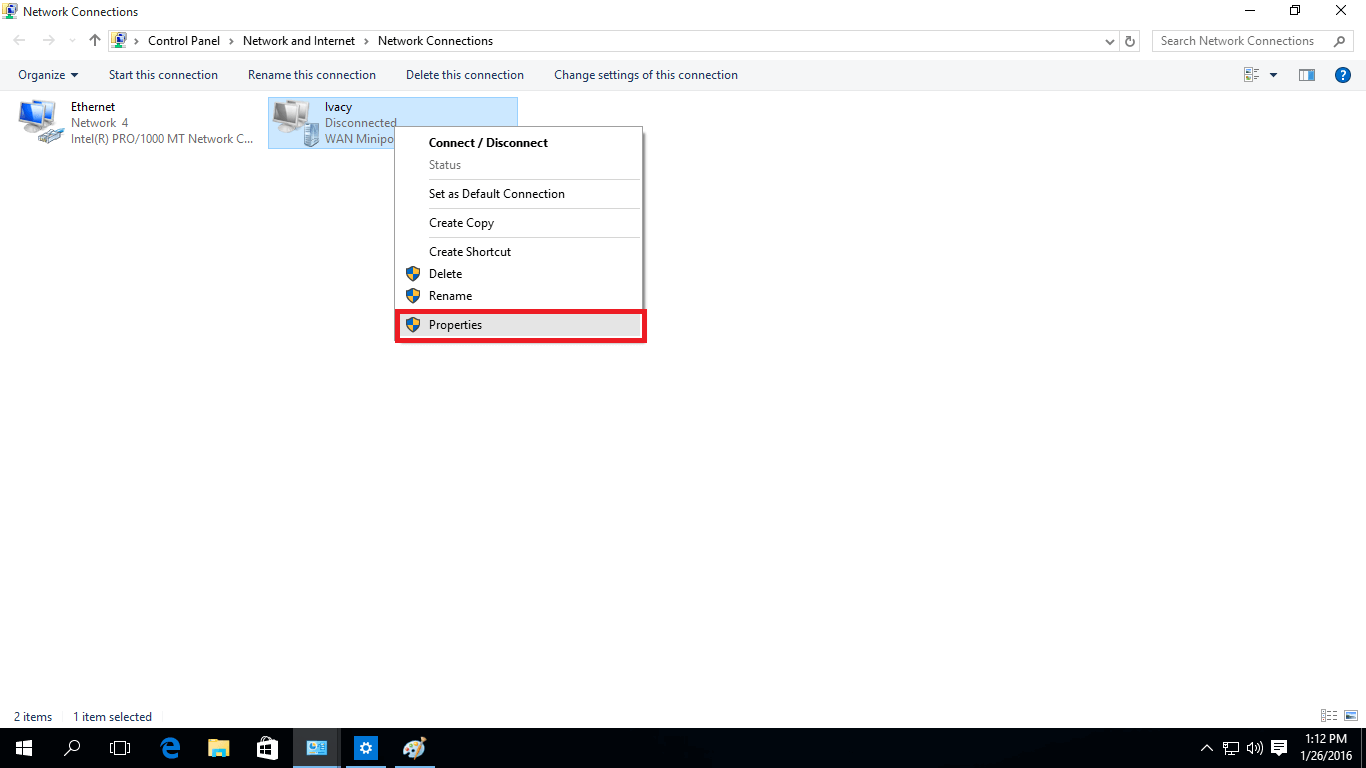
- In the ‘Network connections’ window, right click on the newly created Ivacy connection icon. Click on ‘Properties’.
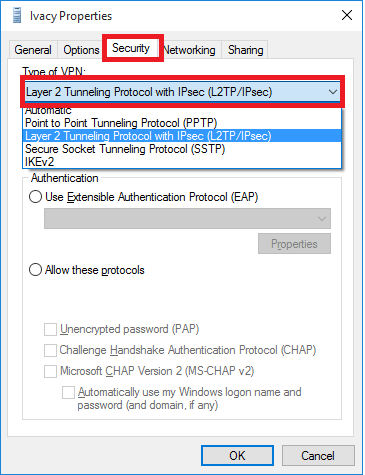
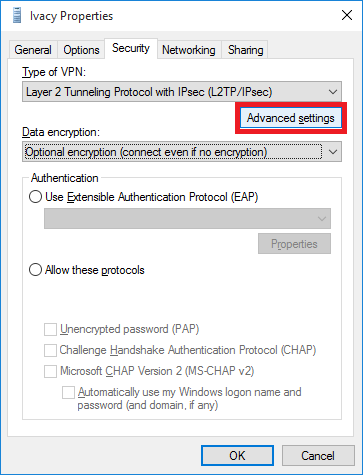
- Go to ‘Security’ tab. From the ‘Type of VPN’ dropdown menu, you should select ‘Layer 2 Tunneling Protocol with IPSec’ option.
- Go to ‘Advanced settings’.
- Keep the ‘Use preshared key for authentication’ option checked. Insert the preshared key ‘12345678’ in the ‘Key’ field. Click ‘OK’.

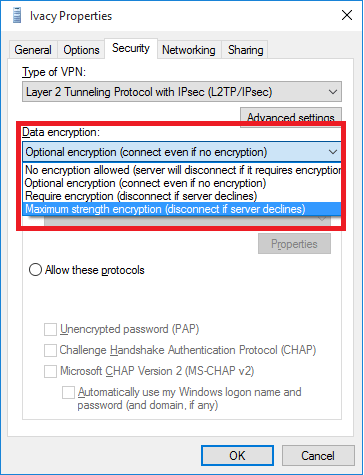
- From the ‘Data encryption’ dropdown menu, select the desired encryption option that you want to use. If you are using VPN for streaming purpose, you should select ‘None’. Click ‘OK’. Close the ‘Network connections’ window.
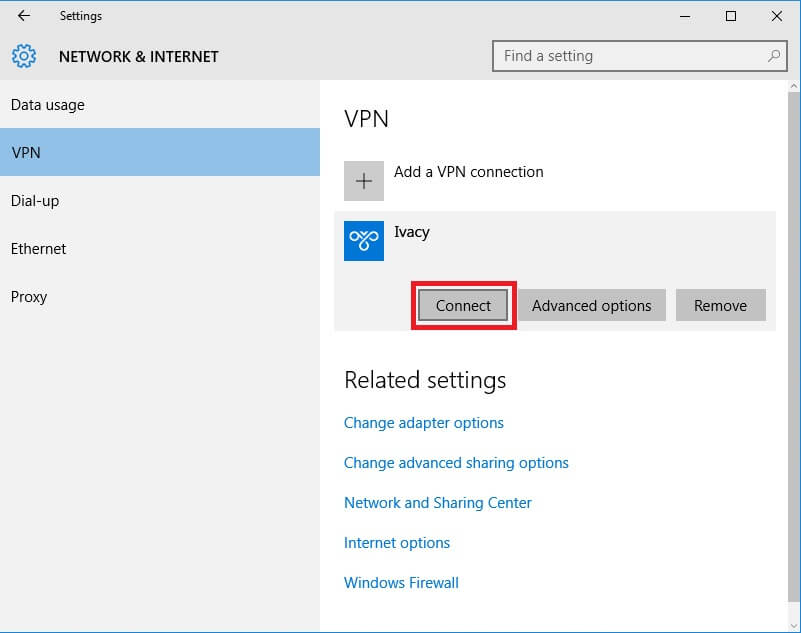
- Return to ‘Network & Internet’ window. Click on the newly created ‘Ivacy’ icon.

- Click ‘Connect’. The Ivacy VPN connection will be established shortly, after verifying your sign-in info.
- Click on the active ‘LAN / Network connection’ icon. Click on ‘Network settings’.

- In the ‘Network & Internet’ window, you should click on. Then click on ‘Add a VPN connection’.
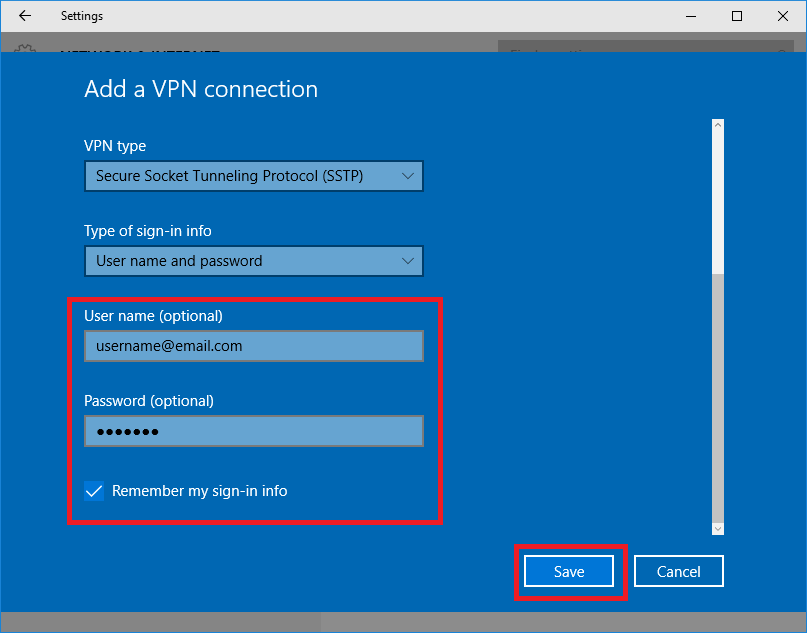
- The ‘Add a VPN connection’ window will open up. You can see multiple fields in the window. From the ‘VPN provider’ dropdown menu, select ‘Windows (built-in)’ option. In the ‘Connection name’ field, type the name of the VPN that you want to utilize. For instance, ‘Ivacy’. In the ‘Server name and address’ field, type the name of the server that you desire to use. For instance, ‘usla1.dns2use.com’ (the list of all server addresses can be found here). From the ‘VPN type’ dropdown menu, you should select the ‘Secure Socket Tunneling Protocol (SSTP)’ option. From the ‘Type of sign-in info’ dropdown menu, you must select the ‘Username and password’ option.

- Scroll down and type your email/username and password in the respective fields provided. Keep the ‘Remember my sign-in info’ checkbox, checked. Click ‘Save’.
- In the ‘Network & Internet’ window, click on the newly established ‘Ivacy’ connection icon.
- Click ‘Connect’. It will take some time to connect, after verifying your sign-in info.
- Installing Ivacy VPN OpenVPNDownload and install the IvacyVPN OpenVPN installer on your system. In order to download the OpenVPN installer, click here. (Click here to Download File).
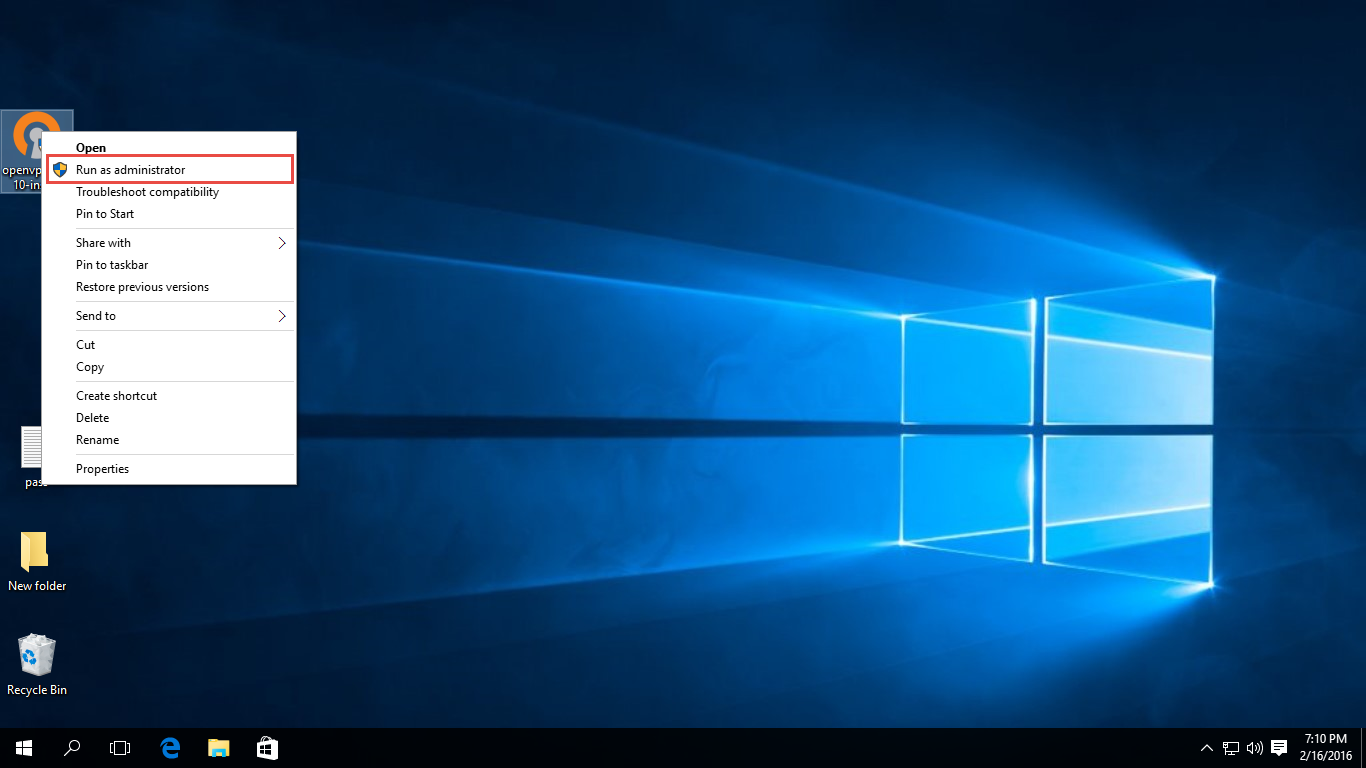
- Right click on ‘OpenVPN Installer’ icon and select ‘Run as Administrator’ option.
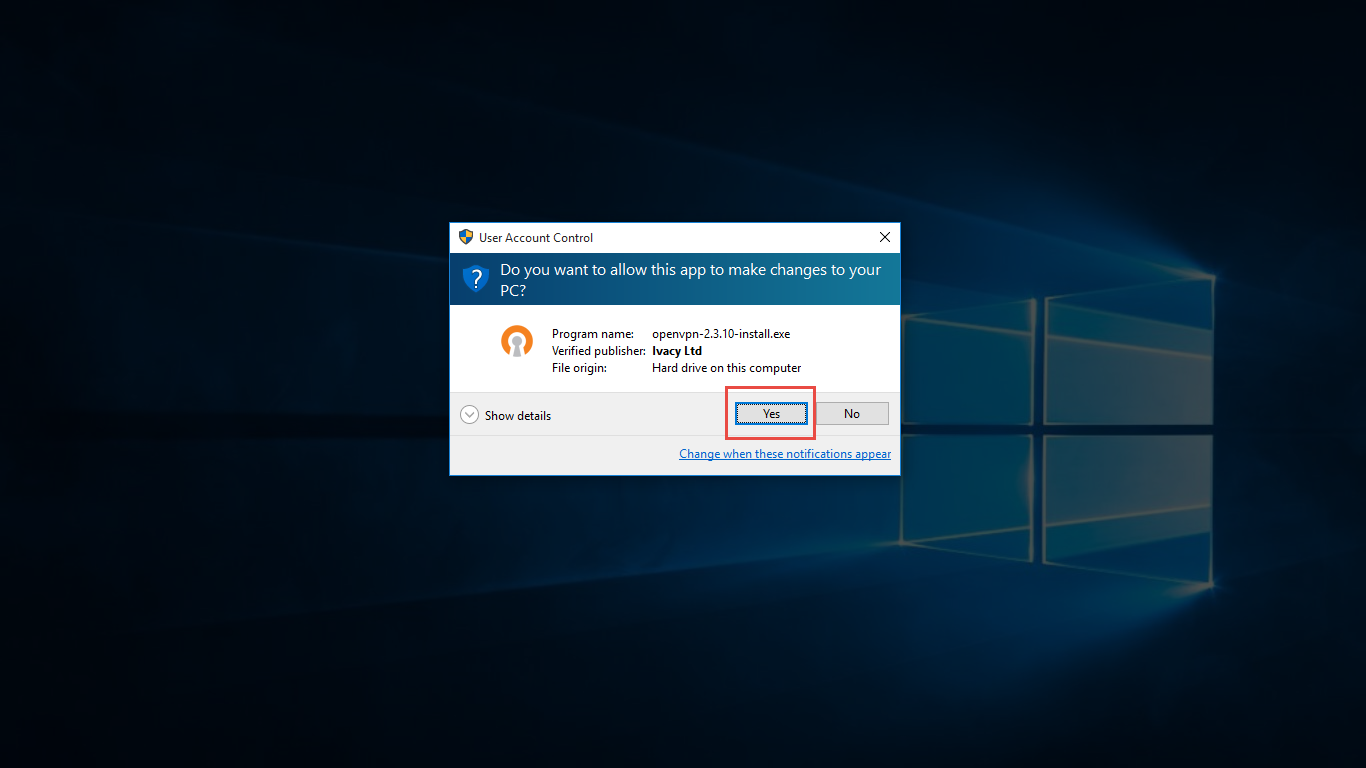
- Click ‘Yes’ button to allow installation from the ‘User Account Control’ dialog box.
- The ‘OpenVPN Setup Wizard’ window will open up. Hit the ‘Next’ button.

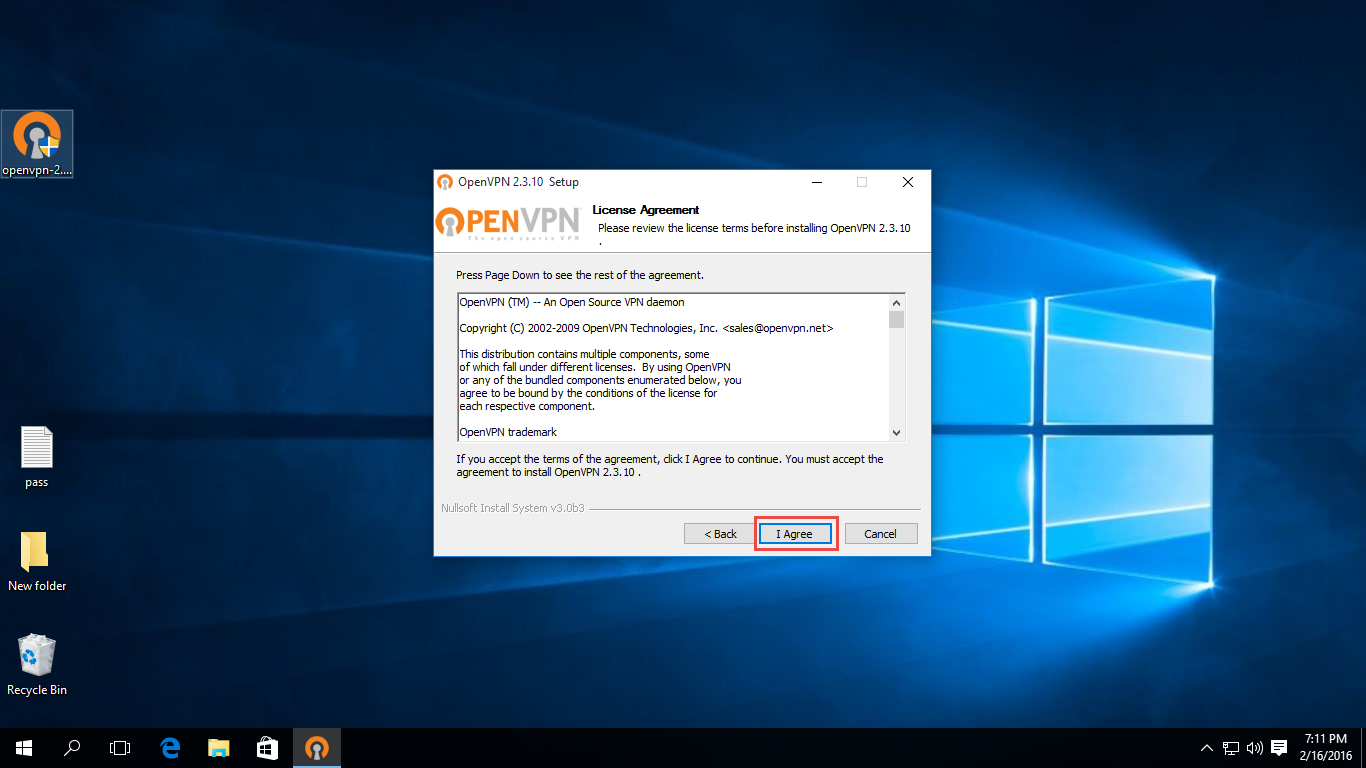
- Hit the ‘I Agree’> button, once the ‘License Agreement’ opens up.
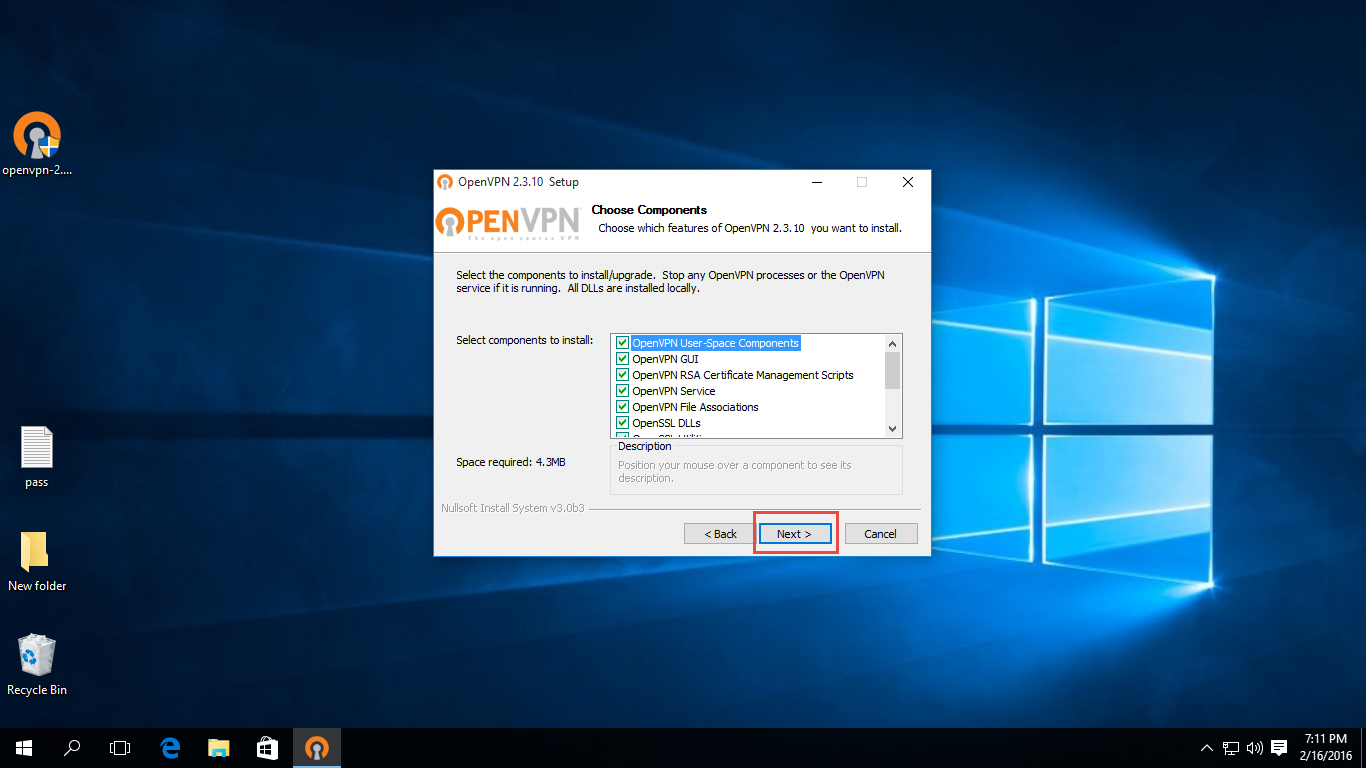
- A new window will open up. Hit the ‘Next’ button.
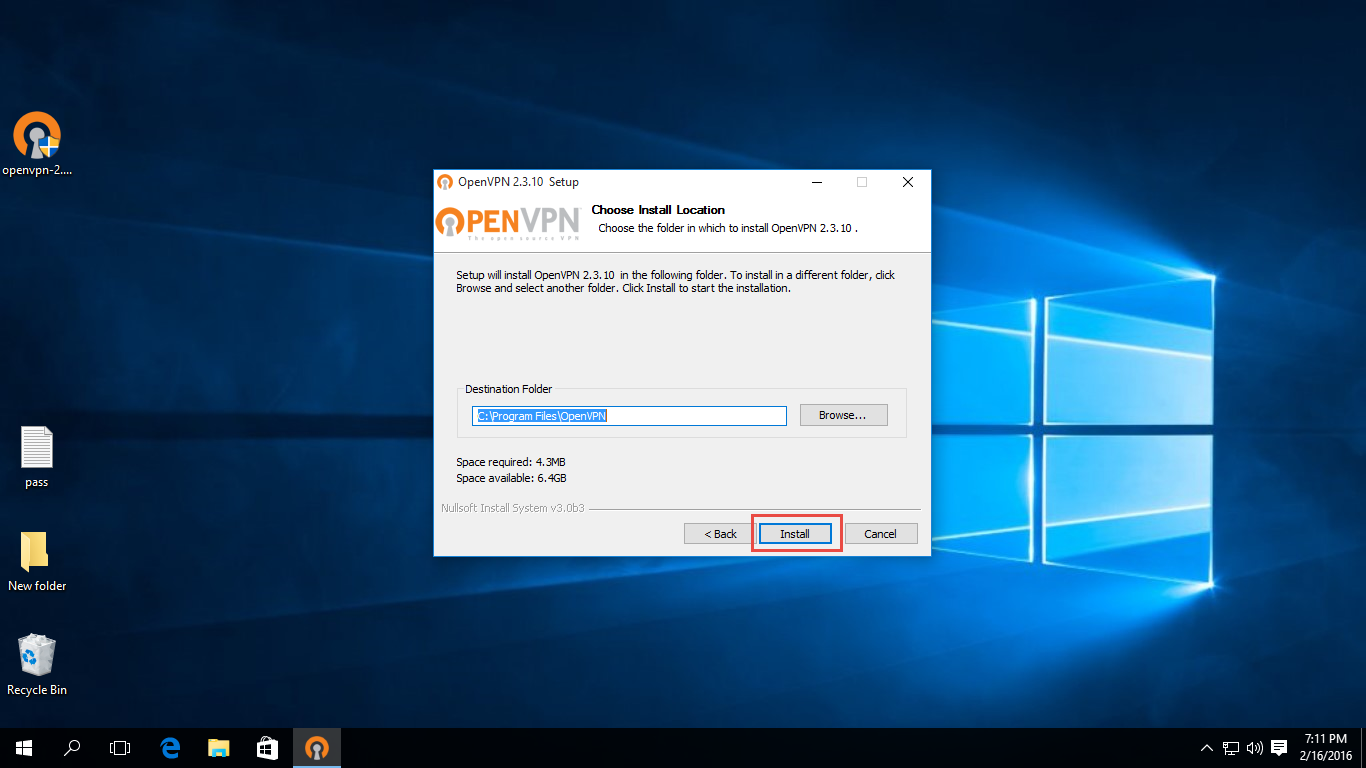
- Hit the ‘Install’ button to start the installation process.
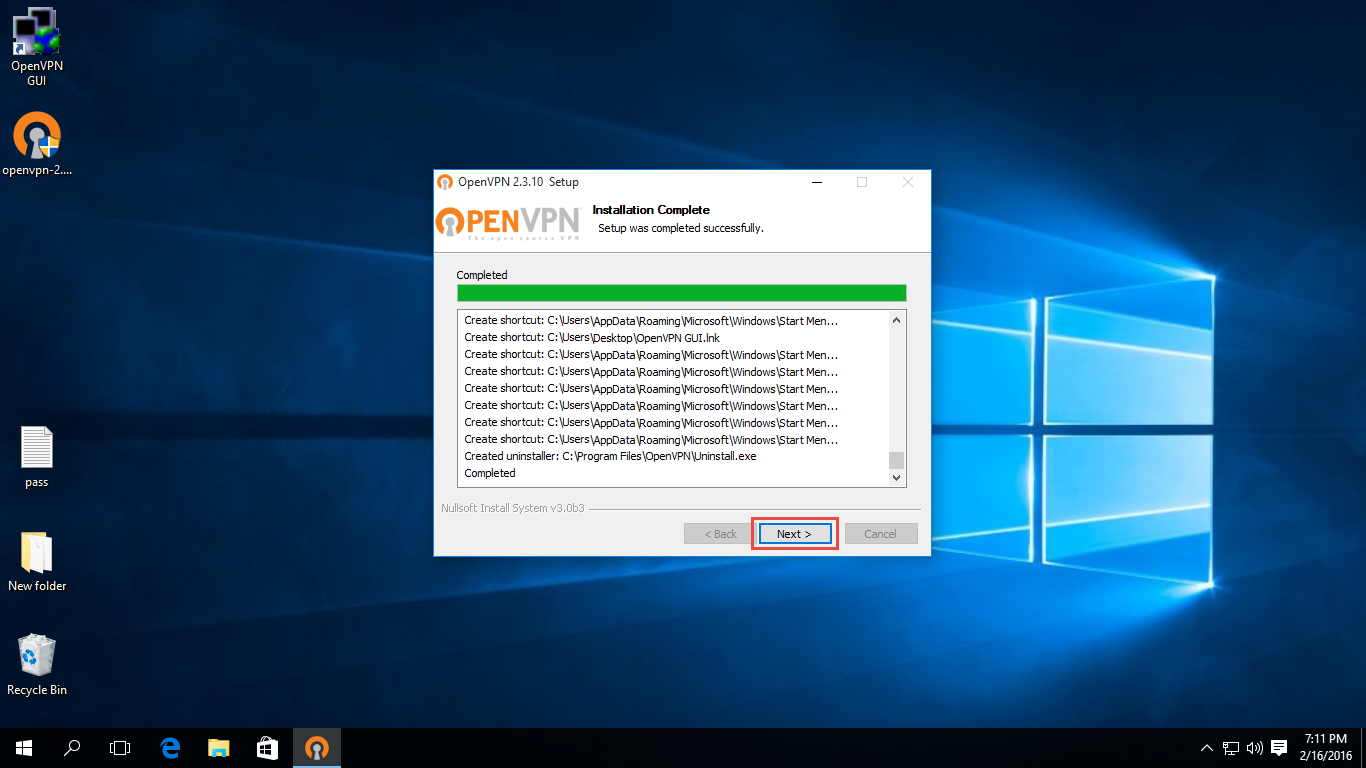
- Once the installation is complete, hit the ‘Next’ button. In case a “Windows Security” Popup appears, Check “Always trust software from Ivacy Ltd” and click Install.
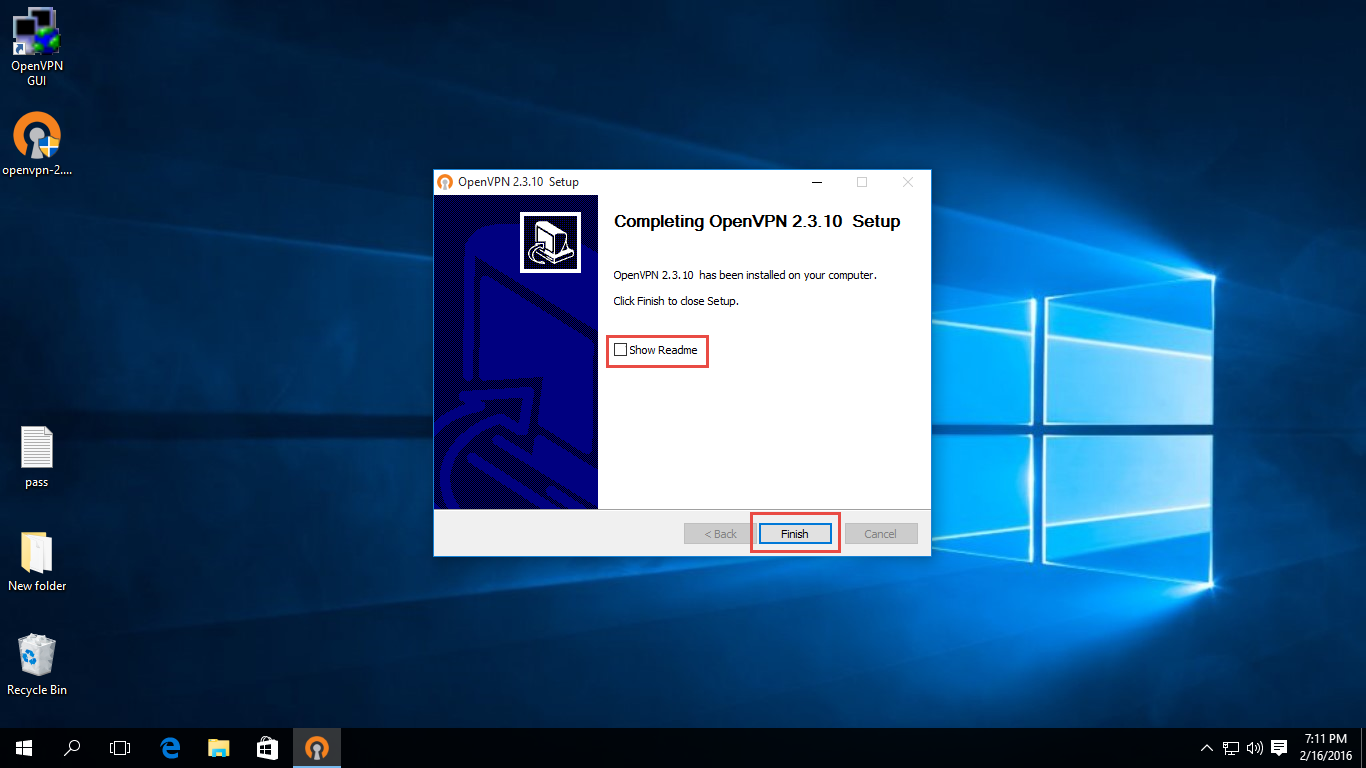
- Uncheck the ‘Show Readme’ checkbox. Hit the ‘Finish’ button.
Connecting to Ivacy VPN OpenVPN
- Right click on the ‘OpenVPN GUI’ icon. Select the ‘Run as administrator’ option.
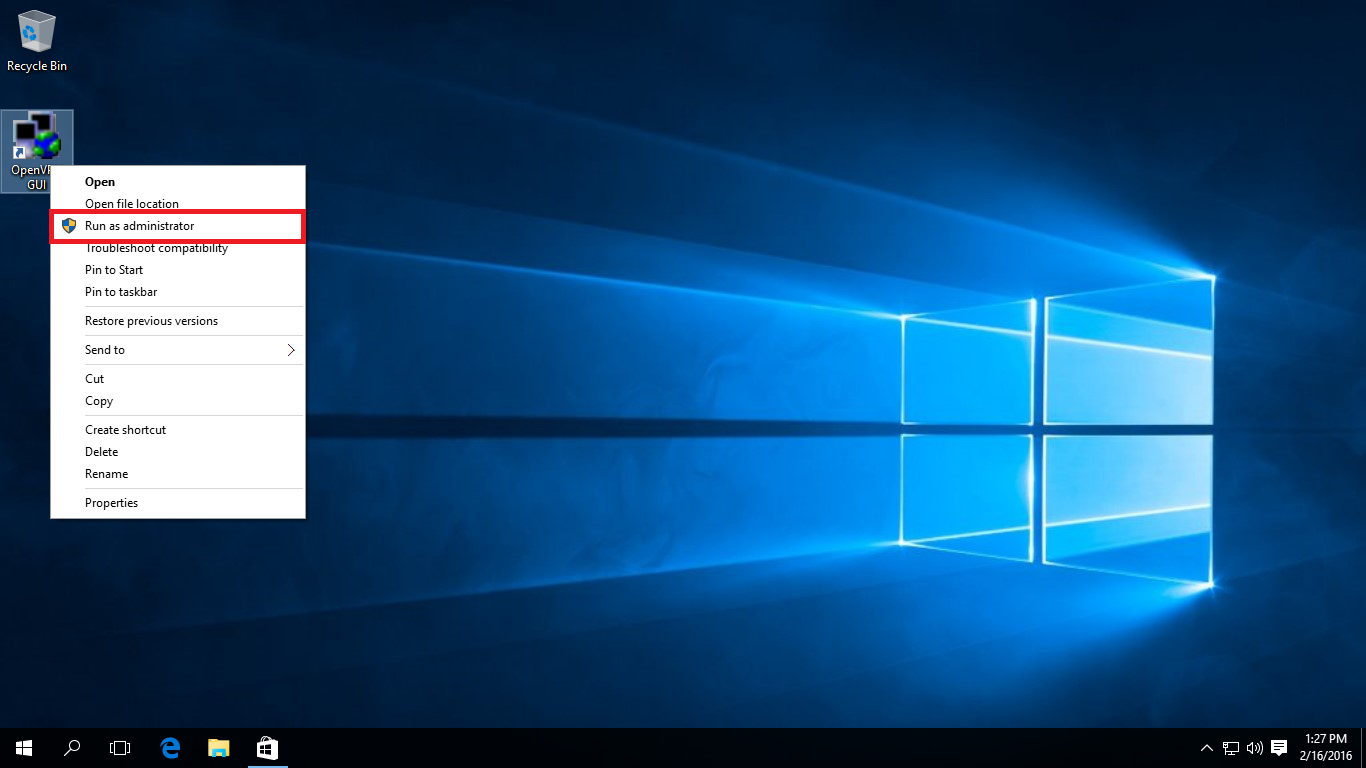
- The ‘User Account Control’ dialog box will open up. Hit the ‘Yes’ button.
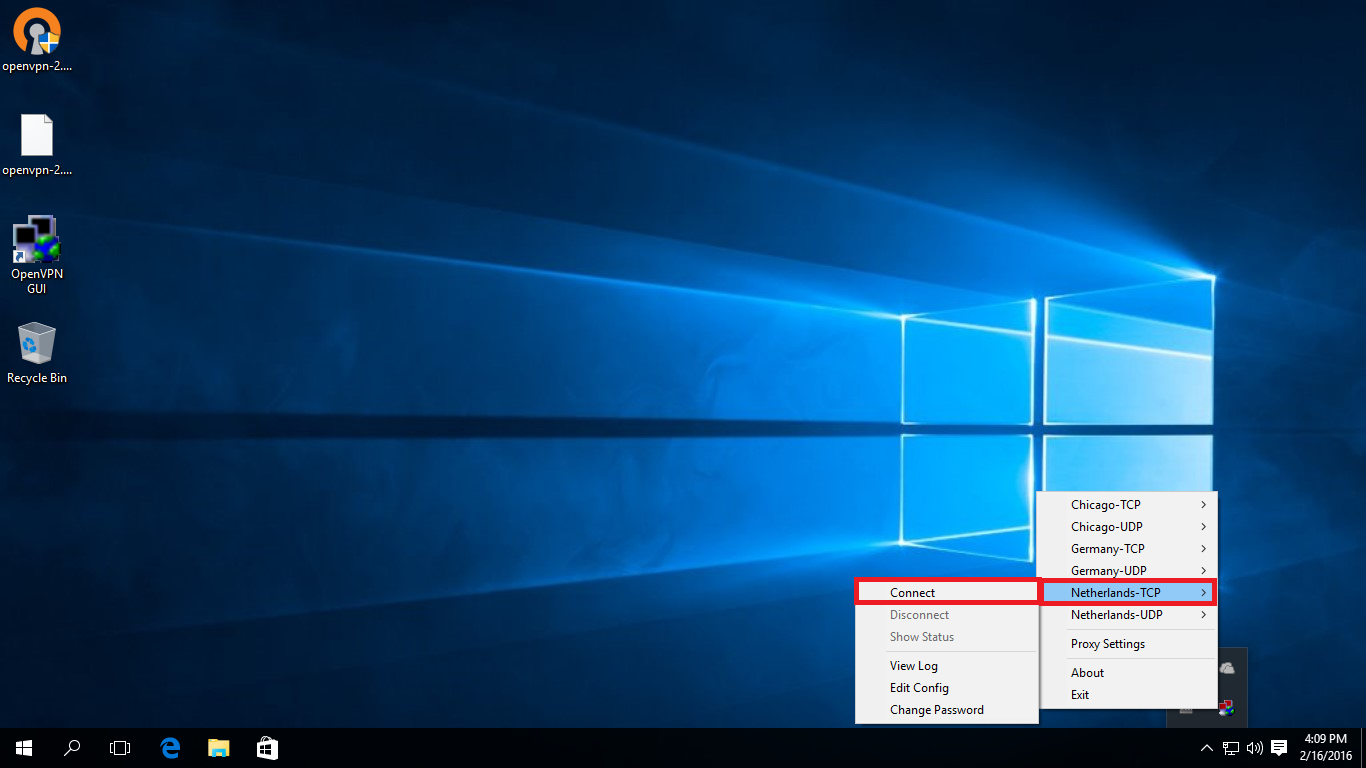
- Navigate to the taskbar. Right click on the ‘OpenVPN icon’ from the system tray. Go to the desired ‘server’ and select the ‘Connect’ option.
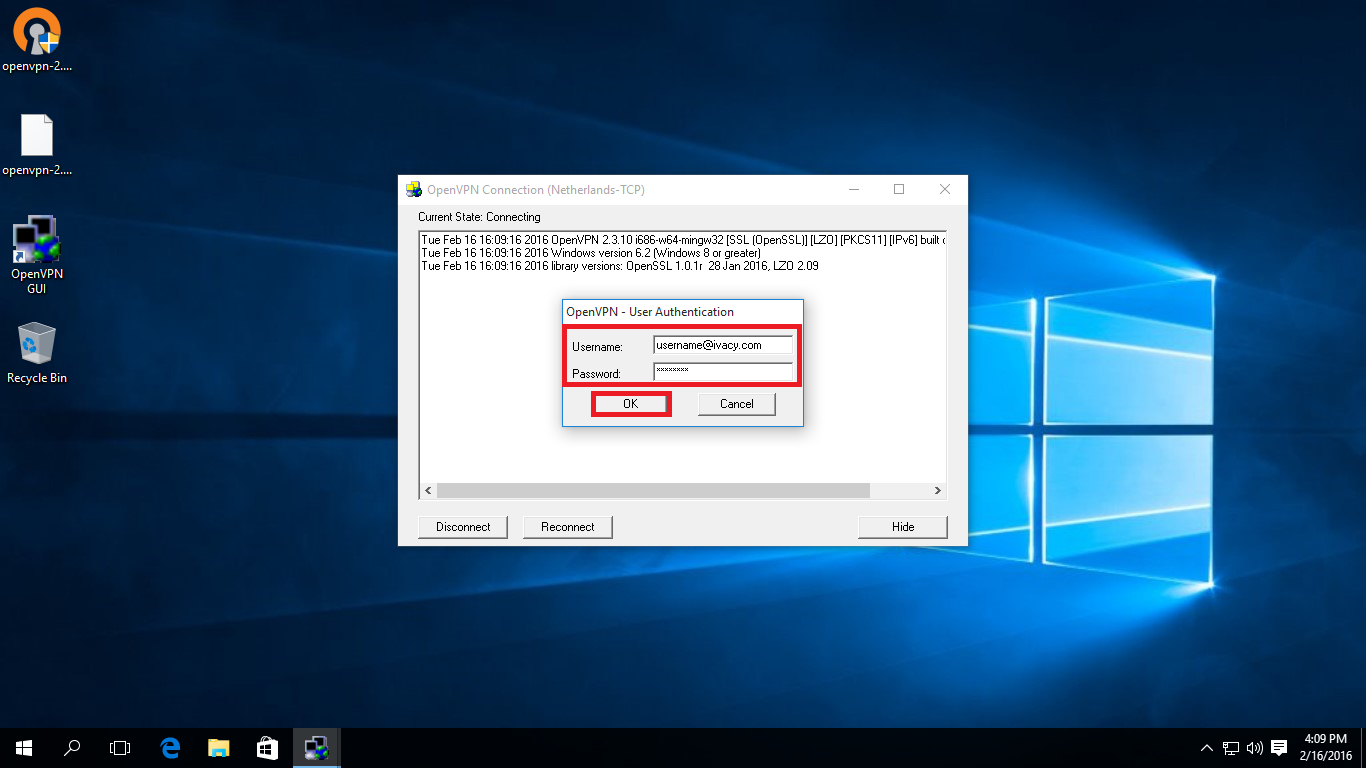
- Type your ‘username / email’ and ‘password’ in the two respective fields available. Hit the ‘OK’ button.
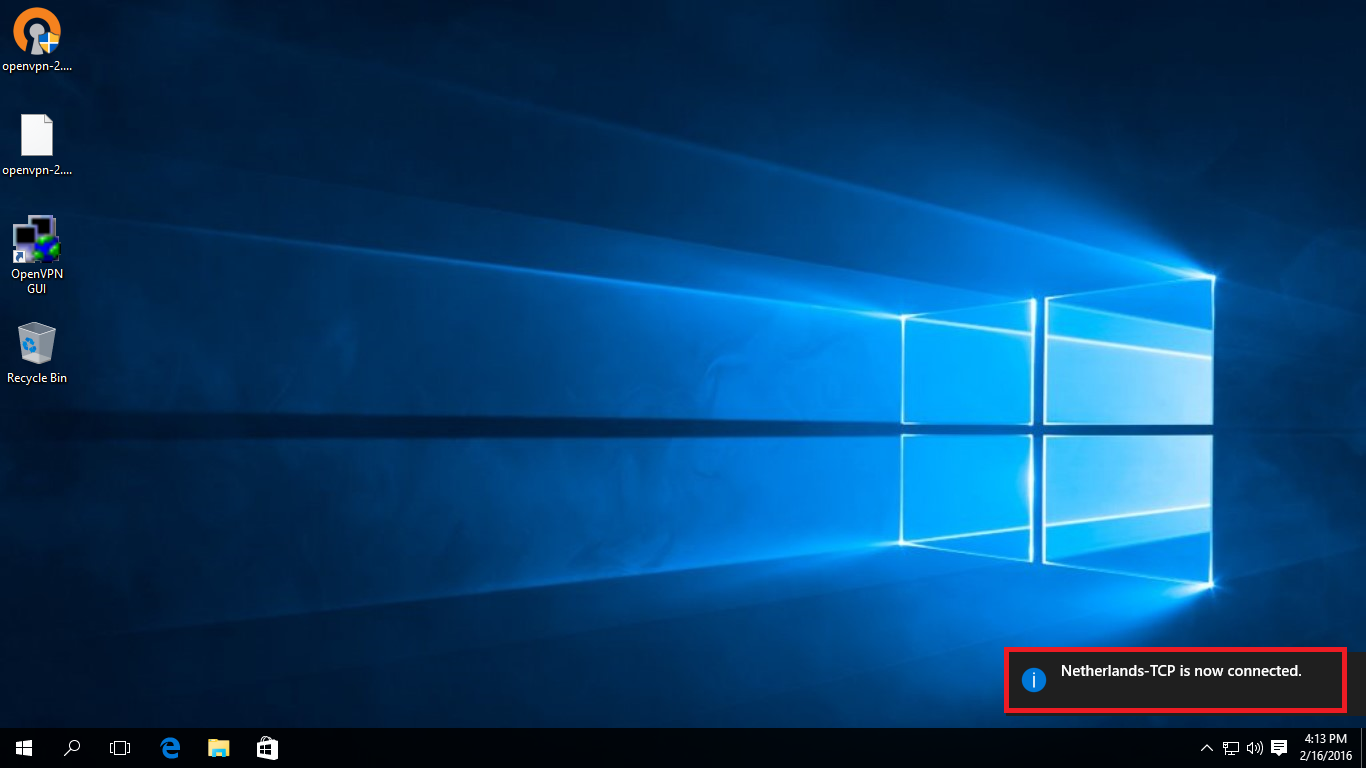
- You are connected now! Enjoy privacy with Ivacy VPN.
Disconnecting from IvacyVPN OpenVPN
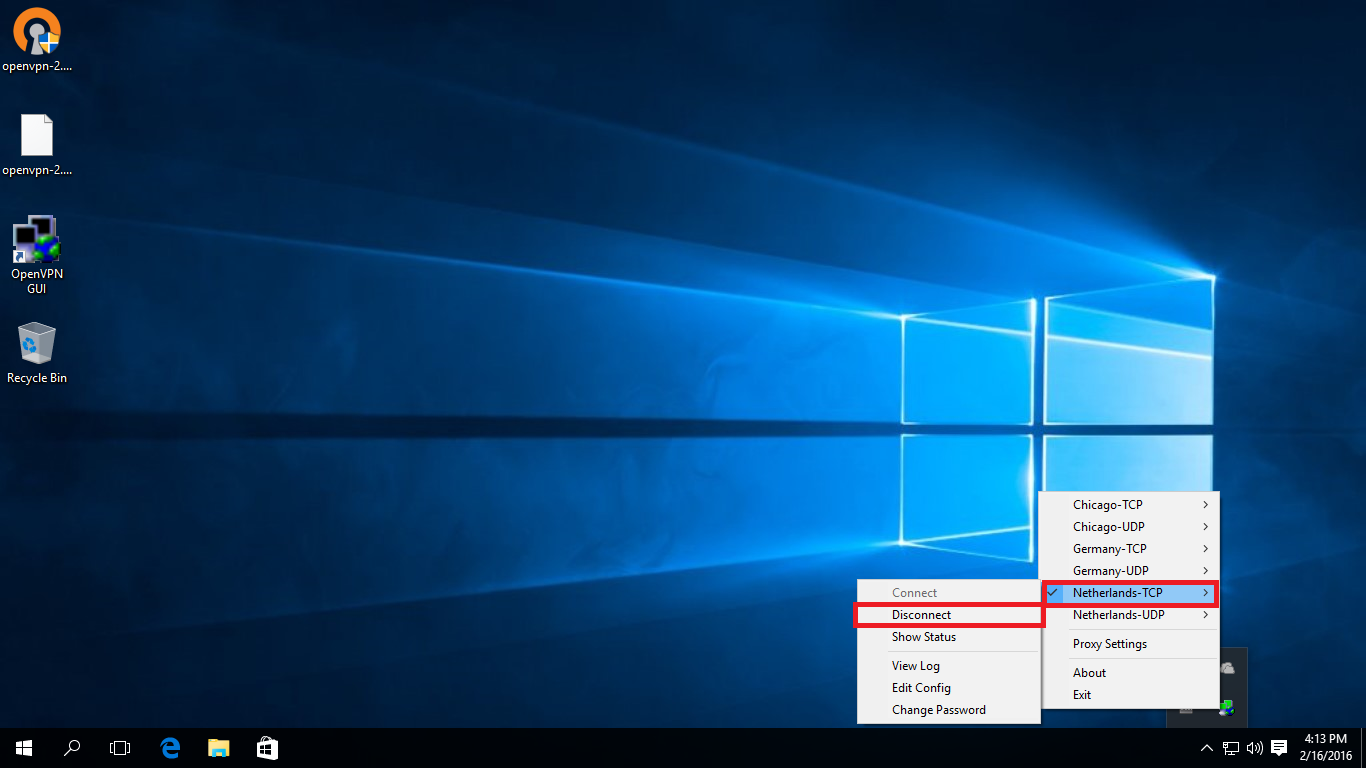
- Right click on the ‘OpenVPN icon’ from the system tray. Go to the ‘connected server’ and select ‘Disconnect’ option.
Saving Account Details
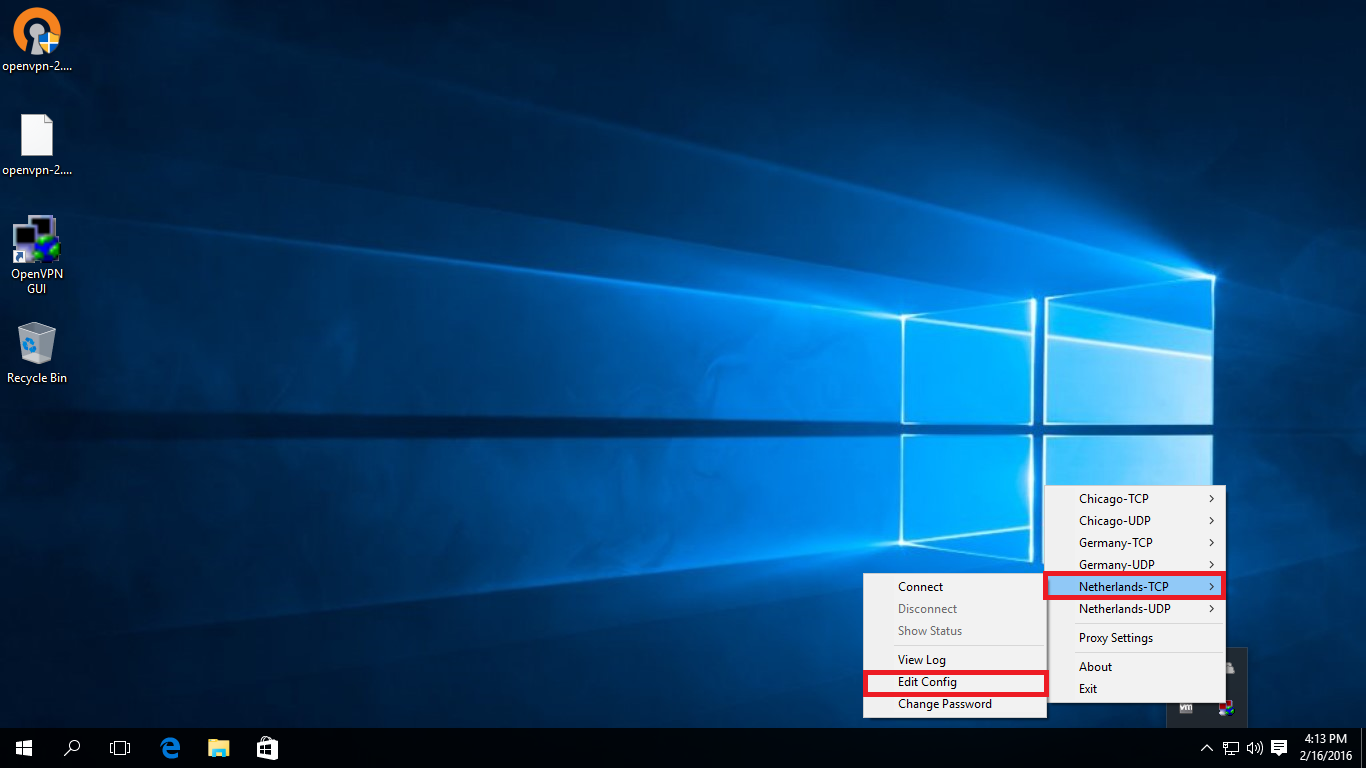
- Go to ‘OpenVPN icon’ from the system tray and right click on it. Go to the desired ‘server’ that you want to use. Select the ‘Edit Config’ option.
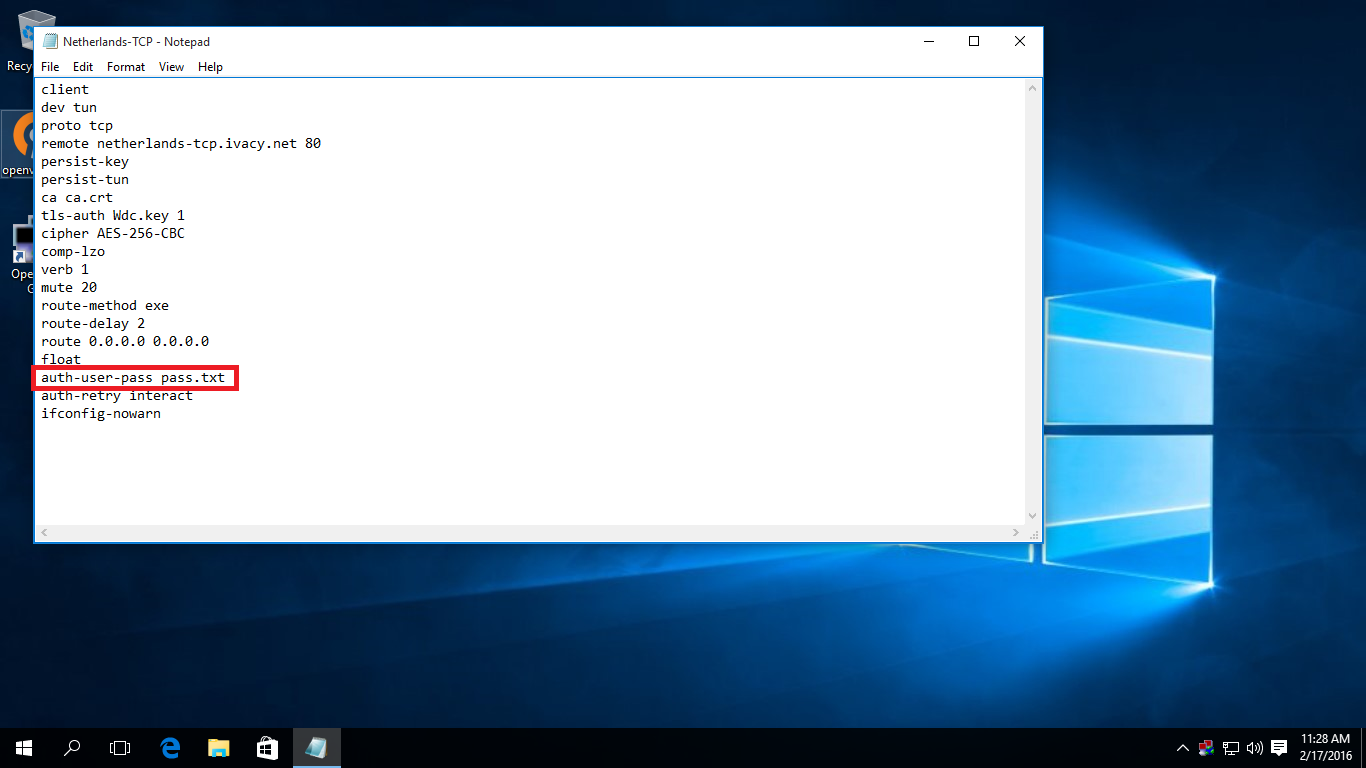
- Look for ‘auth-user-pass’ parameter. Type ‘pass.txt’ after this parameter. ‘Save’ the file.

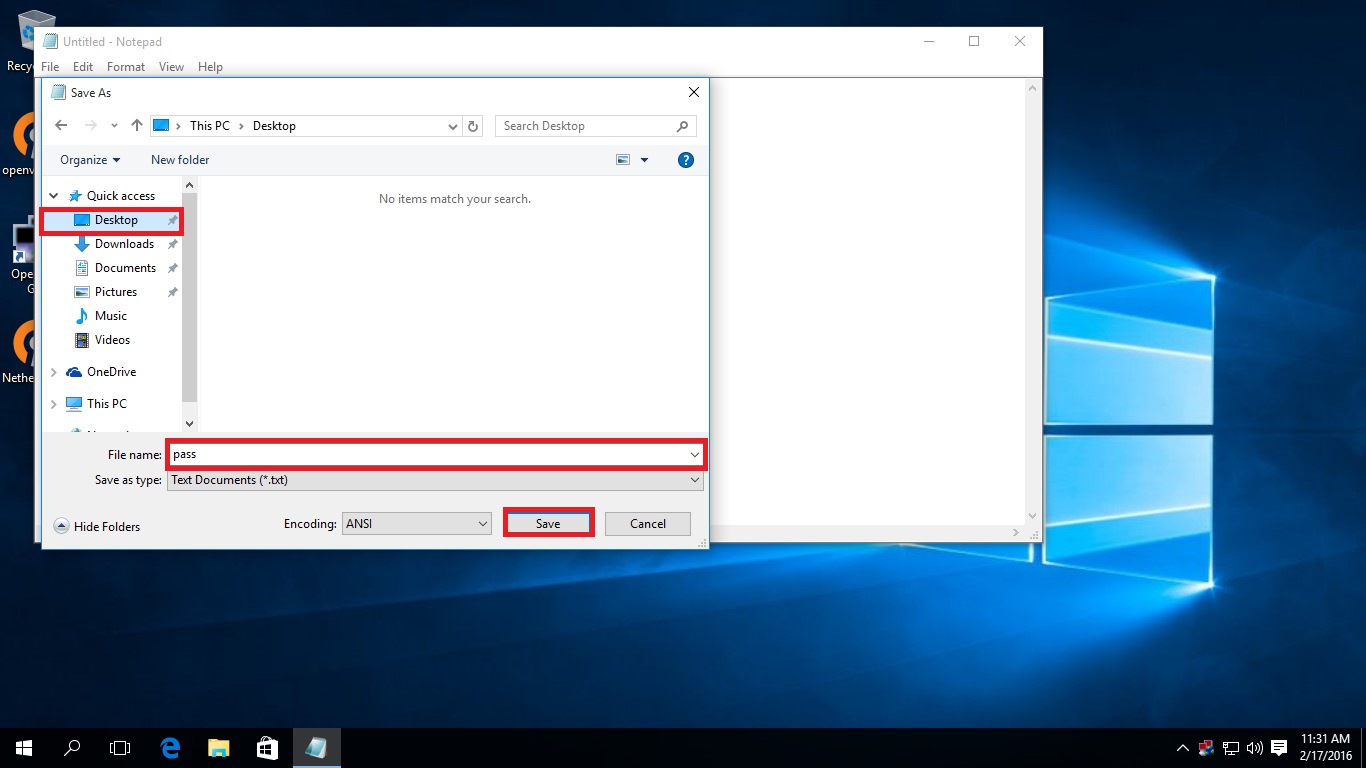
- Now, open a ‘Notepad’ file. Type your ‘username / email’ and ‘password’ in that file.
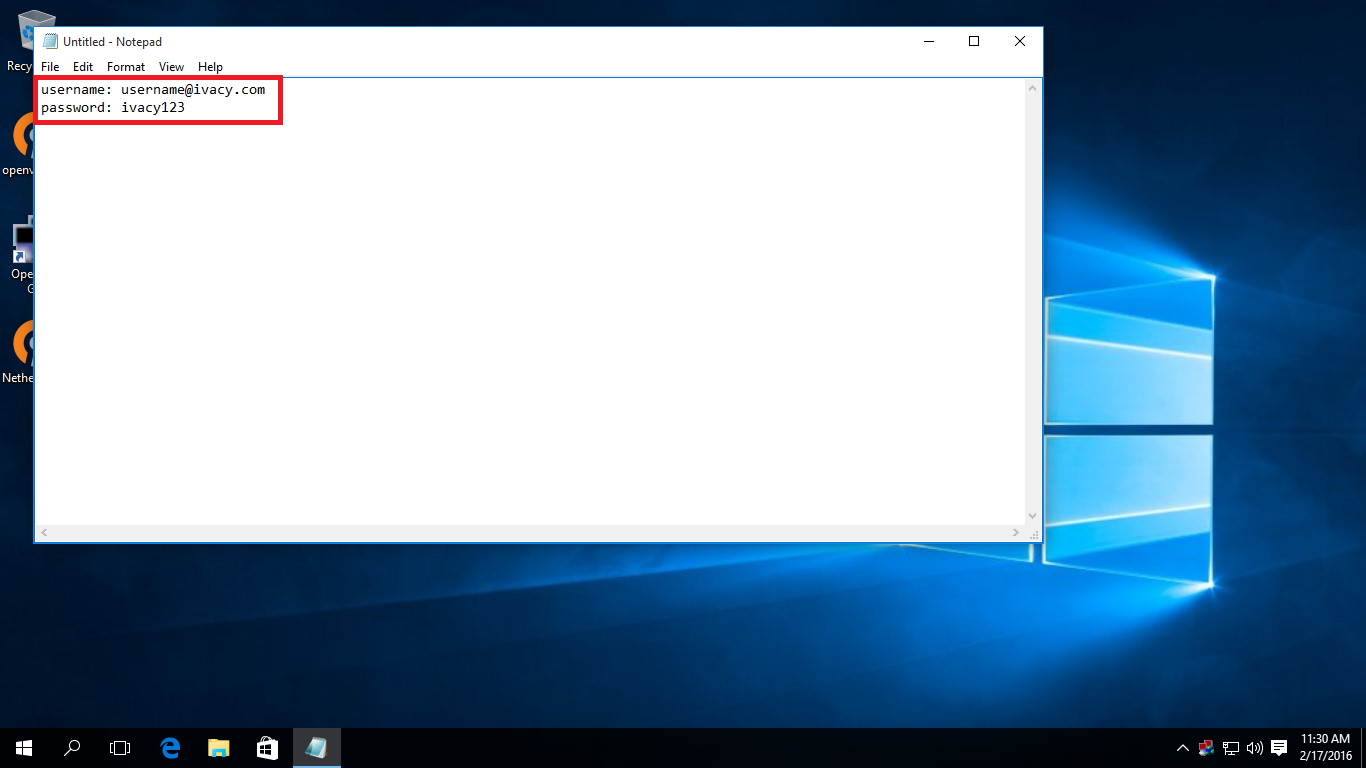
- ‘Save’ the file as ‘pass’ on your desktop.
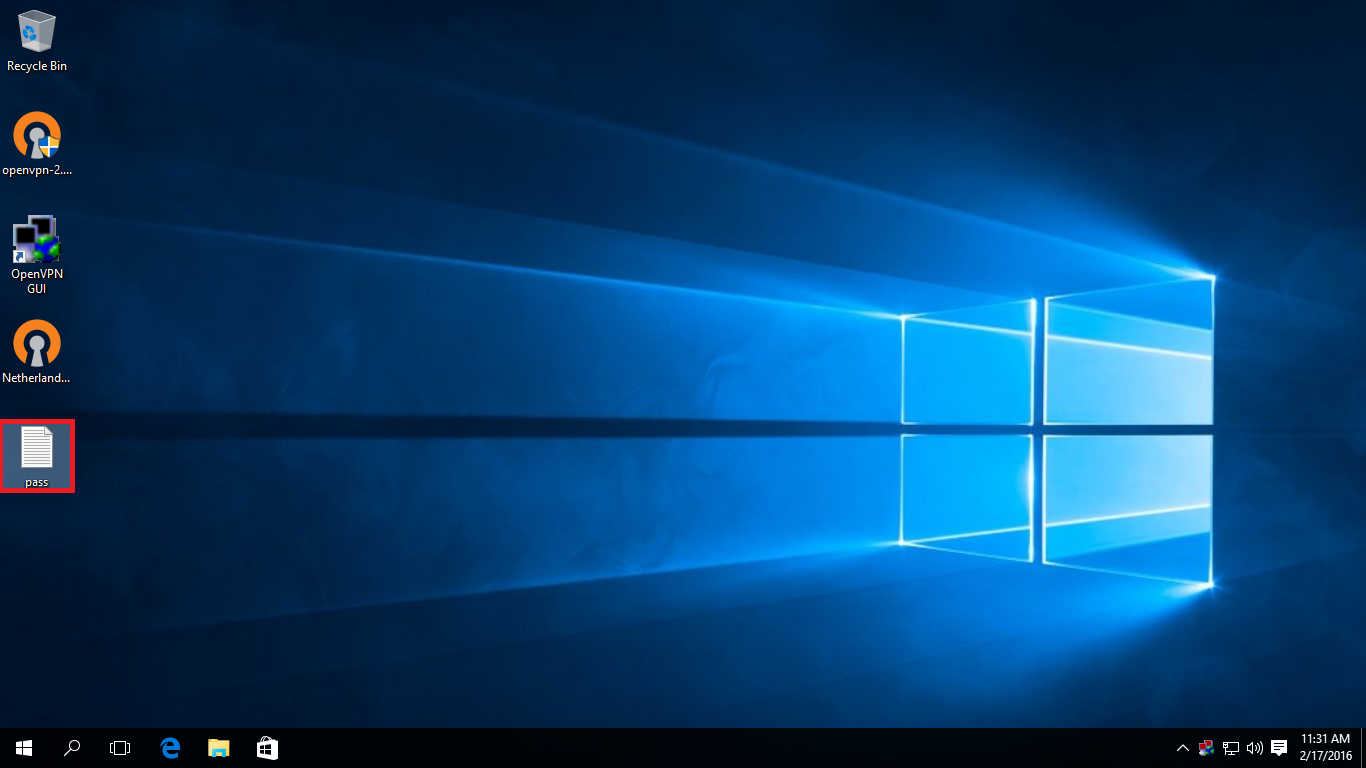
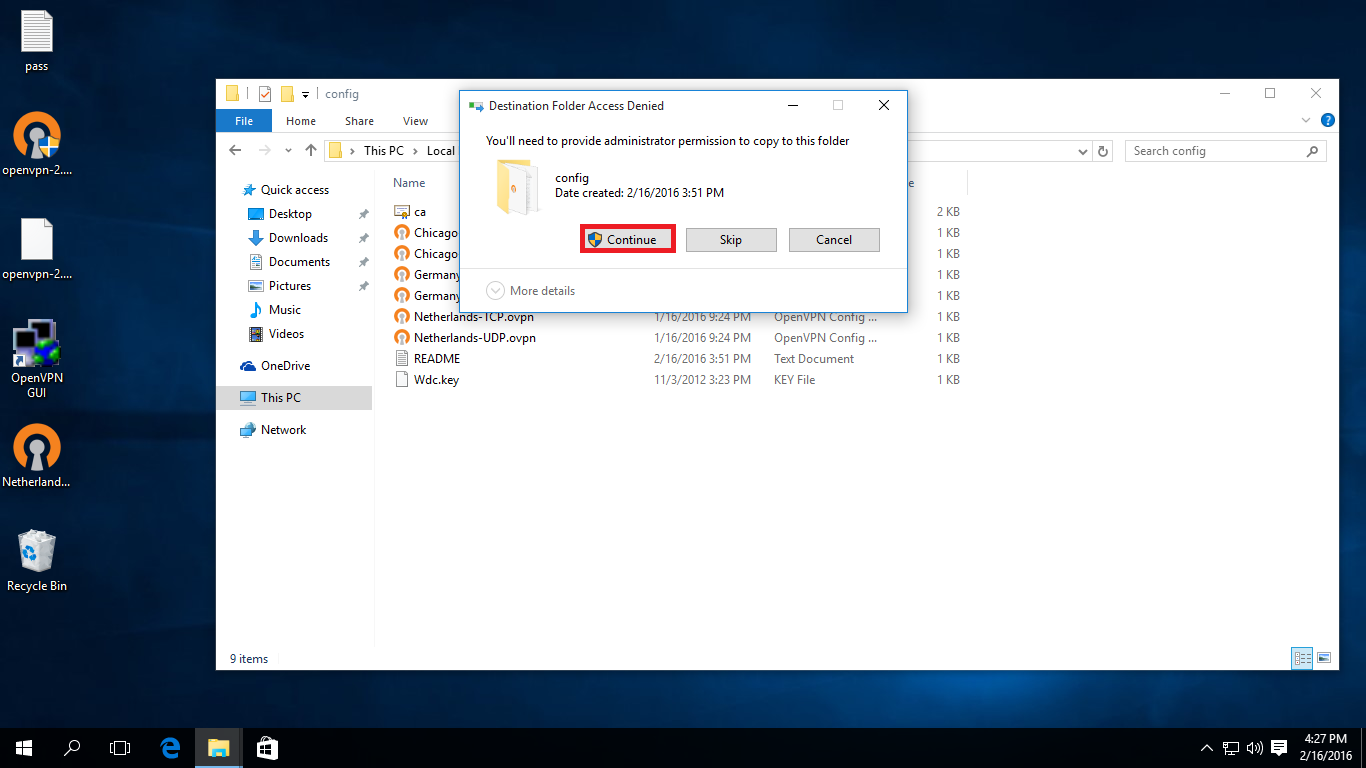
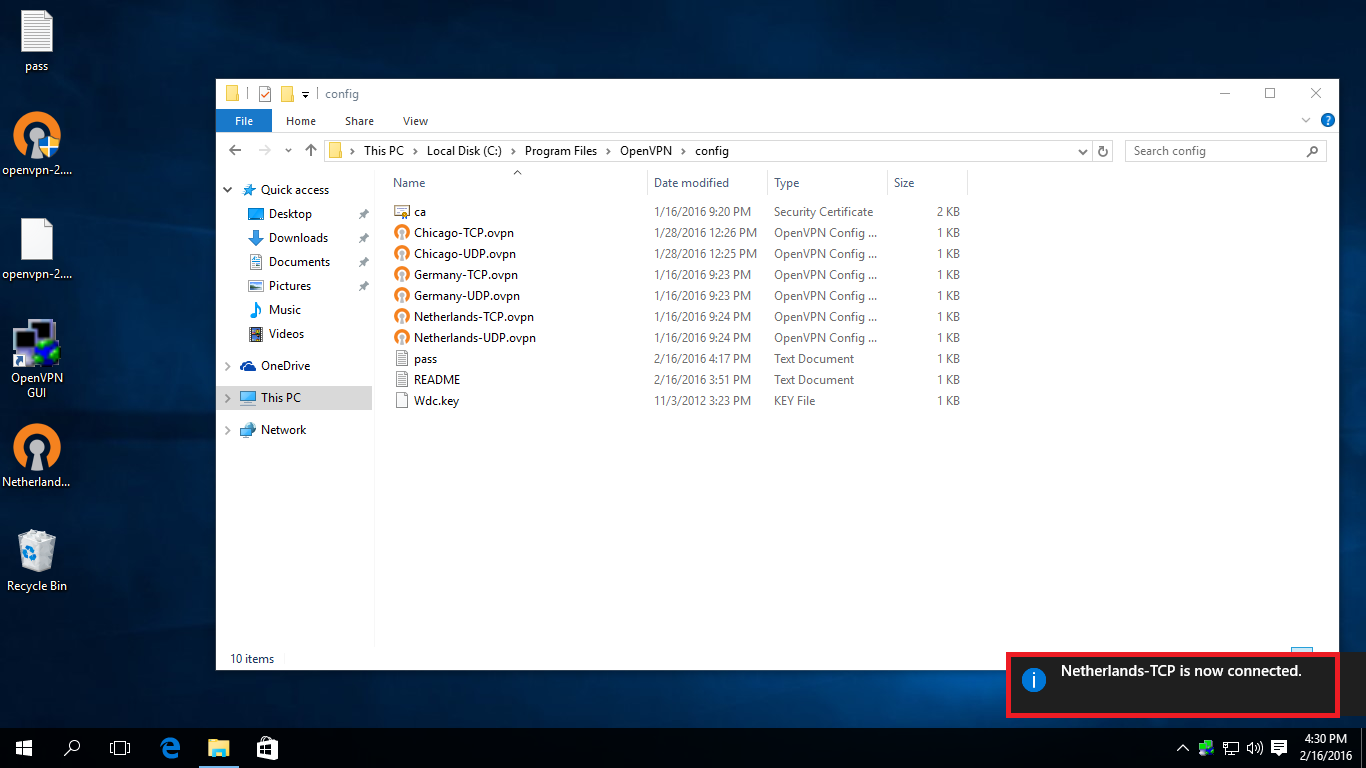
- Go to ‘OpenVPN installation folder’ (C:\Program Files\OpenVPN\config). Drag or copy the ‘pass’ file into the folder.

- The ‘Destination Folder Access Denied’ dialog box will open up. Hit the ‘Continue’ button to copy the file.
- Right click on the ‘OpenVPN icon’ from the system tray on the taskbar. Select the desired ‘server’ you want to use and select the ‘Connect’ option.
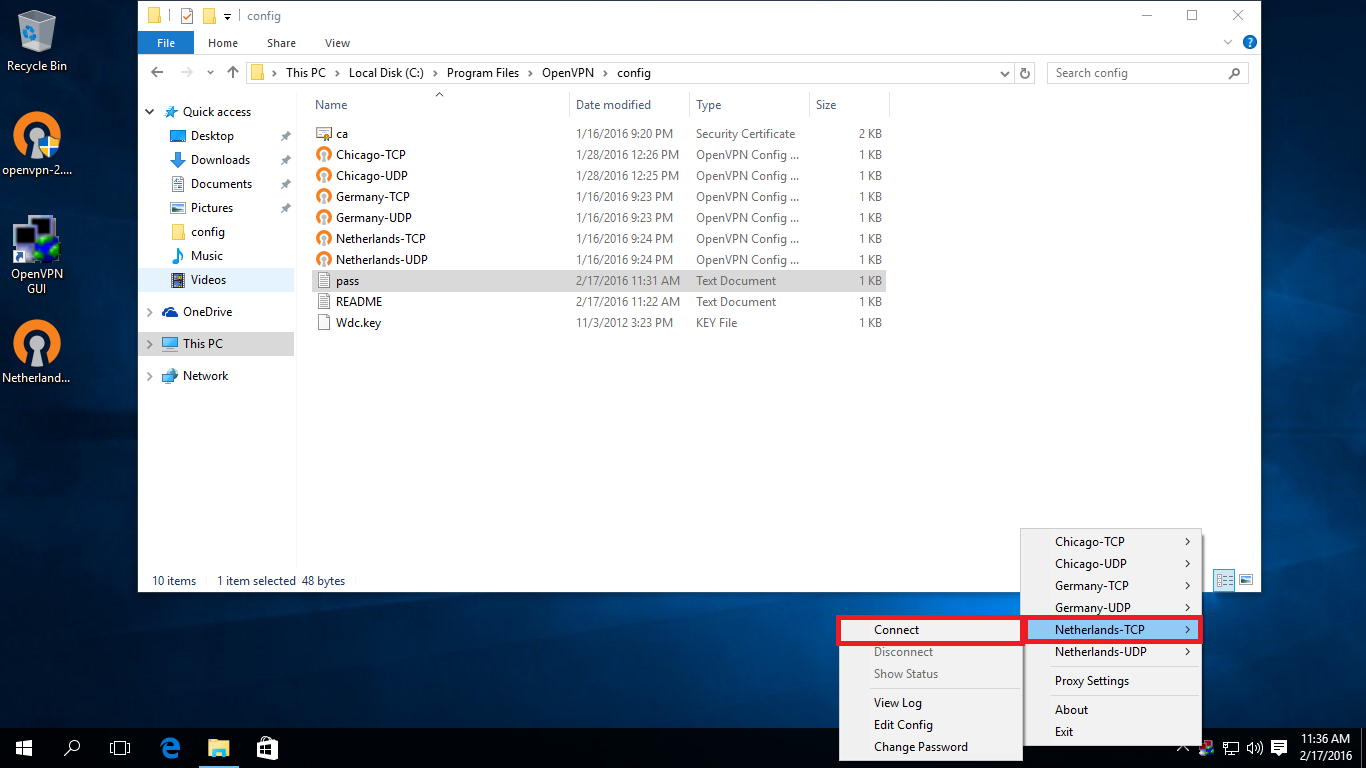
- The Ivacy VPN OpenVPN connection will be connected in a while, without asking for your username / email or password.
 Repeat Step 16 and Step 17 to edit all the servers.
- Click on the ‘Network’ icon on the taskbar of your system. Go to ‘Network settings’.
- In the new ‘Network & Internet’ window, click on ‘VPN’. Then click on ‘Add a VPN connection’.
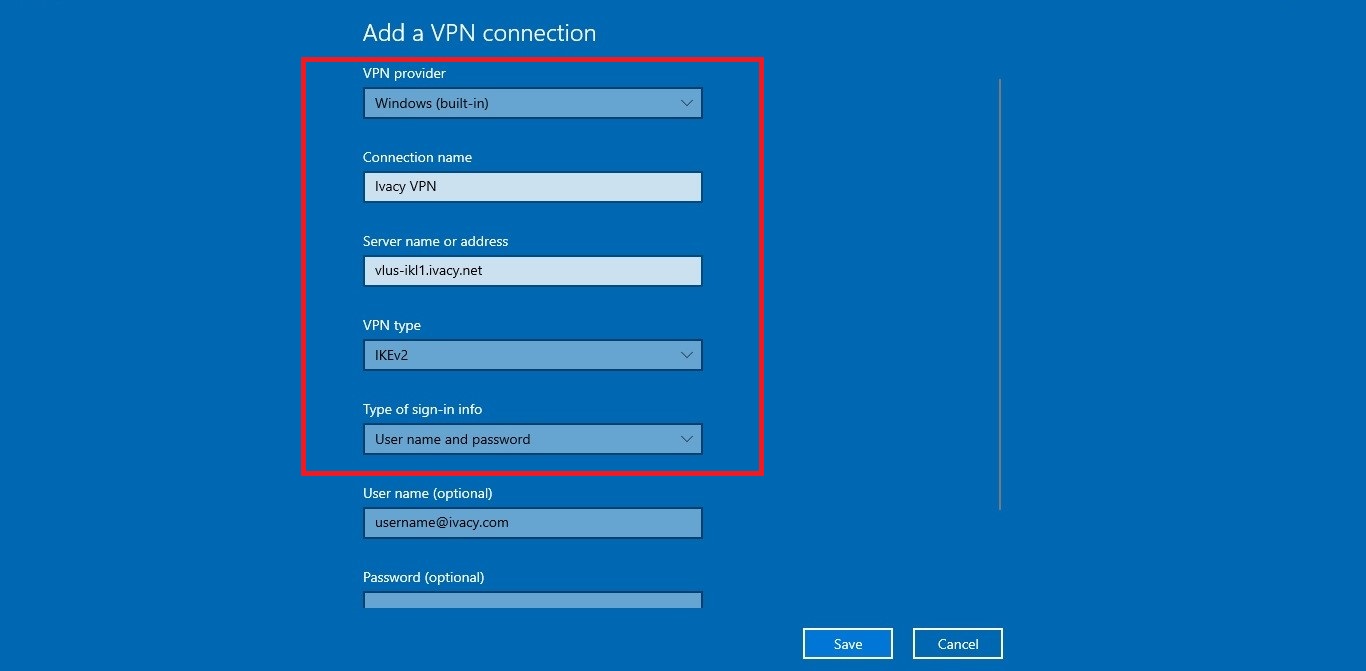
- The new ‘Add a VPN connection’ window will open up. Here, you will see multiple fields. Select ‘Windows (built-in)’ option, from the ‘VPN provider’ drop down menu. In the ‘Connection name’ field, type the name of the VPN that you desire to use, for instance, ‘Ivacy’. In the ‘Server name or address’ field, you should type the desired server address that you want to use. For instance, ‘vlus-ukl1.ivacy.net’ (the list of all server addresses can be found here). From the ‘VPN type’ drop down menu, select ‘IKEV2’. From the ‘Type of sign-in info’ dropdown menu, select, ‘Username and password’ option.

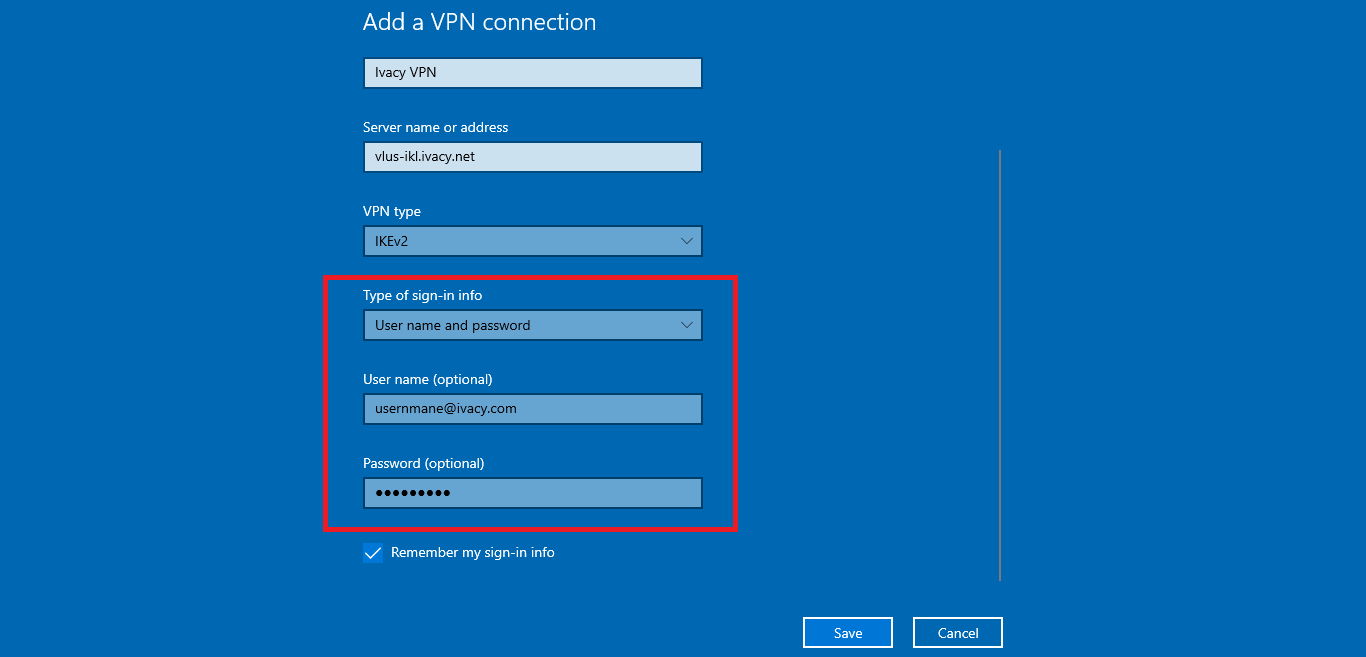
- Scroll down and type your email/username and password in the respective fields provided. Keep the ‘Remember my sign-in info’ checkbox, checked. Click ‘Save’.

- Go back to ‘Network & Internet’ window. Click on the newly created ‘Ivacy’ connection.
- Click ‘Connect’.
That’s it! You have successfully configured Ivacy VPN on your Windows 10. Enjoy complete privacy with Ivacy.