
 Setup Guide
 VPN Use Cases
 Account & Billings
 Video Tutorials
 Faq's
Faq's
How to Setup Ivacy on Raspberry Pi (OpenVPN)
 15365 Views
 August 17, 2020
 Andrew
 No Comments
 9
9Before you begin, please make sure:
- You must have an active internet connection.
- You must have a Raspberry Pi device, with Debian OS.
- Own a premium Ivacy account (If you do not already own one, you can buy a subscription from here)
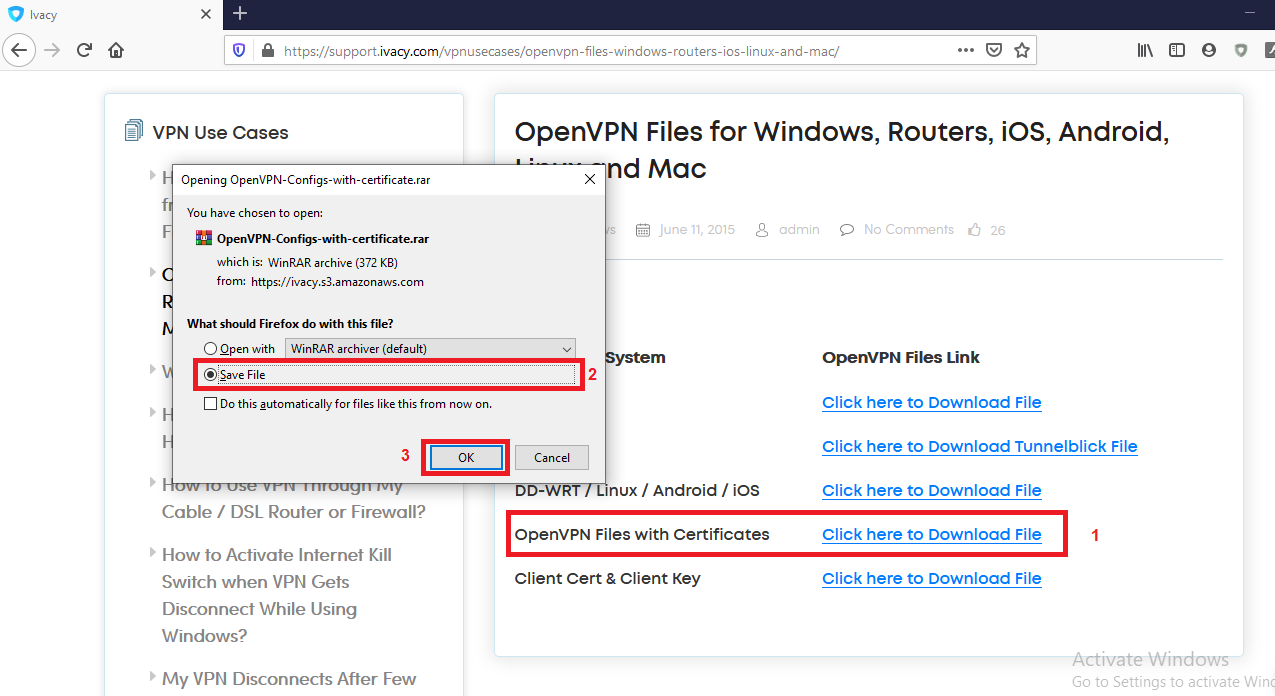
- First, open the web browser and download the OpenVPN configuration files named “OpenVPN Files with Certificates” by clicking here and extract them.
- Now rename the extracted folder to OVPNfiles.
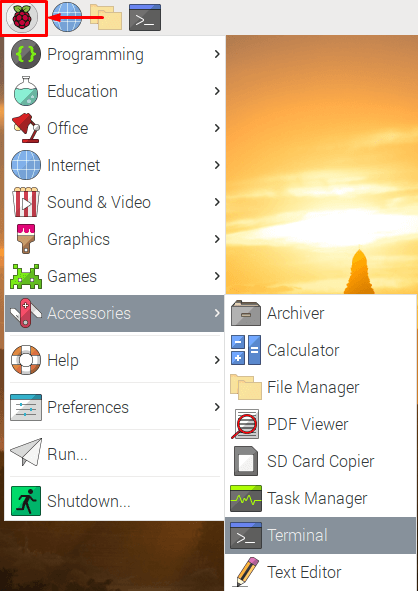
- Now go to the Menu bar and open the “Terminal” from there.
- Now you will need to install OpenVPN packages. Type the following to install it:
• sudo bash
• sudo apt-get install openvpn - Now access the directory where you have downloaded the OpenVPN files (i.e. the Downloads folder) then copy and replace OVPNfiles to /etc/openvpn:
• cd Downloads/
• sudo cp OVPNfiles/* /etc/openvpn
- Now move to the directory where we have copied the OVPNfiles folder i.e. /etc/openvpn:
• cd /etc/openvpn/ - In order to connect to the VPN, run the command:
• sudo openvpn Netherlands-Amsterdam-UDP.ovpn
(Note: In this case the Netherlands UDP server is used to connect to the VPN as an example. You can select any server that fulfills your desired or purpose from the list) - You will be immediately prompted to enter the Ivacy Username and Password, enter your Ivacy username and its respective password.
- You are now connected to Ivacy.
 You can also verify your VPN location from the website:
www.ipaddress.com